🚗 Prep like a pro, protect like a boss!
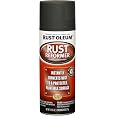
Rust-Oleum 260510 is a 12 oz gray 2-in-1 automotive filler and sandable primer spray that covers up to 35 sq ft. Featuring a fast-drying, oil-based formula with Stops Rust technology, it fills minor surface imperfections, sands smooth for an ultimate finish, and provides superior adhesion on wood, metal, and fiberglass surfaces. Its advanced spray system and comfort tip enable easy application at any angle, making it the go-to primer for professional-grade vehicle restoration and protection.


| Brand | Rust-Oleum |
| Color | Gray |
| Finish Type | Ultimate finish |
| Size | 12 Ounce (Pack of 1) |
| Item Volume | 340 Milliliters |
| Special Feature | Rust Resistant |
| Unit Count | 12.0 Ounce |
| Paint Type | Spray |
| Specific Uses For Product | Interior/Exterior |
| Surface Recommendation | Fiberglass,Metal,Wood |
| Item Form | Aerosol |
| Included Components | Rust-Oleum Automotive 260510 12-Ounce 2 In 1 Filler and Sandable Primer Spray, Gray |
| Age Range (Description) | Adult |
| Is Waterproof | False |
| Model Name | Automotive |
| Package Information | Bottle |
| Color Code | 000000 |
| Coverage | 35 square feet |
| Water Resistance Level | Water Resistant |
| UPC | 020066208684 |
| Manufacturer | Rust-Oleum |
| Part Number | 260510 |
| Item Weight | 12 ounces |
| Product Dimensions | 7.09 x 3.94 x 1.57 inches |
| Country of Origin | USA |
| Item model number | 260510 |
| Is Discontinued By Manufacturer | No |
| Style | Stops Rust formula |
| Finish | Ultimate finish |
| Material | Liquid |
| Pattern | Primer |
| Item Package Quantity | 1 |
| Type of Bulb | Fluorescent |
| Special Features | Rust Resistant |
| Batteries Included? | No |
| Batteries Required? | No |
| Warranty Description | Satisfaction Guaranteed |
C**Y
Sand and spray
Great stuff. Did my entire truck with it
C**N
Does what it's supposed to.
Fills small imperfections and easily sandable
W**A
very nice
very nice
K**E
Gets the job done
There may be better, but for the price, this is your best option.I would like to remind those who are using this on 3D prints, not to simply rely on JUST this product, to remove those layer lines. Otherwise, you're going through 2 cans or more. Sanding is part of the game and can be pretty meditative; but if you want it easier on yourself, this is what i do.I rough sand with 80, wetsand with 220 and 400 and THEN use this product. Put down the first coat the way you would with any rattle-can, which is even light sweeps, side to side while either moving up or down like a printer, a few minutes apart from each other. You can wet-sand after 4 hours, but i give it a full day to cure, so i can work on other projects. Wet sand with 600, let dry, drop another coat, let cure for a day, then wetsand a final time with 600. At this point, any imperfections will only enhance your weathering. Remember, every scrape or blemish is just good weathering, adds character and even opportunities for chipping.A few tips. Do NOT over-spray, JUST to fill up a problem area. Alot of people say not to worry about it, but i do. It will take longer to cure to a dry enough state and will only clog your sandpaper immediately. Be patient, build up layers, give those layers time to cure, and you will use less material. Also, when wet sanding, you can add a little dish soap to the sandpaper, to help slough off the debris. You do this, because when particles get trapped in the sand paper (remember we are using a fine grit), it scuffs up the surface more. Adding a little soap to your wet sanding will give more polished results. And when wet sanding, to not keep the print submerged or directly under flowing water, unless to rinse.3D prints, even with filler, can be porous and absorb the water, meaning you have to wait until its fully dry (at least 48 hours) before you can get back to spraying, because it's still dripping water through the infill. Also, don't use too much soap, as it could possibly be absorbed by the print. A drop less than half a grain of rice is enough. Personally, I just kiss the nozzle of my soap dispenser with the wet sandpaper, and that's enough for me.Also, identify the hard-to-reach areas first, like recesses and trenches, and spray those areas first. If you have to go back to fill those areas in, you risk overspray. If you missed any hard-to-reach spots, let it dry for 10-20 minutes, and then mist those spots. Overspray means more work cleaning up.Another thing is that paint looks different when its wet, and when its dry. When you throw down coats, don't go back over an area just because it doesn't look tacky or wet enough. Stick to your even coats, even passes side to side, up and down like a printer, let dry, and do another pass if need be. Also, a print doesn't necessarily need to be SATURATED in a color. If your intent is to weather, and you used black primer as a base coat, throwing down a light topcoat will allow that black to bleed through, and help make it look dirty.
B**E
Works great
Works great
B**N
Does its job.
Great for finding/covering layer lines on 3D prints.
M**K
Great product
Great!
J**N
Very impressed w this product!
Always have been a big Rustolium user. Call me old school but I stick w what works and what I believe in. So I purchased this specific Auto primer “filler” to use on my storage container office remodel/upfit. Of course a used Conex shipping container has there share of bumps and bruises. I wasn’t looking for a perfect restoration, just wanted to fill some pits and edges after hitting bad rust areas w a wire brush. This done great. Some areas I applied 2X. Drys fast enough to paint over witching a half hr but I always give primer a little longer. One container I used this on, the other I used some other spray primers I had left over and wanted to use up. Why not right. So the container I used this product on turned out much nicer after spraying it w a 20V sprayer I purchased on Amazon “Dewalt battery friendly”. Couldn’t be happier. I’ve ordered 3 cases and have a some left over that I plan on using to repaint a 97 F350 body cab with. Good stuff!!!!