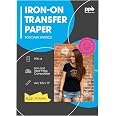
🔥 Turn dark fabrics into bold statements with ease!
PPD Iron on Transfer Paper offers 20 high-quality 8.5x11 sheets designed specifically for dark fabrics. Compatible with inkjet printers and heat application tools, it delivers vibrant, durable, and machine washable transfers that resist cracking and fading. Perfect for professional-grade customization of t-shirts, bags, and more, backed by decades of trusted UK manufacturing expertise.


| Manufacturer | Photo Paper Direct |
| Brand | PPD |
| Item Weight | 9 ounces |
| Product Dimensions | 8.27 x 0.2 x 11.69 inches |
| Item model number | PPD-4-20 |
| Is Discontinued By Manufacturer | No |
| Color | Dark |
| Shape | Rectangular |
| Material Type | paper |
| Number of Items | 1 |
| Size | 20 Sheets (8.5X11) |
| Sheet Size | 8.5-x-11-inch Inches |
| Brightness Rating | 93.00 |
| Paper Weight | 20 |
| Paper Finish | Matte |
| Manufacturer Part Number | PPD-4-20 |
F**Y
When used correctly these are amazing PLEASE READ
I've been using this brand dark transfer papers for. awhile now, with a heat press machine, and I'm almost always happy with the results.First, when using heat press, make sure it is set at 375 and for 13-15 secs (max). Set to hard pressure. Also, I use no less than 350 in resolution for my images and they come out so so SO colorful and clear. Resolution is important.Also, understand that if you're running a tshirt merch business, your customers may be sending you a flawed image. Take the time to clean up any images you use, increase the resolution, increase the vibrancy, etc. Make sure your screen brightness is up so that you're viewing the image on your computer screen accurately (color-wise). I have had zero issues cutting my images on this paper. Also, zero issues peeling the image.I definitely recommend having a 2nd person help if you are trying to arrange peeled images to a shirt while its under the heat press. The images WILL curl under heat and that makes it impossible to press. INSTEAD, invest in a teflon pad/pillow and have your 2nd person hold it directly under the heat on the press so that it blocks the heat while you arrange your peeled images. ALSO, you can arrange the peeled images on the shirt OFF the heat press and you and your 2nd person can carefully carry the shirt to the heat press (while the parchment paper is already placed on top of shirt)IF you are heat pressing an image on a material that hasn't been pre-washed and is a dark color, there is a chance that, that color may bleed through the image. I do a lot of printing on shirts that I've tie dyed and I've found that I have to wash the shirts twice to avoid any color bleeding through. To anyone doing a big order, do ONE shirt and wash before doing the entire order so you can see how it holds up.Lastly, this product listing doesn't really specifically say to use sublimation ink. It says to use regular ink. So if you've been using regular ink and you're unhappy with the color quality, this is likely why. USE SUBLIMATION INK!!!!! Sublimation ink is compatible with inkjet printers and it costs about the same to fill/refill. You can find this ink online easily.SN: I mentioned parchment paper......not sure what everyone else is using but I use high quality parchment paper between my shirts and the heat press. Make sure the parchment paper is not folded, creased, torn etc or it will leave an imprint in your image. DO not use butcher paper. Bad idea, learn from me! After you're done pressing, let the parchment paper remain for about 30 seconds before peeling off. Do not move the shirt or fold or wash for, well, as long as you can until its time to wear or package (But allow shirt to cool UNMOVED for at least an hour before handling).I can't think of anything else but I read all the bad reviews on this product and most of them sounded like issues that are fixable with the tips I included here. My customers LOVE their shirts and hoodies. The only time I've had issues is when my printer was acting up, which was an ink and false paper jam issue, not a transfer paper issue. DO NOT FORCE JAMMED PAPER OUT EVER! Instead, turn the printer off and on and this will push the stuck paper through. Hope this helps!
L**D
Money saver
Great price
M**N
Beautiful results!
This was my first time ever using this dark transfer paper, and my first time using any at all in a good 20 years...you could say I was incredibly nervous when deciding on the materials, as well as the actual process of using them. And you know what? It was CAKE, and turned out amazingly for the shirts I made for myself and another bartender to wear while working our American Legion's Memorial Day party.As long as you follow the directions, you shouldn't have any problems. Specifically:1. You do not need to print the image backward as you would with standard transfer paper. JUST DON'T DO IT.2. While standard transfer paper is clear, this paper is white. Meaning any background or surrounding areas left "blank" will be white. So keep your designs trimmed close to the edges. And use the white to your advantage!3. I cannot stress this enough, but when transferring your design onto your shirt/pilowcase/bag, etc., PRESS DOWN VERY CONSISTENTLY FIRMLY, on HIGH heat, on a FLAT, HEAT-RESISTANT SURFACE. And do so for AT LEAST as long as the directions tell you to.If you follow the directions, you'll end up with something pretty spectacular. It's not silk screening, but for what it is, it's amazing. I've had no problems with cracking/peeling, but if you were to use the entire sheet without cutting at all, I could see the potential for that, as the vinyl will be stiffer as the design size gets bigger.Unfortunately, these are the best pictures we were able to get that day, and they truly don't do them justice. I'll have to upload the shirt itself later!Product arrived on time and in perfect condition. 10/10 would recommmend!
B**Y
Great product
Great product.
J**B
Not a replacement for silkscreen, but the best at what it does!
We are an Independent record store that puts the "Y" in "DIY". So when international Record Store Day came around, we were still in our first 6 months of business. That meant that any swag would have to be done on the cheap until we can get traction to get proper screenprinted gear.We bought these Iron on transfers knowing that the print would be real stiff, and they may not last as long as more expensive methods. But, for our application, they turned out GREAT! But, that is because we tempered our expectations and FOLLOWED THE INSTRUCTIONS!!!First off: Those who say this stuff doesn't stick... read the directions! Odds are people tried using an ironing board and did not use enough heat and pressure. You have to be CONSISTENT and firm! We did it directly to a steel and masonite table. Also, if you dont have the highest heat possible, you will get discoloration. Not because the vinyl is melted too much, but because it is not melted ENOUGH. I went with 30 seconds to a minute longer than I thought I should, and when I did they came out perfect.The colors were more muted than I was expecting, but I feel it was the cheap printer. The vinyl is stiff, so wearing a big print on a T shirt won't breathe as well and it will probably crack over time. But, on the canvas tote bags they look and feel AWESOME! We got so many compliments and, if you bother to watch the instructional videos and read the instructions, you will get stunning results.
Trustpilot
2 weeks ago
1 month ago