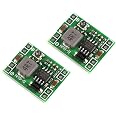
🔧 Power Up Your Projects with Precision!
The HiLetgo 14.8V 4S 30A 18650 Li-ion Lithium Battery BMS PCB is a high-performance protection board designed for lithium battery applications. It features advanced safety mechanisms, precise voltage detection, and a compact form factor, making it ideal for both hobbyists and professionals seeking reliability and efficiency.
R**E
You have to plug it in to "wake it up"
Like most of the reviews, I got the board, wired it up according to the picture with four 18650 battery holders, checked all of the connections with a multimeter, put four fully-charged 18650 batteries into the holders, and expected 14.8V or more at the P+ and P- pins. I was getting 2.1V out and thought that these boards must really be defective like so many of the reviews say.As it turns out, the board requires that you apply power to the P+ and P- pins before it "wakes up".Basically you have to have everything wired up including the charging port that you're going to use wired to the P+ and P- pins, have the batteries in the holders, and then "plug it in" briefly to wake up the board. Just one second of being plugged in will do it. Then you can unplug it and it will keep putting out the full 16V or whatever your input voltage is as long as you don't disconnect the batteries.This means don't put a power switch between the batteries and the board. Wire both the battery holders and the charging port straight to the board so that the board is powered from the batteries all the time. If you want to add a power switch, add it between this board's output and the circuit you're trying to power.
D**E
100 amp bms
works great
R**S
Didn’t work at first
Board didn’t work at first. No voltage on the output pads. Came back 5 minutes later and it’s now working. We’ll see how well it works when the pack is fully charged
F**O
Drops to 11v as soon as I connect anything to the "P+ P-" ports
I initially bought 2 of these, then requested replacements, the seller sent back another 2, had the same exact issue:I am connecting 4S3P 18650 battery pack to it, I can read all the correct values on each B-, B1, B2, B3, B+ ports, it comes with a P- and P+ ports as well which work as Charge and Discharge ports, it has NO additional Charging or C- port.When I connect a car break light bulb (12v , 55 watt max draw) to the P+ and P- port the bulb doesn't light up and the P ports drop the voltage to 0 and then they go back up to 11v but it never goes back up to 15-16v again. I have tried 4 boards of the exact same model and they all act the same way. It seems like the board is protecting itself but I don't understand why, since the bulb is a 12v and the current for it shouldn't be more than 10 amps, this board is supposed to handle 30A x 12v = 360wNot worth the time waisted in this product.
H**.
works well for me
So far, so very good (April 10th, 2024).As far as I can tell this BMS works as advertised.Setup:I ordered two of these BMSs to create two 4S, 3P lithium battery packs with 14.8V nominal voltage, using for each pack twelve 2,500 mAh LMC cells with each 3.7V nominal voltage (4.2V max) and 10A max discharge rate per cell.The voltage of one 100% charged battery pack is 16.8V and the capacity is 7,500 mAh. The maximum discharge current of 3 cells in parallel is 30A which is what the BMS is rated for.I did the wiring successful using the wiring diagrams from the Amazon pictures. In my application, one battery pack consists of of 4 units of 3 parallel cells. The instructions that came with the BMS were not so helpful but the pictures from Amazon explained everything.Charging:I am using an 18V, 2.7A power supply to charge the two packs connected in parallel.I fried a 12V, 2A powersupply (it got too hot during 1 hour of charging while providing 2.7A), so I found and bought a slightly more capable powersupply that was just right (max current eated at 2.7 A). I verified that the charging cut-off mechanism of the BMS is activated at a battery pack voltage of 16.7-16.8V which is just right at 100% charge. So charging working great now.Discharging:I connected both packs in parallel, hopefully giving me a total of 60A maximum discharge current at 16.8 V maximum voltage, or 1,008 watts of max power.I have only tested low discharge currents of up to 2 ampere so far, and that has worked well. The bms is rated for up to 30 ampere discharge, which I intend to test in future.
A**L
Plan your battery build
I built a bomb!This item probably works well but I wouldn't know just yet as I totally screwed up my build. Know what you are doing before starting an advanced build! This is actually dangerous stuff. Here's how I almost set the building on fire:I decided to build me a 4s10p pack. Pretty straight forward. I was quite proud of my design. But before connecting the board to it I decided to offload some power as all 40 cells were charged. And I over discharged. The voltage dropped to about 11,5 volts which is overdischarged. This is what the board protects you from and it was my second big mistake. The first I discovered later.I now connected the board as instructed but something was wrong. I tried to charge the pack at 16,8 volts but everytime I connected the powersupply the voltage dropped to 11,5 volts, same as the pack voltage. I thought this was due to some undervoltage protection on the board. Or maybe the powersupply? I couldn't tell what was wrong. I tried another psu that is weaker but, I figured, might put in some amps to push the pack over the undervoltage limit. It still didn't work.Then I decided to brute force it. I connected the psu to the battery + and -, bypassing the board. And it seemed to work. The pack seemed to pick up some charge. But the tiny psu wasn't doing the job. I went with my more powerful psu. As long as I monitored the voltage manually I should be fine, right? Well, strange things happened. I'd connect the psu at 16,7 volts and it dropped to 13 volts. Weird. But since it's above the packs, now, 12,6 volts it means the pack is charging. And at a safe, slow pace. So I left it. I actually fell asleep while my very sketchy and homebuilt pack was charging. Big no no. When I checked the pack in the morning I burnt my hand! It was really, really hot. I disconnected the psu and checked the voltage. It was now 10 volts! What was going on?! And then I saw it.I don't know how I could have made such a mistake and how I could have missed it for the days I had spent trouble seeking: one whole pack wasn't paralleled! I had forgotten to parallell one whole 10p pack! My b - was connected to one 5p side while the other 5 cells were just out in the air. Only the + side was connected. The pack seemed to be getting hotter and hotter and I realized it was now a bomb that had no offswitch, was encased in nickelstrip welds and with no easy way to take apart. Really scary. As I checked the voltages in more detail across the pack I made some bizzare discoveries. Voltage across b + and b - was 10v. But when checked voltage over the missed 5p cells and b + it was 17,8v! I had seriously overcharged the pack and it was probably mere moments away from exploding when I disconnected the charger. And for some reason there was a 4,1 voltage from the connected 5p - and the unconnected 5p -. Anyone know how? I tried paralleling the 5p packs to make the intended 10p but sparks where flying. The cable got so hot it was burning my hands. Connecting negative to negative caused a short. Go figure.I realized the pack was built wrong from the start and it was never going to work. I had probably destroyed 40 perfectly good cells as well as a nice bms board. I started ripping the nickle strips off my beautiful build and at one point smoke starting comming off the the bms board. Gone for sure.Check your build and recheck it after you double recheck it. Here endeth the lesson.
Trustpilot
2 months ago
1 month ago