
下载应用程序


🔧 Fix it once, fix it right — the ultimate plastic bonding power move!
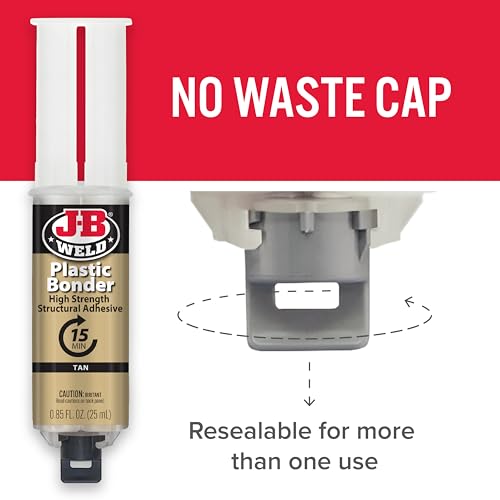
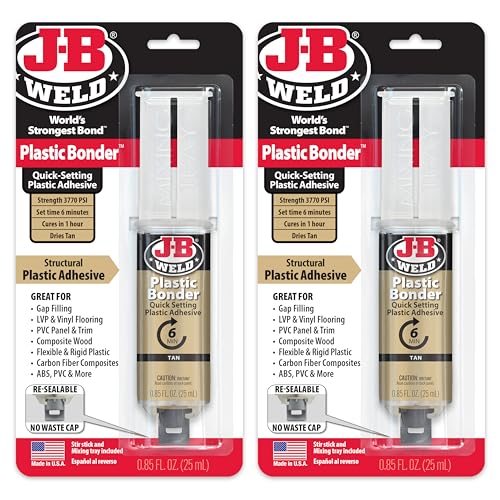
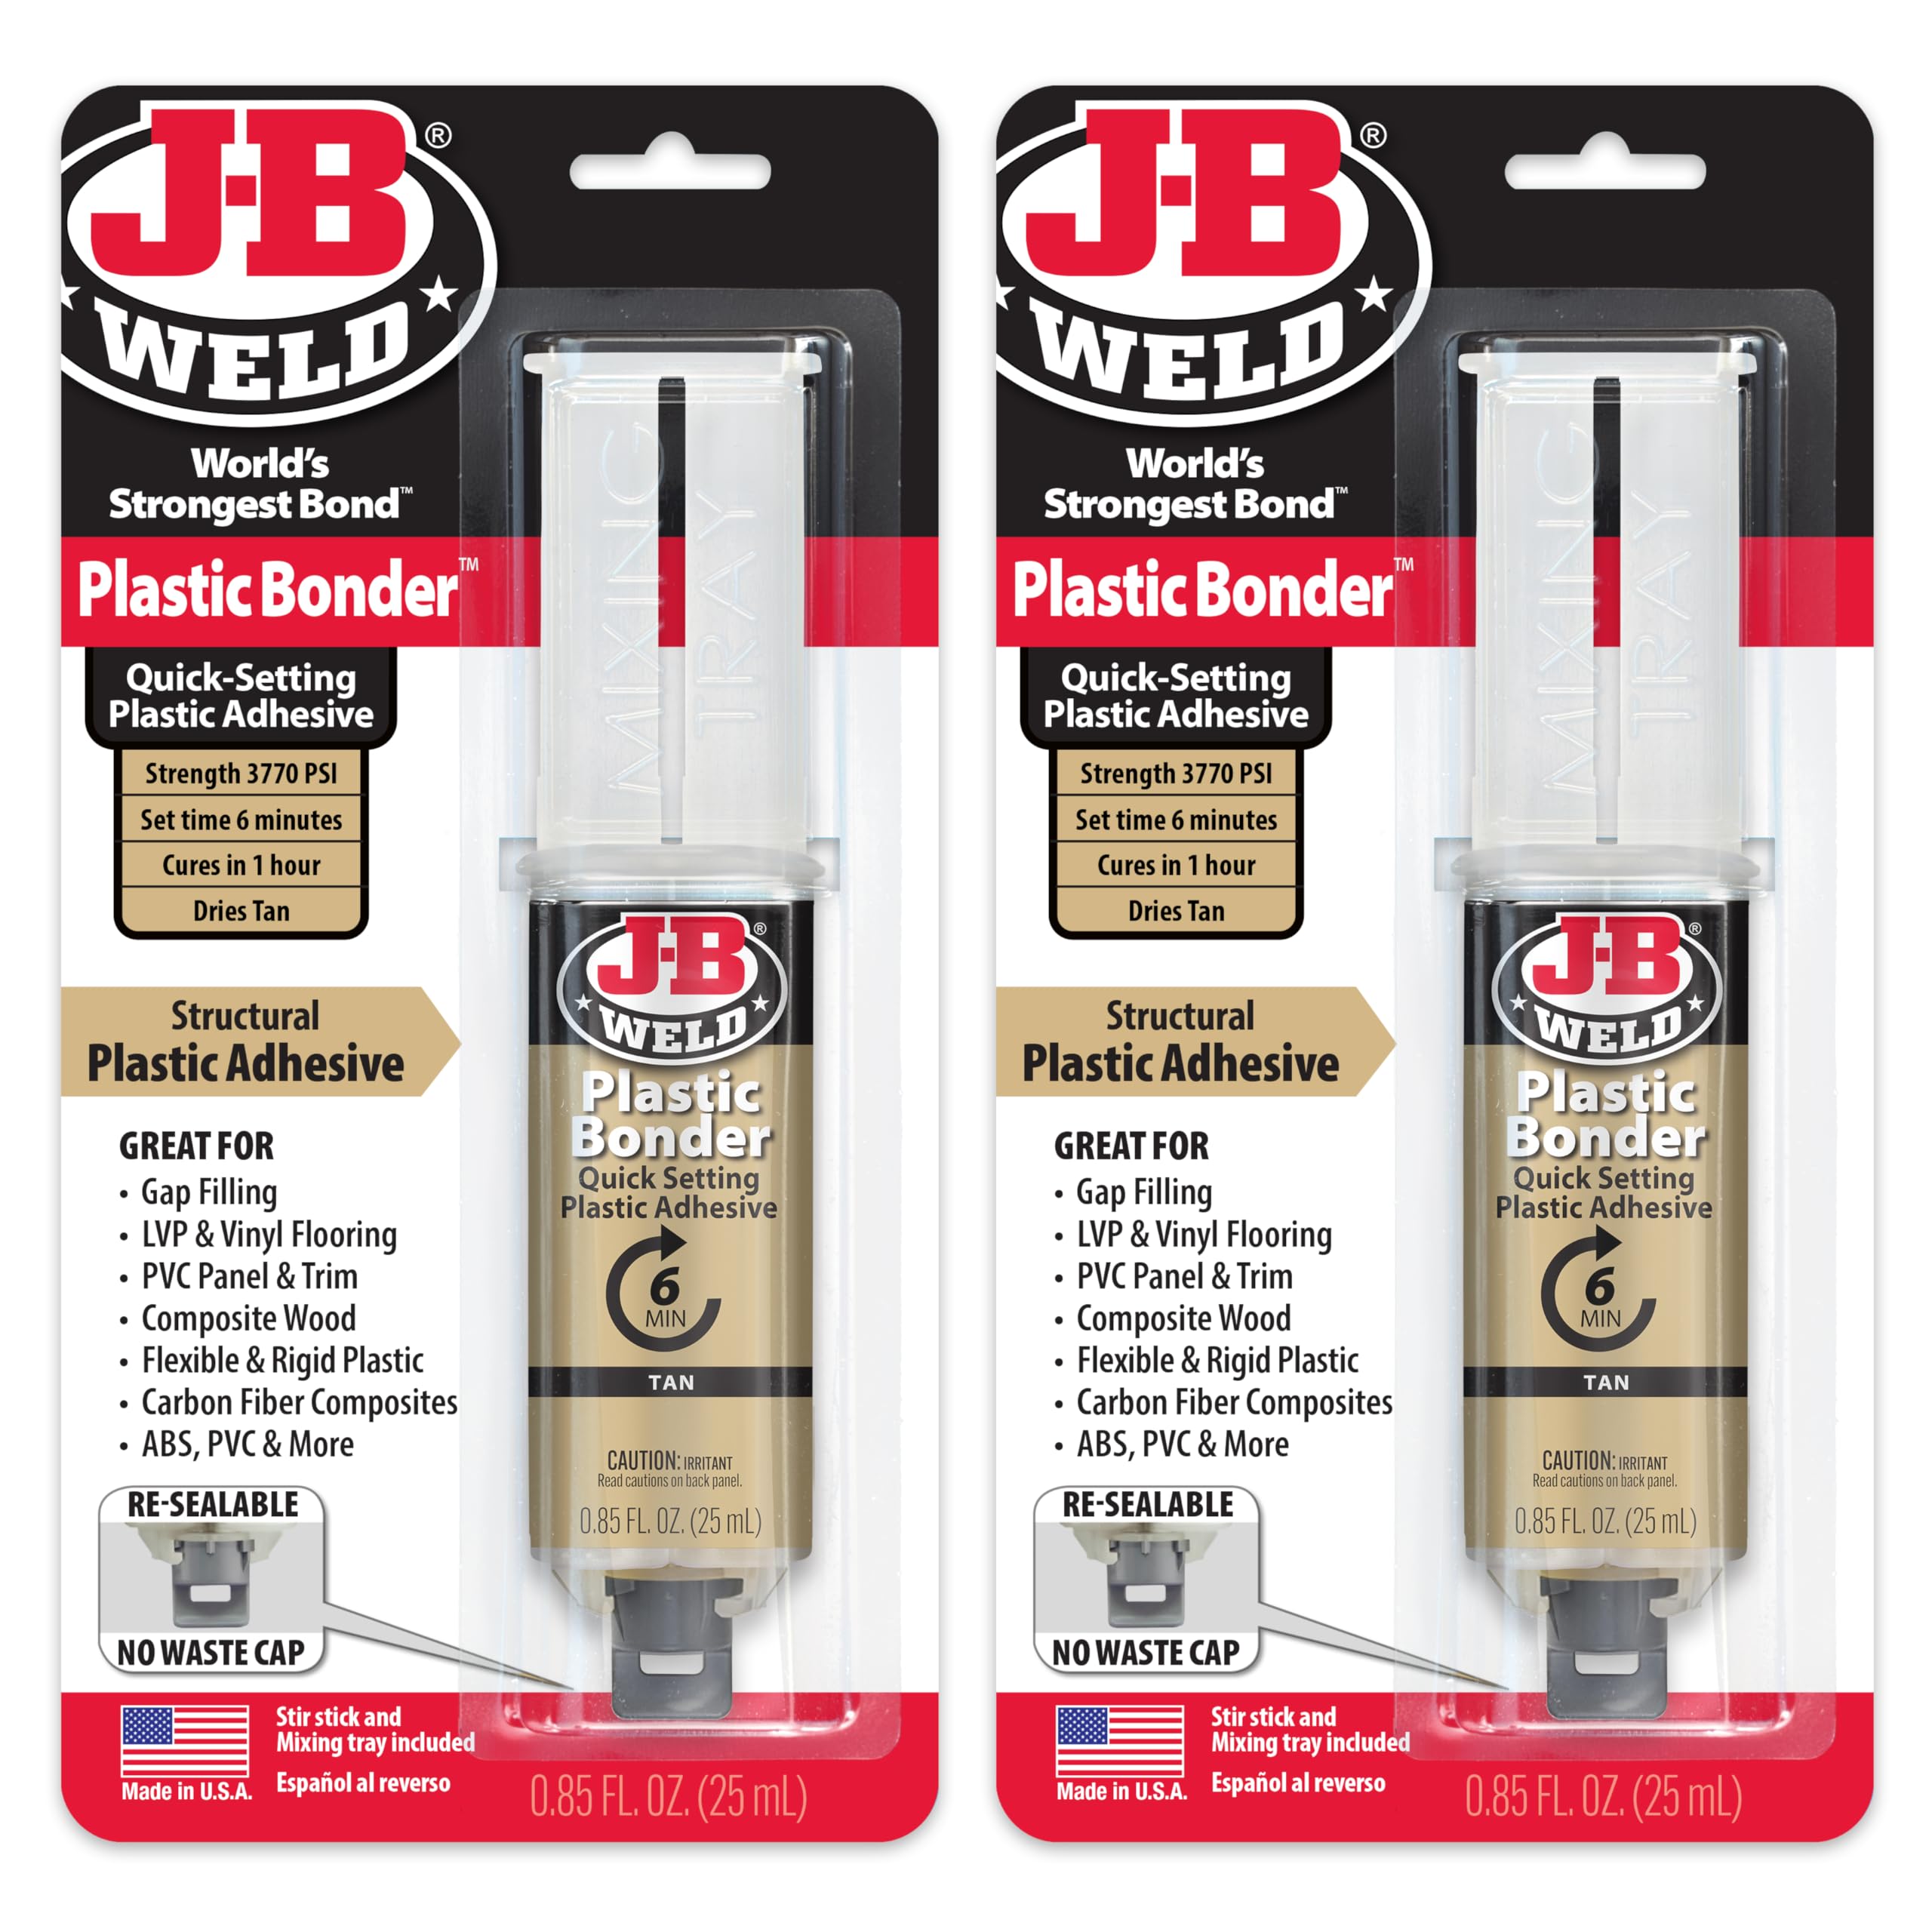
J-B Weld PlasticBonder Tan is a high-strength, quick-setting two-part urethane adhesive designed for durable plastic repairs. Featuring a convenient resealable syringe for precise 1:1 mixing, it sets in 15 minutes and cures fully in 30, delivering an impressive 3770 PSI tensile strength. Ideal for DIY enthusiasts and professionals alike, it bonds a wide range of materials including ABS, PVC, fiberglass, and coated metals, making it the go-to solution for lasting, gap-filling repairs.
| ASIN | B0CT999S1L |
| Best Sellers Rank | #12,196 in Automotive ( See Top 100 in Automotive ) #662 in Oils & Fluids |
| Brand | J-B Weld |
| Color | Tan |
| Date First Available | January 25, 2024 |
| Full Cure Time | 30 Minutes |
| Item Form | Liquid |
| Item Package Quantity | 1 |
| Item Volume | 25 Milliliters |
| Item Weight | 7.7 ounces |
| Item model number | 50133-2 |
| Manufacturer | J-B Weld |
| Material | ABS, PVC, Polyurethane, Polypropylene |
| Number of Pieces | 2 |
| Package Information | Syringe |
| Product Dimensions | 1.25 x 4.38 x 8.63 inches |
| Specific Uses For Product | Repair |
| Tensile Strength | 3770 Pounds Per Square Inch |
| UPC | 043425990532 |
| Unit Count | 1.7 Fluid Ounces |
| Viscosity | Medium |
| Viscosity Level | Medium |
| Water Resistance Level | Not Water Resistant |
A**Y
Best Plastic Adhesive I’ve Ever Used – Rock-Solid Bond for Every Project!
I cannot say enough good things about the J-B Weld 50133 Plastic Bonder! I needed to repair a cracked ABS plastic panel on my car and a broken PVC trim piece around my house, and this adhesive exceeded every expectation. The syringe design makes mixing the two-part epoxy so easy—no messy measuring, just squeeze and go. It set in under 6 minutes like the label says, and after letting it cure for an hour, the bond was unbreakable. I tried prying the repaired pieces apart and they wouldn’t budge at all! What I love most is how versatile it is. It worked perfectly on flexible and rigid plastic, and even filled small gaps seamlessly without any extra filler. The tan color also blended in nicely with my project materials, so the repair isn’t an eyesore. At under $7 for a 25ml pack, it’s an incredible value too. I’ve gone through cheap plastic glues that fail after a week, but this J-B Weld bonder is built to last. Whether you’re a DIY hobbyist or tackling household repairs, this is a must-have in your toolbox. 5 stars all the way—will definitely buy again!
D**H
JB Weld Saves the Day Again
Great product! Have used JB Weld products for decades and they are always reliable. This plastic weld did not disappoint. Used it to repair a small post that holds a side cover on a motorcycle. Obviously buying a new one would have cost a lot of money. This made it like new for a few bucks. And there is plenty left over for future jobs. Easy to mix and apply. I put it on a little thick for the small area and it took more time to cure. Once it did, the piece is as strong as original. Only caution is on first use, squeeze out the first bit and discard. See photo. Then squeeze the portion for your job. The first portion will not provide a good 50/50 mix. JB Weld has never failed to perform for me.
A**!
Great, quick fix (works great for plastic to metal)
I use this on my lawnmower’s gas tank and just to add some structure to it. I put a piece of a paper towel on top of the crack and then put some more of this over top of it to harden it and it doesn’t leak at all even under pressure. Perfect for a good quick fix that last long great price dries quickly no smell. update.: I also used it to attach my emblem to my truck. I use the very small amount just around the edge and it is very strong. Probably one of my favorite JB weld products.
R**Z
Comparing glues for polypropylene
I tested this glue and several others on polypropylene. I used the lid of a disposable coffee cup, which had "5" in the recycle symbol indicating polypropylene (pp). I did not sand the surface to rough it up. I used a drop of each glue to attach a metal nut (as in bolt/nut) to the flat plastic surface and allowed 16 hours to cure. * JB Weld Plastic Bonder (this item). Peeled right off, adhered moderately to metal nut. * Testors model cement. Peeled right off, did not adhere to metal nut. * Gorilla Glue. Peeled right off, adhered moderately to metal nut. * Bob Smith Industries slow cure Epoxy. Peeled right off, adhered well to metal nut. * Contact cement. Adhered moderately to polypropylene and to metal nut. Adhesion depends on size of surface area. * Super glue. Peeled right off, adhered well to metal nut. * Construction adhesive (Fuze-It). Peeled off of polypropylene easily. Adhered moderately to metal nut. * Hot glue. Adhered moderately to polypropylene and to metal nut. * High temperature hot glue (Steinel GF 260). Adhered well to polypropylene and to metal nut. * 2-part superglue and accelerant (Loctite Plastics Bonding System). Adhered well to polypropylene but only moderately to metal nut, fairly easy to separate, probably requires larger surface area contact. Only contact cement and hot glue produced a good bond of metal to polypropylene. Contact cement is only as strong as the latex itself so I was able to stretch the nut away from the polypropylene with a little force. Hot glue gave a stronger bond, though with more force I was able to break them apart. High temperature/high performance hot glue stick formulation held well and required significant force to break apart. This also has the benefit of filling gaps if that is a requirement. This seems to be the best option, though I don't know about longevity of the bond. Untested were polypropylene formulations of hot glue (SuperTac 500 or Tecbond 263) because of cost and availability.
T**Y
Strong bond
Worked excellent to repair broken plastic ebrake release handle. Easy to use dual syringe style makes mix ratio even.
K**.
Great
High quality, does what its described to do.
Z**N
let me dry for 24hours for best results
i used this to fix my car bumper and it worked perfectly. i had a 3" whole in my bumper. i used some mesh metal on back side of the hole behind bumper as support and stick it with this glue and let it dry for 24 hours. i then filled the front hole using this glue leaving some space to fill it later with bondo. i let it dry for 24hours as it cures best in 24hours. After it was cured, it was really strong. i then filled the rest with bondo and sanded and painted. worked perfectly.
S**I
Always a trusted brand!
Great quality epoxy and like the resealable cap to use now than once! Super bond holds perfectly
K**.
Very strong glue that sticks to almost anything
N**B
Très satisfaite de ce produit car avec le système de fermeture ne sèche pas et dure
R**N
Amazing product as it perfectly worked for my car bumper misplacement. As expected Aramex delivery service is pathetic in my area and customer service doesn't bother to respond to my calls
K**1
Used esun white PETG to make some dedk top shelves and this stuff worked great is a little yellowish in color but not noticeable in thin layers with this white. It hardens in under an hour, is almost hard in 25 to 20 min and cures rock solid and impact resisrant in about 24 hours. Rhe stuff I bought did anyway and am quite happy with the results.
B**H
It's already dry and not coming out from it. Completely wastage of money