
Desert Online General Trading LLC
Dubai, United Arab Emirates
Desert Online General Trading LLC
Dubai, United Arab Emirates


🚀 Elevate your IoT game with the ultimate wireless dev board!
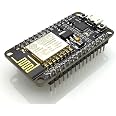
The Lolin NodeMCU ESP8266 CP2102 is a compact, lightweight development board featuring an 8.5 GHz A9 processor and built-in micro-USB for easy programming. Supporting 802.11b Wi-Fi, it offers seamless wireless connectivity and is fully compatible with Arduino IDE, Mongoose IoT, and MicroPython, making it the perfect choice for cutting-edge IoT projects.
| Brand | eleduino |
| Manufacturer | Sound Land Corp |
| Country of Origin | India |
| Model number | 3-01-0268-1 |
| Number of Memory Sticks | 1 |
| Special Feature | Wireless |
| Item Weight | 9 g |
| Product Dimensions | 4 x 4 x 4 cm; 9 g |
| Item model number | 3-01-0268-1 |
| Item Height | 40 Millimeters |
| Item Width | 40 Millimeters |
| Processor Type | A Series A9 |
| Processor Speed | 8.5 GHz |
| Number of processors | 1 |
| Memory Storage Capacity | 4 MB |
| Memory Technology | LPDDR4 |
| Hard Disk Interface | USB |
| Wireless Standard | 802.11b |
| Number of USB Ports | 1 |
| Connectivity Technology | Wi-Fi |
| Voltage | 5.5 Volts |
| Power Source | USB |
| Operating System | NodeMCU |
| Compatible Device | Arduino, Personal Computer, Smartphone |
| Included Components | Lolin NodeMCU ESP8266 CP2102 NodeMCU WIFI Serial Wireless Module |
| Are batteries included? | No |
| Hardware Interface Type | USB |

![Arduino Nano 33 BLE Sense Rev2 with Headers [ABX00070] – AI Microcontroller with Sensors, Bluetooth, for Wearables, Gesture & Voice Recognition](https://images-na.ssl-images-amazon.com/images/I/61MC7q9EEVL._AC_UL116_SR116,116_.jpg)