Desert Online General Trading LLC
Dubai, United Arab Emirates
Desert Online General Trading LLC
Dubai, United Arab Emirates


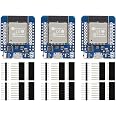
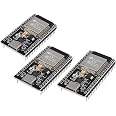
🚀 Unlock your IoT potential with the ultimate ESP32 trio!
The HiLetgo 3pcs ESP32 Mini Development Boards are compact, high-performance modules featuring 520KB SRAM, 34 I/O pins, and dual WiFi/Bluetooth connectivity. Powered via USB 5V and compatible with Arduino IDE, these boards are perfect for rapid prototyping and scalable IoT projects.
| RAM | SRAM |
| Wireless Type | Bluetooth |
| Brand | HiLetgo |
| Series | 8541612412 |
| Item model number | 8541612412 |
| Operating System | Linux |
| Item Weight | 0.32 ounces |
| Package Dimensions | 3.94 x 3.03 x 0.55 inches |
| Color | Blue |
| Processor Brand | Espressif |
| Number of Processors | 3 |
| Manufacturer | HiLetgo |
| ASIN | B07BK435ZW |
| Is Discontinued By Manufacturer | No |
| Date First Available | March 19, 2018 |
TrustPilot
1天前
1 个月前