We remain fully operational. Our teams are working around the clock to ensure your deliveries continue safely.

下载应用程序


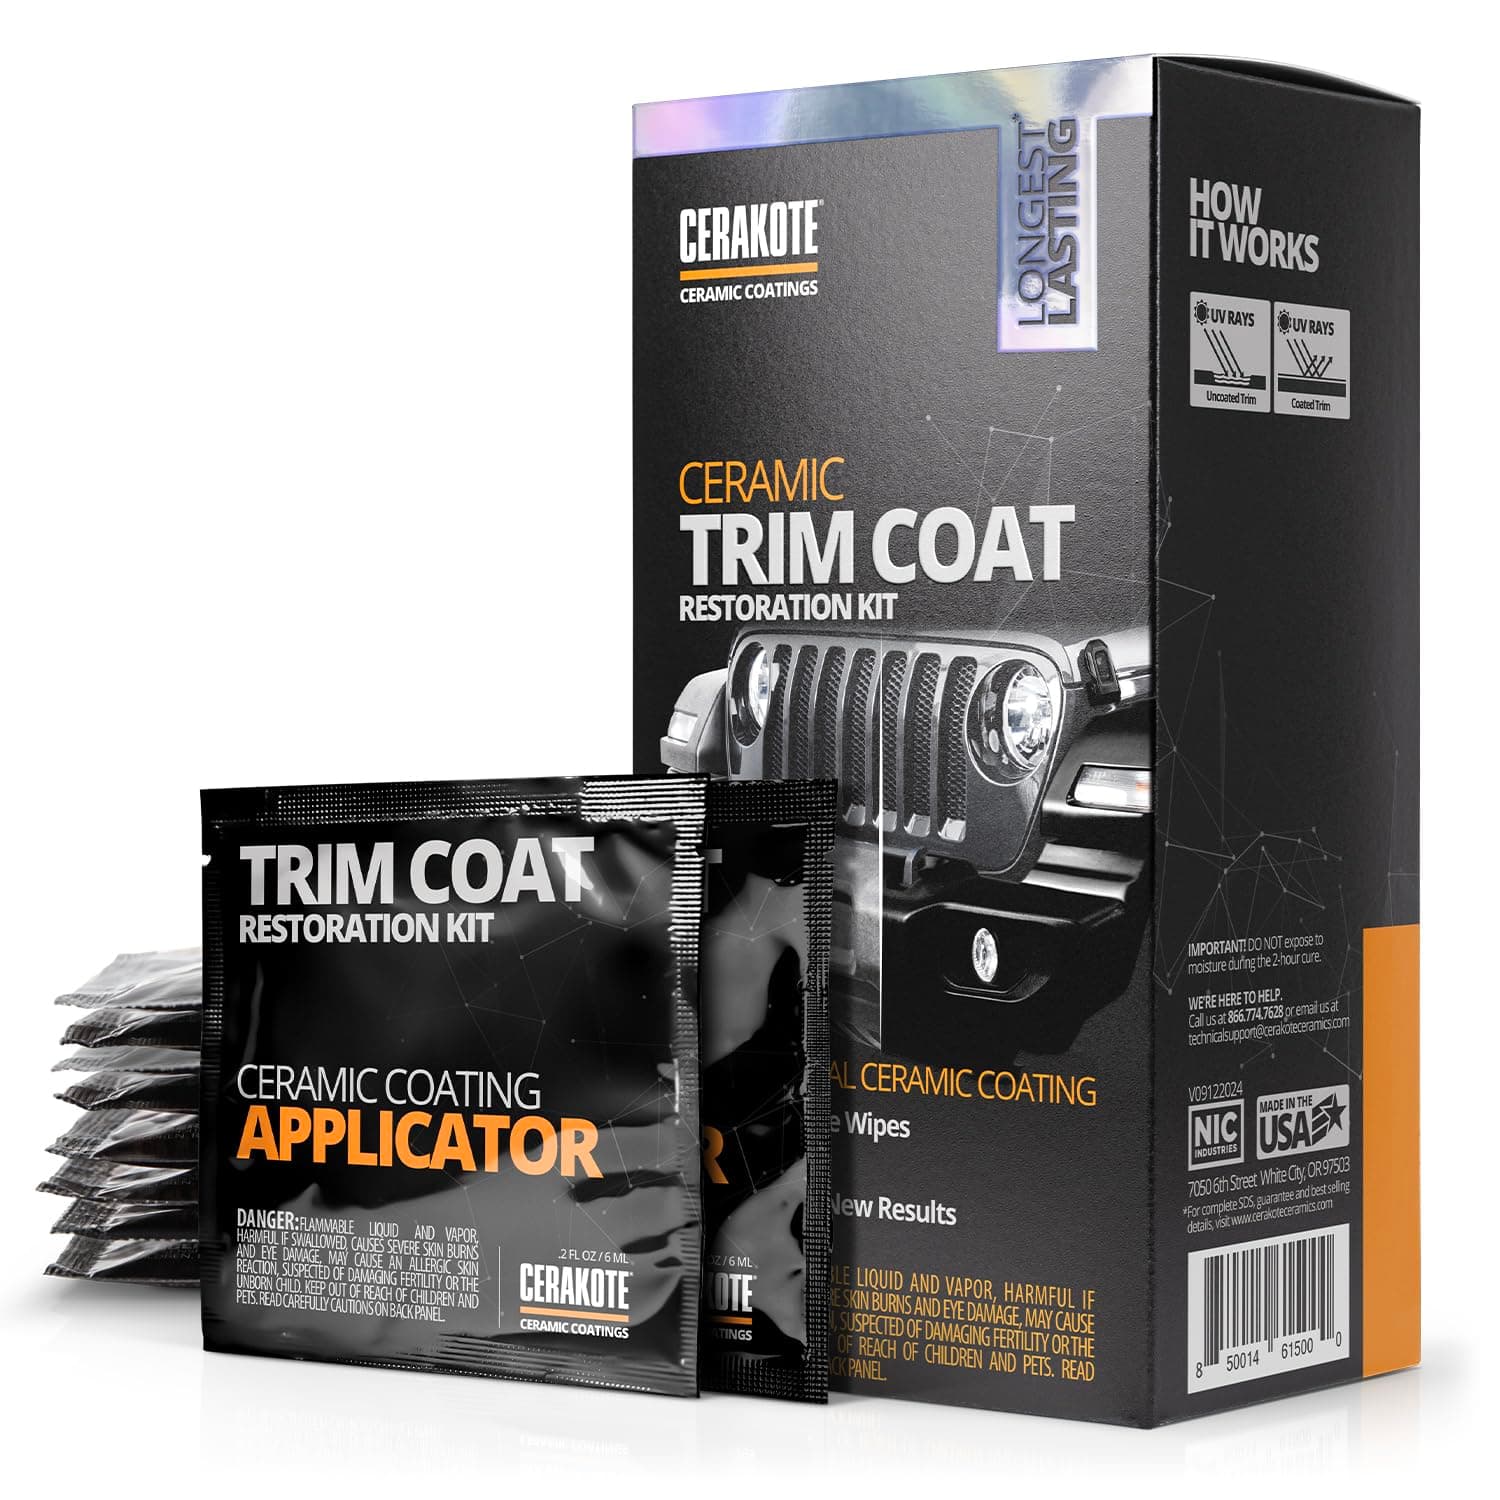
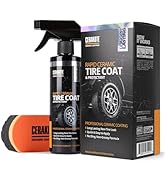
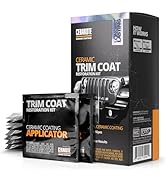
🖤 Bring your trim back to life — because your ride deserves the spotlight.
The CERAKOTE Ceramic Trim Coat Kit delivers a professional-grade ceramic coating that restores and protects vehicle plastic trims with a durable finish lasting over 200 washes. Featuring UV-resistant technology and an easy-to-use wipe application, it revives faded trim to a rich gloss without greasy residues, making it the go-to solution for millennial professionals who demand both style and lasting performance.


| ASIN | B07SHJVK4G |
| Best Sellers Rank | #453 in Automotive ( See Top 100 in Automotive ) #18 in Interior Care Products |
| Brand Name | CERAKOTE |
| Customer Reviews | 4.5 4.5 out of 5 stars (23,759) |
| Included Components | CERAKOTE® Ceramic Trim Coat Kit - Quick Plastic Trim Restorer |
| Item Type Name | CERAKOTE® Ceramic Trim Coat Kit - Quick Plastic Trim Restorer - Ceramic Coating Black Trim Restoration to Last Over 200 Washes – A Ceramic Coating, Not a Dressing |
| Item Weight | 136 g |
| Manufacturer | CERAKOTE |
| Model Number | 8 |
| Number of Items | 1 |
| Part Number | R-TKIT1004 |
| Specific Uses For Product | specific_uses_for_product |
| UPC | 850014615000 |
| Unit Count | 1 Count |
F**N
Perfect 👌
I watched many reviews about it, and i was confused about the result. After applying it, the trim became better than when it was new, just the wipes is not the best idea, while applying, it makes some lines which appears under the light especially when it's very wet In general, very satisfied
C**N
THEY WEREN'T PLAYING AROUND WITH THEM WIPES
GEEZ. THESE WIPES COMPLETELY CHANGES THE LOOK OF MY TRUCK. I HAVE AN '08 FORD F150 AND THE TRIMS ARE JUST GONE, FADED. TO BE HONEST, I SAW MY TRUCK ON ONE OF THE IMAGES ON HERE AND I WAS LIKE 'YEA THAT'S THE RESULT, OKAY'. OBVIOUSLY I WASN'T EXPECTING MUCH AND THINKING IT'S JUST MARKETING PROPAGANDA. BUT AFTER I TRIED IT, COUPLE PASSES AND MY JAW DROPPED. YOU DON'T UNDERSTAND HOW "SILVER" LOOKING MY TRIM WERE DUE TO FADING. IT JUST TURNED BLACK AND LOOKING LIKE NEW. I CAN DO A LITTLE BETTER ON THE APPLICATION BUT THE RESULT ARE FANTASTIC. BEEN DRIVING IT FOR 2 WEEKS RIGHT NOW, 2 WASHES WITH A POWER WASHER EACH WEEK, DIDN'T BUDGE. THIS THING STICKS PRETTY GOOD. VERY HAPPY WITH IT. SORRY FOR THE CAPS, I REALIZED IT AND I'M ALREADY MORE THAN HALF WAY MY REVIEW. LOL RIGHT.
T**T
Amazing
Amazing quality
C**S
Works good.
Works great. Ensure your surfaces are clean before applying. Had some water stains on my plastics and it left streaks which is now permanent. Wish it was a bottle with fluid instead of wipes. Managed to do the whole truck with one box. Gloves does not last long. Will see how long it lasts.
W**Y
UNBELIEVABLE!!!!!
I saw an online video review of this product which compared it to 5 or 6 other similar products. The reviewer gave this the best ratings across the board. I decided to try in on my 2007 Jeep Liberty/Cherokee at it's been showing its age on the faded plastic bodywork. Living in a desert will do that. I was blown away, the shine that this stuff gives is absolutely incredible. I wasn't expecting a huge difference, but now the plastic looks almost brand new. it's easy to apply, no difficult instructions. And the results look great. I can't recommend this high enough. 5 Stars!!!
A**R
Good
22nd sept 2023, used it on chevy suburban 2005, 7 wipes used to cover all exterior trim. Applied at night. Looks good and shiny non sticky. Will update later on the results and how it holds.
R**Y
Great product for internal use too
I got it based on some users who did it for internal detailing too . It works really well, it does leave a glossy look but it fades a bit with time.
M**.
Good Packaging and Clear Instructions
The product came with good packaging. The instructions were clear. I dont know about the results yet but its the best one available in market. Since it was my new car i did not use it on new trim because it clearly mentioned not to be used on new trims. So, I returned the product.
J**P
I have a honda crv 2017 which we bought brand new when I became pregnant. All the black plastic bumpers are now faded to grey which annoys me because the car is otherwise in great condition. Ive tried UV protectant sprays and even fell for the cheap restore creams advertised on temu but nothing lasts longer than a week or two. I applied Cerakote tonight and WOW WOW WOW! The bumpers look and feel completely brand new. It totally exceeded my expectations. Im super happy with the result, and I highly recommend. I have two wipes left over after doing all black plastic including on the side mirrors and window divider thingys.
A**O
Un excelente producto, se aplica sobre plástico duro, no sobre hule de preferencia. Nó aplicar en los, postes laterales de las puertas Es recomendable que el plástico esté avejentado, cuando es nuevo el auto te tienes que esperar ya que tiene desmoldantes. Usar alcohol isopropilico para limpiar o promotor
A**.
Ich hatte an meinem BMW Cabrio aus dem Baujahr 2008 an den Lamellen der Innenraumbelüftung sehr deutliche UV -bedingte Ausbleichungen. Da die Mittelstrebe zur Steuerung des Luftstroms anscheinend aus einem anderen Kunststoff ist, war sie nicht betroffen und noch ansehnlich matt schwarz. Nach der Behandlung und mittlerweile einer Woche skeptischer Wartezeit sind die anderen Lamellen ebenfalls sofort wieder schwarz geworden und bisher geblieben. Der Unterschied zur besagten Mittelstrebe ist nicht zu vernehmen. Ich bin sehr zufrieden und werde dieses Produkt an weiteren betroffenen Kunststoffen anwenden.
M**N
Really impressed with this product. I used this on my 2005 Land Rover Discovery 3, loads of faded plastic but Cerakote really transformed my faded plastics. It's been through so much rain very soon after application and it hasn't worn off. I would definitely recommend using Cerakote, it's really easy to apply.
E**I
I am thoroughly pleased with the results of this product, and the application was easier than I expected. Outstanding stuff. I am writing a longer review in case it helps people who are unsure about a "once and done" product that calls itself permanent. It's not hard to apply. It is forgiving and there's time to even it out. But here are some things to anticipate. My use case: I used Cerakote to restore the plastic trim on a used 2014 black Dodge Challenger that had been repainted but the plastic trim was original and it had been kept outside by the prior owner, so the contrast between the new paint and faded trim was noticeable. The trim was originally a deep, dark gray (it is never as black as the paint). It had faded to a medium-gray in many places: running boards on the side beneath the door, below the read bumper (which were also somewhat worn from debris), around the tail lights, and the plastic piece beneath the windshield wipers between the windshield and the hood. These were all looking weathered. The trim was very oxidized in some places, chalky grey near the hood and around the back bumper. The plastic around the tail lights also had light streaks in it from where water drains down from the trunk. What else I tried before I tried Cerakote: I got middling results from Mother's Back to Black. It looked somewhat better for a week or two, and then it went back to looking as before. Not impressed. I got a tip online to try rubbing the plastic trim with a melamine magic eraser, so I did that next, and this made a significant difference. Melamine is abrasive, so be careful if you do this on your trim. I went gently, up-and-down, side-to-side and in small circles, by hand, with gentle pressure like one would with a polishing compound. By removing the oxidation, the plastic was a few shades darker in the worst spots and the streaking on the rear tail light piece was gone. The rough spots on the trim at the bottom of the car and around the wheels looked somewhat better. But it certainly did not "like new." Cerakote experience: I decided to give Cerakote a try based on the video and good reviews. Bam! Back to factory-like deep dark gray. I wish I had taken pictures. It's incredible. Fully satisfied! I had already washed the trim with Dawn dish soap. I started with the trim bone dry. You are warned everywhere that water droplets will ruin the result, so don't expect to do this process right after you wash the car unless you like to live dangerously and have compressed air to spray cracks and crevices. I was worried that application would be streaky if I didn't do it right. Not so. It is forgiving. Here's what I learned. 1) The first 20% of what you'll get out of the packet goes on heavy with the lightest touch. One packet goes a long way. The next 60% is the "normal" application. This goes on the easiest. You can really milk the last drop out of each towelette, but I didn't because the last 20% of what you can get out of it by rubbing it really hard comes out very light and is not worth the uneven application unless you have some random area you don't care much about and want to use the remainder for that. I only used 5 packets to do the whole car. When you start a new packet, the beginning is where you might want to go back later and even it out once the application gets more normal. Or better, start a new packet on a big section to spread it around well and then move to smaller trim when the towelette is less fresh. 2) You've got time to work with it and make corrections. It stayed liquid like water for at least 20 minutes in my conditions: about 80 degrees, not very humid, indirect sunlight on an 80 degree car. Don't apply in direct sun or on a hot car. The product then gets sticky as it cures, but you can still work with it during the sticky time, rubbing it in and spreading it evenly with the towelette. I did not use a microfiber to "knock down" heavy spots. I just came back around with the towelette. I think a dry microfiber might pull off too much product. When it is half-cured, it is sticky and you can buff it with the towelette at this stage to further flatten and even things out. Work in sections, one piece of trim at a time. 3) Overlaps won't show as long as you rub it all in thoroughly. I tried the overlapping parallel passes method that they recommend, and this works pretty well. I was worried that I might get a "double heavy" streak where the passes overlap but this not so unless the towelette is fresh, but this is fixable. You can do a pretty natural, casual back-and-forth motion for the most part and it comes out fine. This is NOT a super-finicky product. I made a second or third back-and-forth pass in a few areas, and used circular motion in some places where the trim was textured or a little rough from wear, and it all looked even in the end. Just rub it down into the plastic and even out the sheen while it is uncured and it's good. 4) It cures like you see it when it's still wet. It doesn't lighten up very much as it cures. It just looks a little less wet. So get it right by eye when it is wet and that's pretty much what you will still have in an hour when it is cured. 5) Don't miss a spot! You'll see it for sure if you do because the different is so dramatic. And a "second coat" is not easy or recommended. This is the only once-and-done part that you want to get right, and you have plenty of cure time to be thorough. 6) Use the folded corner of the towelette to get into small corners and edges, like where the trim meets the paint or has an inside corner or some little nook. A fresh towelette is great for getting into small areas because a feather touch applies plenty of product when the towelette is fresh. The trim now looks amazing and I am entirely satisfied. I will use Cerakote on my other vehicles. The only minor con is a strong ammonia smell when you are up close to it while it is wet. No smell once it is cured. I would definitely wear the recommended gloves while applying. As others say, you will probably drop that towelette on the ground. It's slippery when wet. Keep it folded in quarters as it comes for ease of application. Turn to a new quarter once a side gets dirty or dry and fold it inside out for four more quarters to use. Bonus, but off-label -- at your own risk: The product is not intended for the soft rubber around the windows, but I tried it there too, and it looks amazing. All I did was wash the rubber with dish soap like the trim, and I rubbed it a few times with a wet microfiber cloth to get the superficial layer of oxidized rubber off. Then I applied Cerakote. It looks great. The rubber used to be blotchy and faded. The microfiber evened this out a little. I would not use melamine on the rubber -- this made it look worse in a test section. The Cerakote made it look great: jet black, much shiner, and much more even looking. Not quite "brand new" but far better than I thought possible. I thought I might need to replace the rubber. Now it's looking great next to the jet-black new paint. This afterthought use alone was worth the money. Can you apply a second coat the next day? They don't say you can, and I don't recommend it. This is meant to be one-shot, which is why you should check to make sure you don't miss any spots. I had two areas where I tried a second coat the next day. The first was on the plastic trim between the windshield and the hood. I didn't rub this trim much with melamine beforehand so there was a lighter area (light grey originally, the worst spot) that didn't get as black as the other sections so I did it again, which helped a little, but not much. I didn't wash this area with soap beforehand because I wasn't intending to fix it until I got going. Once you put things back to black you will start noticing other faded things more. Likewise, I did a second coat on the very top of the soft rubber at the bottom of the windows (the part which faces upward and thus gets the most sun), it wasn't as shiny as the other parts, so I went over that section gently again the next day with a fresh towelette. As soon as I did it, I thought it was a mistake. This didn't go well initially because the cured coating is very hydrophobic so the new, wet, Cerakote of the second coat goes on smooth initially and then "puddles up" into little droplets a few minutes later. It doesn't want to stick to the first coat. I thought I had messed it up, but I let it cure a little until the sticky phase, and spread it out again with the towelette. It stayed that time but gathered back a little into some streaks. I spread it once more a few minutes later and it looked good. It stayed even. It looks just fine a few days later, so I think it cured OK. I hope this product last for months as advertised. Even if it doesn't I would totally do it again because the results are superior, I still have half my towelettes left, and the product is not expensive. 10/10 would do again and will recommend to everyone.