
下载应用程序


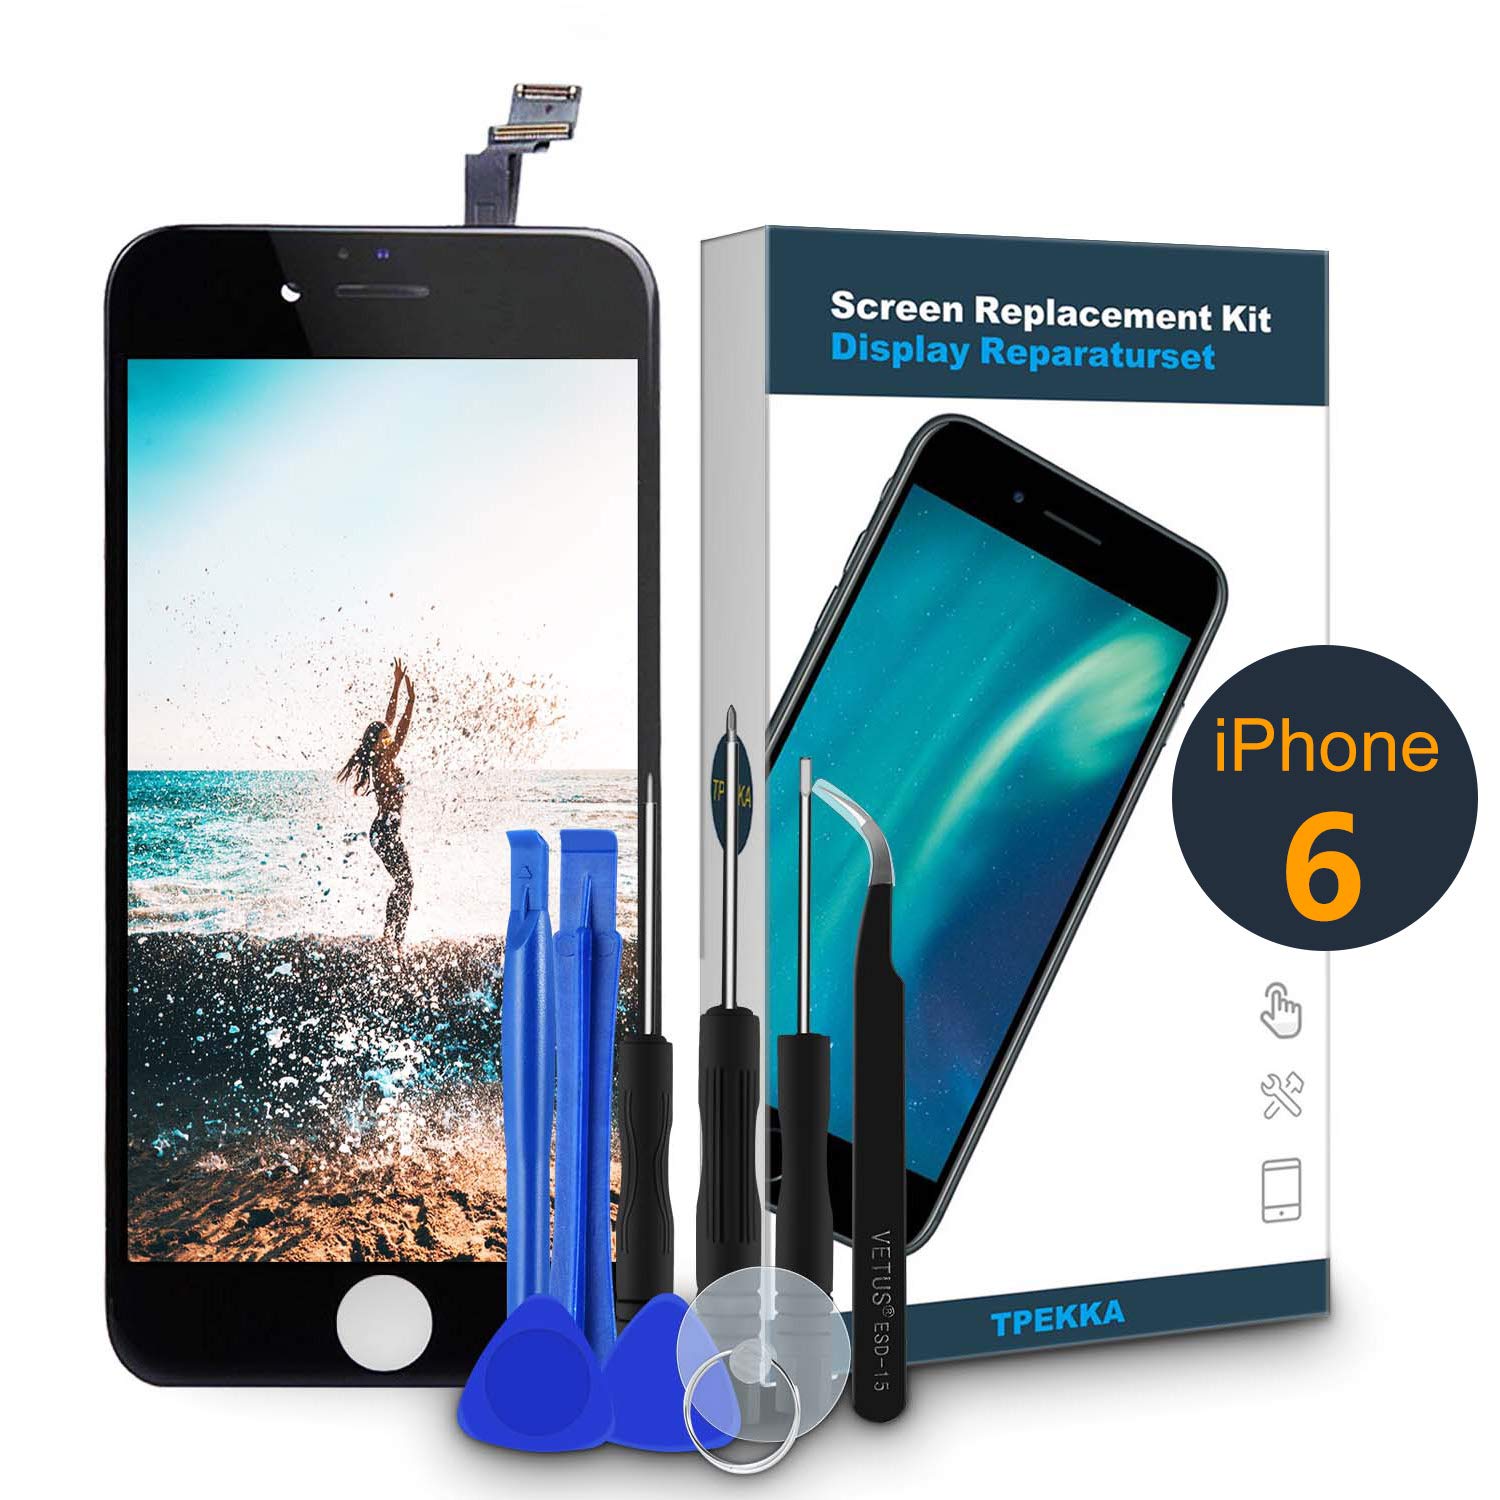
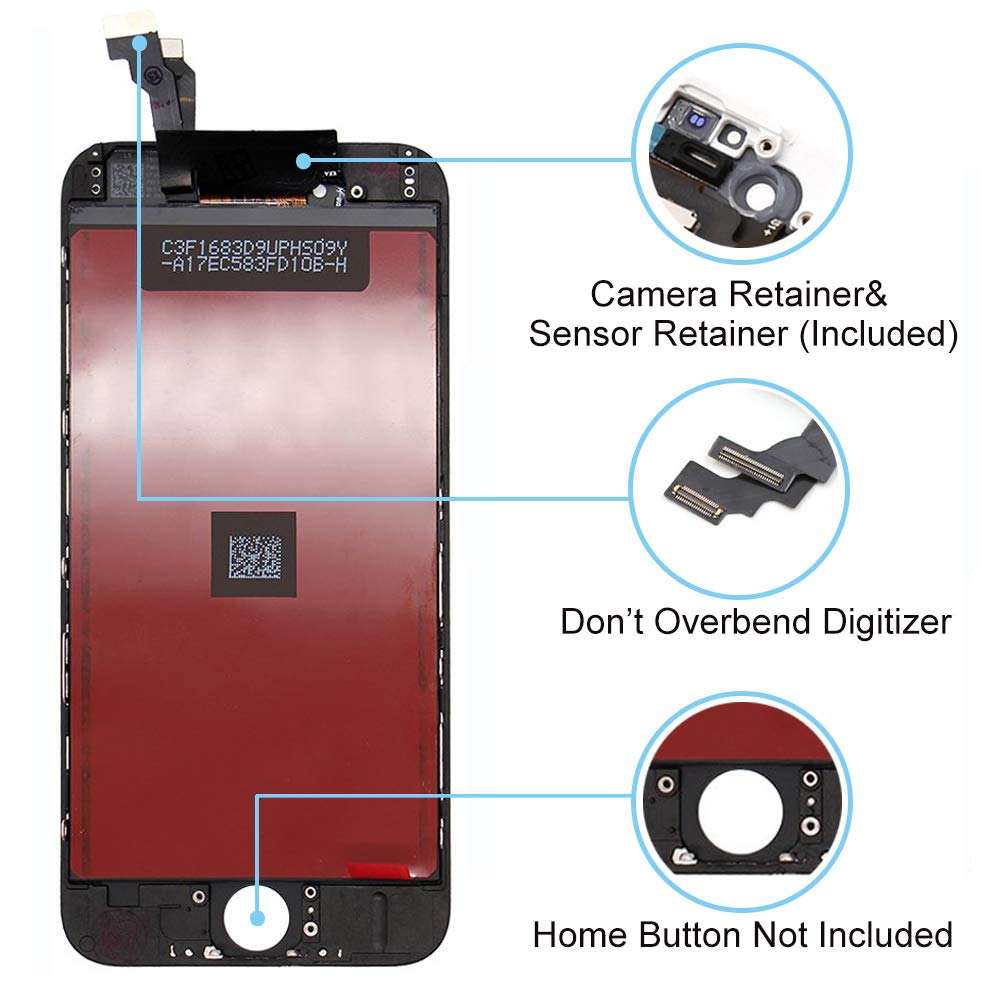

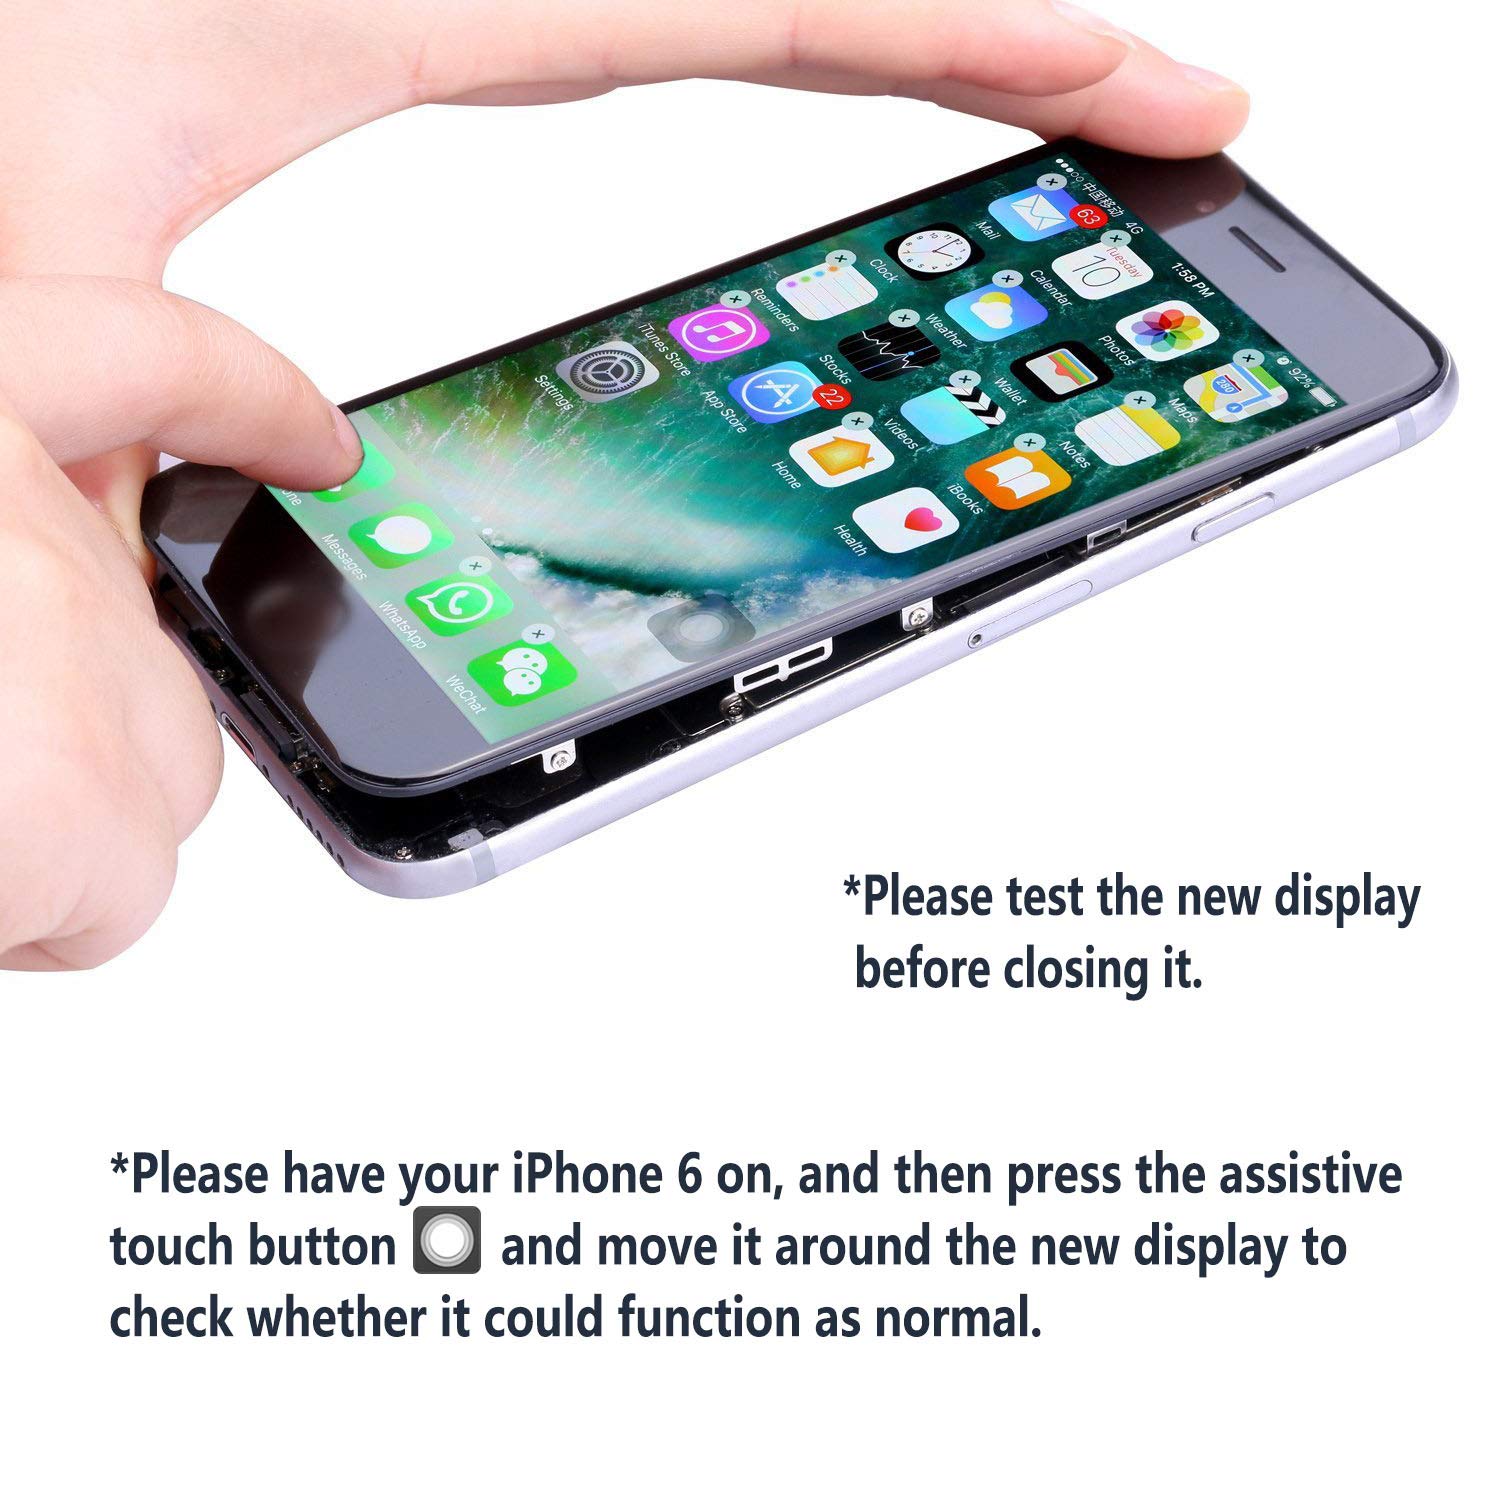

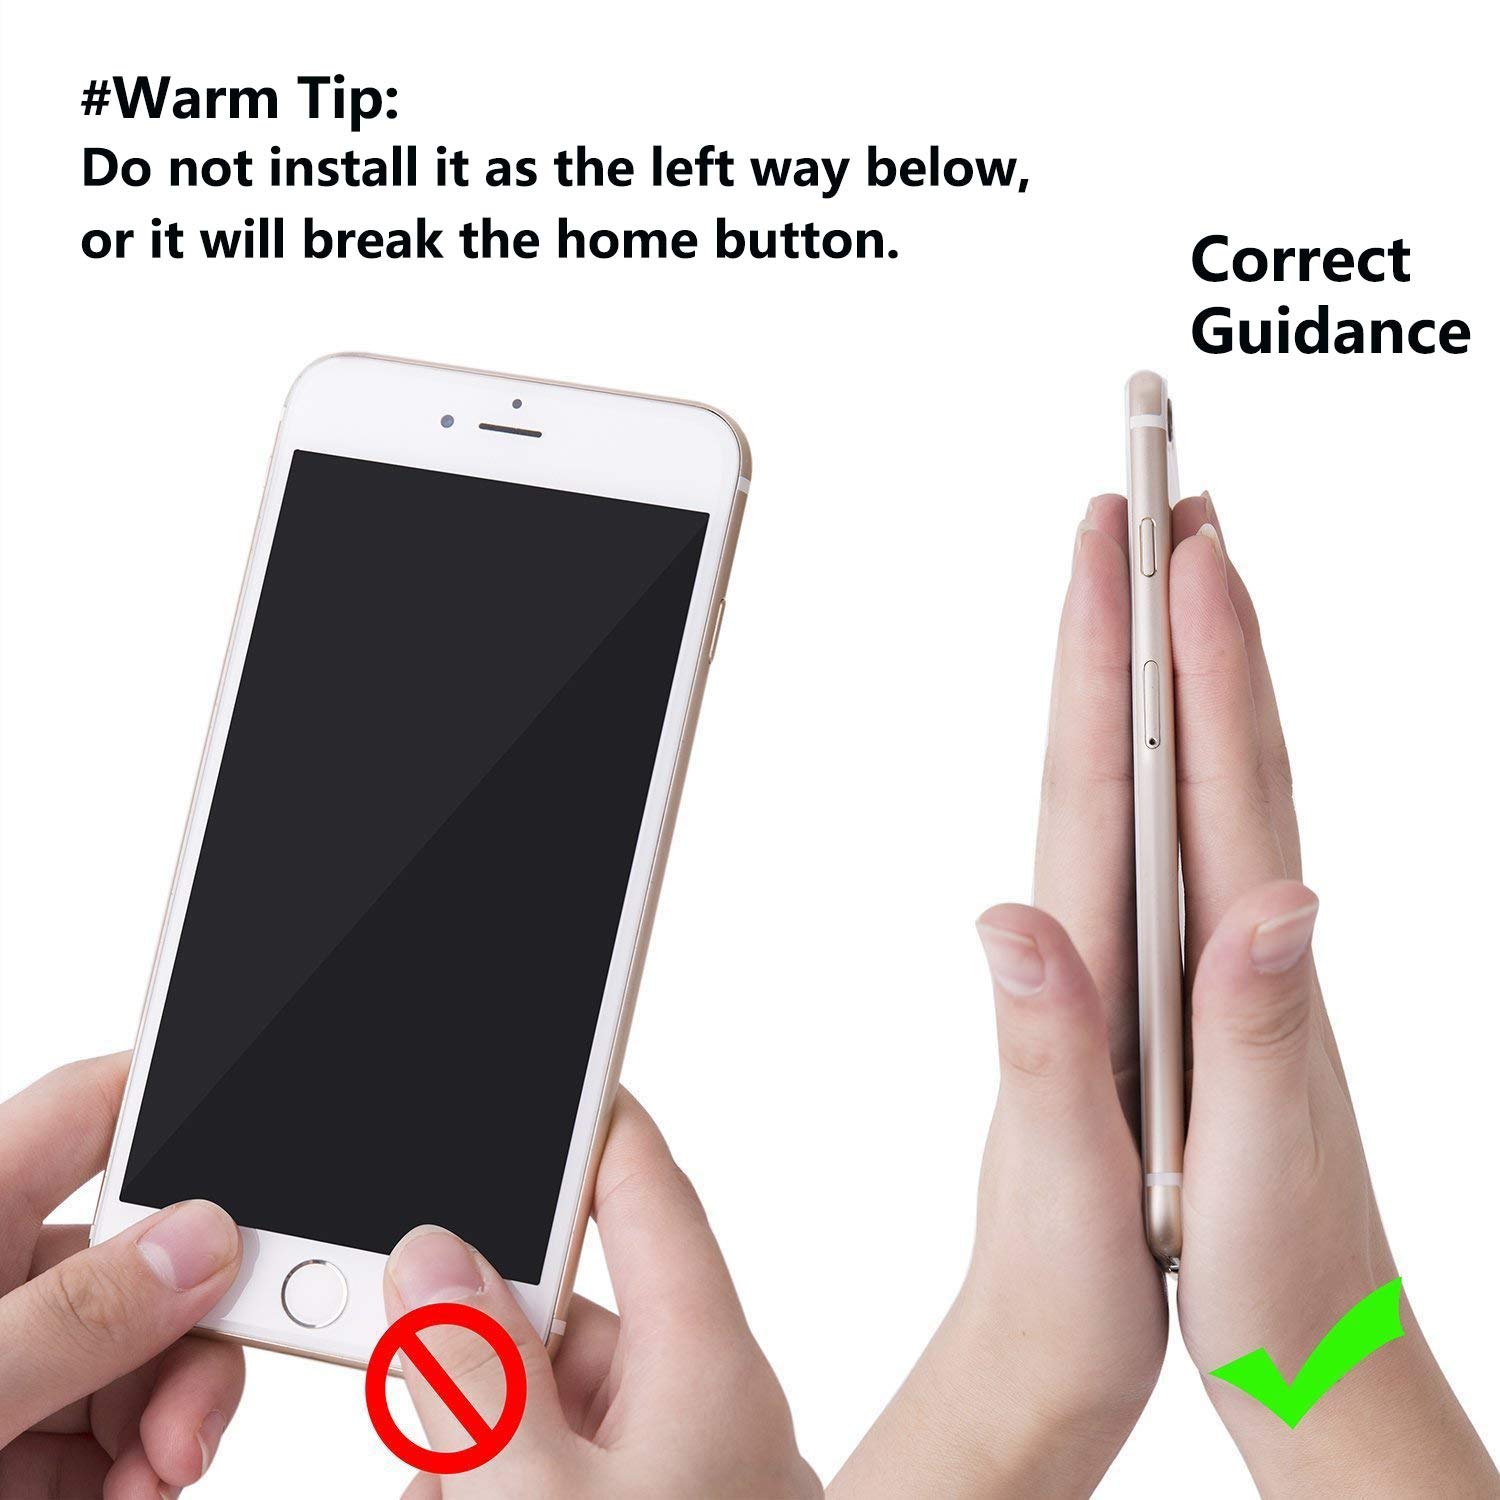

● for iPhone 6 Do-It-Yourself Screen Replacement Repair ● Step 1 Remove Pentalobe Screws Remove the two 3.6 mm-long Pentalobe screws next to the Lightning connector. ● Step 2 Opening Procedure Use the edge of a spudger to slice through the adhesive on either side of the phone. Use the suction cup to open the display, breaking the last of the adhesive. ● Step 3 Remove the internal hardware #Throughout this repair, keep track of each screw and make sure it goes back exactly where it came from to avoid damaging your iPhone. Battery Connector: Use the edge of a spudger to disconnect the battery connector. Front Panel Assembly: Disconnect the digitizer cable. Disconnect the display cable. Remove the display assembly. Home Button Assembly: Use the edge of a spudger to pry the home button flex cable off the back of the display panel. Remove the home button assembly. Display Assembly: Remove silver metal LCD shield plate. Only the front panel remains. ● Step 4 Reassemble Your iPhone Follow these instructions in reverse order. It's important to transfer the original home button onto the new display in order for Touch ID (fingerprint scanning) to function. #Notes: ①Power Off the device before starting.②Use the correct screwdriver to open the screws. ③Need to remark the screws and keep in mind its’ original position ④Remember to disassembly the battery connector when doing further steps.⑤Do not forget to test the LCD ⑥Be careful to disassembly the home button, it is easy broken.⑦Avoid to pull the flex cable too hard ⑧Do not press the upper 2 corners of the LCD, it is easy damage.● Package Include: 1x iPhone 6 Premium Screen Replacement (Black)  1x Complete Repair Toolkit1x Manual Instruction
A**R
well packaging, watch youtube video and instruction.
The packaged complete toolkit is the crucial premise for a successful installation. Referring to YouTube guidance video, it would take around 50 minutes to make it. Its brightness might be slightly lower than that of the original iPhone but acceptable.