🪟 Privacy, protection, and style—your window’s new best friend!
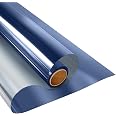
KESPEM Window Privacy Film offers daytime one-way privacy with a reflective blue-silver tint that blocks 80% infrared and 93% UV rays. Its static cling design ensures easy, glue-free installation and removal without residue. Beyond privacy, it reduces glare, controls heat for energy savings, and fits a variety of smooth glass surfaces in homes and offices.


C**.
Absolute Game-Changer for Privacy & Comfort
We put the KESPEN one-way window film on and it honestly made a huge difference. During the day, you can’t see in at all—it just looks like a mirror from the outside—but we can still see out clearly. It also blocks a ton of heat and glare. Our living room is so much cooler now, and we’re not constantly messing with the blinds to get rid of sun spots on the TV.It was super easy to install—no glue, just water and a squeegee. Took a little patience getting it smooth, but once it was on, it looked great. Just a heads-up: at night, if your lights are on inside, the mirror effect goes away, so you’ll still want to close your curtains then.Bottom line: it looks clean, works like it says, and definitely helps with privacy and heat. Would totally buy it again.
A**R
Life Changing
This was bought for 2 reasons. One we wanted privacy. It’s a beautiful big window and we like looking outside but wanted privacy. Keep in mind this is privacy during the day. At night with the lights there is no privacy. You can see in one of the photos what it looks like from the outside. It’s just black. You cannot see inside. The other reason is that the window faces west so when the sun sets especially in the summer it’s incredibly sunny and warm in the room. It’s very uncomfortable. We have a mini blind but I don’t want it down. We like looking outside. This product is amazing. It is significantly cooler in the living room and the sun isn’t blinding you. You can still clearly see outside. Applying it was easy. Just follow directions and you’re all set. We bought the black silver.
C**O
Enhancing Privacy and Comfort
KESPEN Window Privacy Film was the solution I was looking for to make my home and office more tranquil and secure. This sun-blocking, anti-UV, and reflective one-way daytime privacy solution seemed like a good option. There are several things to keep in mind despite its many strengths. In this comprehensive 4-star review, I'll talk about my experience with the KESPEN Window Privacy Film, including its features, performance, and overall value.The KESPEN Window Privacy Film distinguishes out because it does more than just provide privacy; it also blocks the sun. The midday isolation is much appreciated thanks to the one-way privacy element that blocks views from the outside. The sun-blocking and anti-UV characteristics simultaneously lessen glare and shield furniture from overexposure to the sun.The static cling design made the assembly process quick and easy. However, some patience and accuracy were required to complete the application without any bubbles. The film's generous dimensions of 17.5 inches by 6.5 feet made it usable for a wide range of window sizes.The film's one-way privacy effect works best during the day, which is an important consideration. The privacy feature loses its effectiveness when inside lighting is brighter than the outdoor surroundings, as is the case in the evening. Expectations must be managed, and extra window coverings should be considered for nocturnal privacy.The KESPEN Window Privacy Film did a great job of keeping the inside of my house private throughout the day. It let me see out yet blocked prying eyes from the inside, giving me the much-needed privacy I was seeking. The mirrorlike appearance provided by the reflective surface amplified this illusion further. This made my windows look more contemporary.While the film's reflective quality is great for privacy, it's important to keep in mind that it can also make it difficult to see out the window during the day. This effect may be more noticeable in rooms with a lot of natural light, which may reduce the level of comfort there.The film's ability to hide the sun was immediately noticeable. I was able to use my computer and watch TV without getting eye strain because of the significant decrease in strong glare. The film's anti-UV capabilities added peace of mind, since I knew it was shielding my things from the sun's harmful rays.It's important to remember, though, that the sun-blocking effect can also drastically reduce the amount of light entering the room. This could be problematic in areas where natural light is particularly important, yet ideal, such as theater rooms. It's crucial to weigh the advantages of sunshading against the reduction in indoor lighting.As was noted earlier, the installation process was simple, however there were some difficulties in establishing a bubble-free application. Static cling technology makes adjustments easy during set up. However, it might be tricky to align exactly due to the film's reflecting surface, as it can be difficult to see through the film from the inside.Throughout my experiments, the film kept its initial adherence and performance levels. There was no peeling or deterioration, so you know it was well made.If you're looking for a practical way to protect your privacy and shield yourself from the sun, consider the KESPEN Window Privacy Film. Its low price makes it a desirable alternative to more permanent window coverings like blinds. It is important to weigh the benefits against any potential downsides, such as increased interior reflection and less natural light.If you're looking to improve privacy and cut down on glare without breaking the bank, look no further than the KESPEN Window Privacy Film. Because of its double purpose, static cling construction, and shielding qualities, it can be used in a variety of settings. The film's overall performance and low cost score it a solid 4 stars, despite minor concerns regarding nighttime privacy, inside reflectivity, and impact on interior illumination. KESPEN Window Privacy Film may do wonders for your comfort and privacy provided it is installed properly and its features are taken into consideration.
S**H
Great purchase
I ordered this to cover one window and ended up buying enough to do my whole house. I cannot tell yet how much energy it’s reducing but does seem to help keep some of the heat out where there is direct sunlight. I chose the black-silver one and the color gives a cooler feel to it. In most rooms I really like it but in one room it seems a bit dark and makes it feel overcast for some reason so a lighter color might have been better.The instructions are easy to follow and it can be applied by one person. It’s clearly not a professional job with the cutting around the edges not perfect and a few small bubbles in it but from the outside it looks great and where we have blinds on top of it the imperfections are not very visible. Had I had a bit more patience applying it I probably could have had it looking better. That said, the imperfections only show when looking up close.I’ve already recommended this to another friend, I really like this product. I haven’t tried to remove it but as easy as it went on, I’m guessing it should come off ok should we decide to remove it.