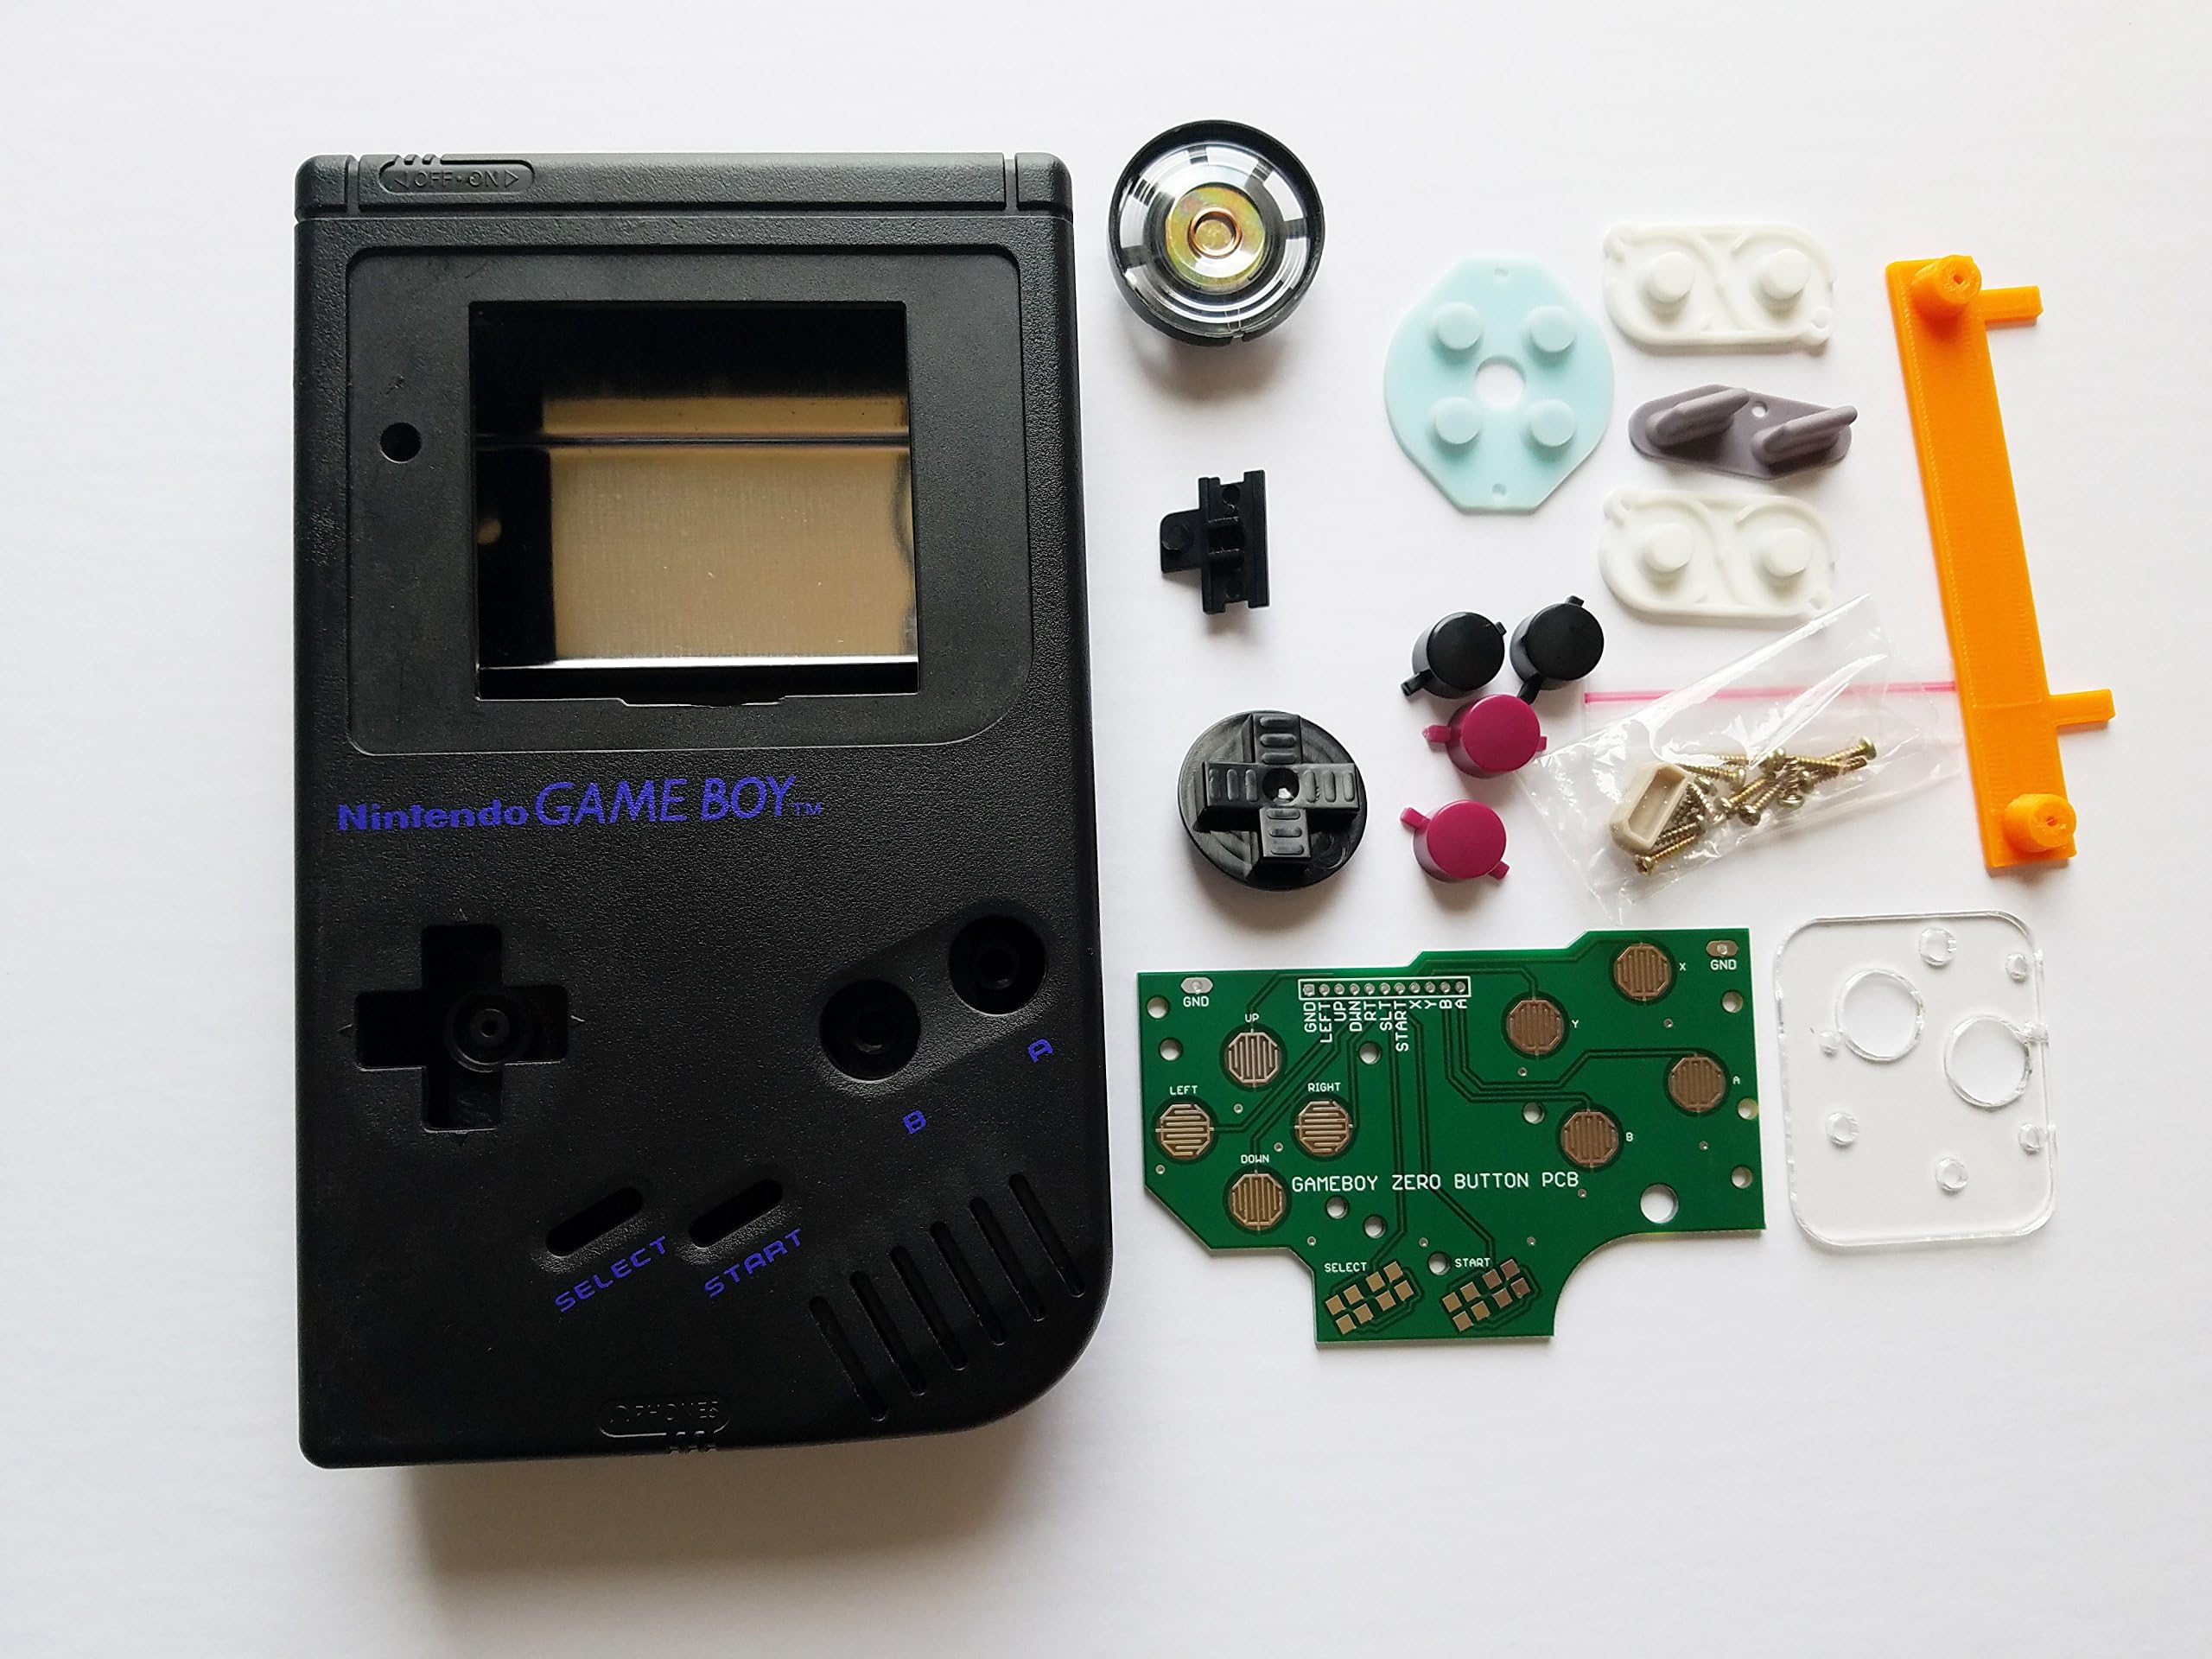

Black Starter Kit Gameboy Zero DMG-01 4 Button PCB DIY W/ Case Speaker & Buttons by Atomic Market
Product ID: 47019407
S**.
Nice starter kit, have purchased two and will purchase again.
As others have already mentioned, this is a great starter kit if you are building a handheld emulator system and is less expensive than purchasing all of your parts individually from other vendors. I have purchased two of these and will likely be ordering more in the future because now a bunch of friends want me to build for them as well. I will say, from an engineering perspective that it's clear these shells are made on shared equipment and could have some very slight defects but the two I have received did not. Use the drilling template at your own risk, the tolerances on the alignments holes are not close enough to perfectly align the template. The better way to do it if you are trying to drill out the two additional button holes would be to mask off the front of the case and measure / mark your drill points. Use a stepped drill bit and if you have access to one, a drill press. This will ensure you don't get drill bit chatter that will cause the holes to be out of round which is very apparent in the final product. I'm still not sure what the 3D printed part is for because there are no instructions so that gets tossed in the garbage along with the drilling template. Also be sure to clean the contacts both on the circuit board and on the rubber button contacts as they most definitely will be dirty. To note a few more parts that you will want for a complete build:Power switch, volume potentiometer, and stereo headphone jack. All of these are available on Amazon and are prime eligible. Additionally you will need a battery and charging / power distribution board (Available on Amazon) A raspberry pi, Odroid or other single board computer, I find that the Zero W fits great in this case and a display. There are plenty of 3.5 inch TFT displays available that are designed to be installed in a vehicle to serve as the display for a back-up camera. These can easily be modified to operate at 5 volts, just make sure you find one that has a driver board that is slightly smaller than the LCD itself or you will have trouble getting it to fit in the case. All in all, this is a nice starter kit, but it would also be fantastically helpful if somebody would put together a complete kit with all the parts needed to build a Gameboy Zero.If you are apprehensive about purchasing this kit, don't be. The quality is acceptable and there are plenty of builder groups on facebook and other places that can help you through your build. I've added a picture of my *Almost* complete first build. Still waiting to order a glass screen bezel.
A**R
Good Stuff
Was a little worried by the few reviews but everything came on time and was good quality. Woulda liked a volume wheel and a better template for drilling holes. But all in all good value.
C**M
Very nice kit. Not complete, but well worth the price
You still need a few more parts to put this together, but for what this costs, this is a great start.
B**N
Essentially a gameboy shell with extras
This is literally a replacement case for a gameboy. It is exactly the same, down to the Nintendo name and volume and power switch and buttons. There is a custom board for wiring the buttons and a few other internal stuff that have been added. I wish it had instructions, I haven’t figured out what the yellow piece is and the screws are crap, you will need to replace them but it all seems good otherwise. I’m sticking a raspberry pi in mine.
K**.
Two Stars
case came with a defect, part of the edge of the plastic was peeling off
E**K
Five Stars
Came in a great condition! Nothing was missing and organized to get you started on your project.
Trustpilot
1 month ago
1 week ago