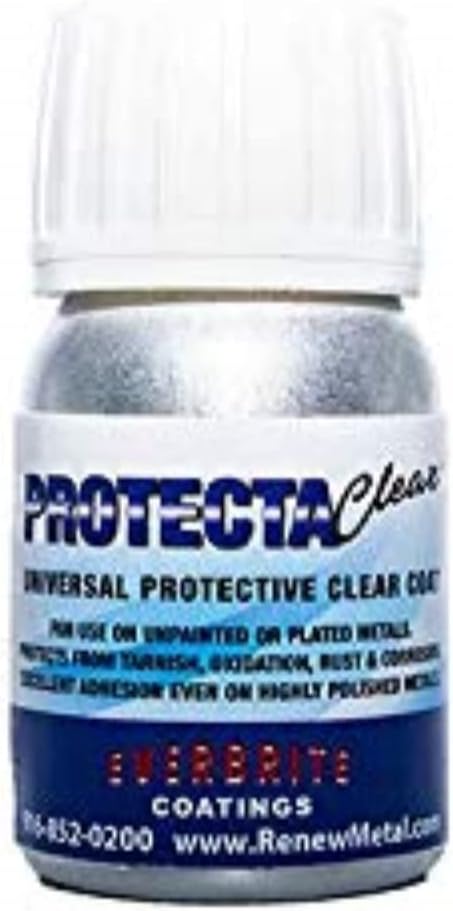
🛡️ Keep your metals flawless and envy-worthy—because your shine deserves the best!
ProtectaClear is a premium clear protective coating designed to shield high-use metal surfaces from tarnish, oxidation, and fingerprints. Easy to apply with multiple methods, it dries to a hard, invisible finish that preserves the look and value of jewelry, silver, stainless steel, and other polished metals. One ounce covers approximately 4 square feet per coat, making it a must-have for professionals and enthusiasts aiming for long-lasting metal protection.
Manufacturer | Everbrite, Inc. |
Part Number | 43216-83271 |
Item Weight | 1.76 ounces |
Product Dimensions | 2 x 1 x 2 inches |
Item model number | 8542146770 |
Is Discontinued By Manufacturer | No |
Size | 1 Oz. |
Color | Clear |
Material | Clear coating |
Item Package Quantity | 1 |
Batteries Included? | No |
Batteries Required? | No |
Z**K
Nice for precious metals
Perfect for preventing tarnishing. Make sure you read and follow the directions if you want it to work and not look dumb. I use it for protecting some of my jewelry pieces (mostly pendants and earrings) from tarnishing and before I hand them over to clients. Be sure to clean off the metal of any oils or residue (I use acetone or mineral spirits) and make sure you let it cure completely and DO NOT TOUCH IT until it it fully cured lest you want fingerprints or a smudge. Overall, its nice, it protects precious metals from tarnishing and, if you use it right, it creates a nice moderately strong and durable, smooth non sticky coating for a relatively inexpensive price.
G**Z
This is a truly effective rust preventive coating. .
This product was utilized on a custom stainless steel “moon and Star” bed by Dan KRIETZ. It had been in storage for 3 months and developed rust on most surfaces. We removed the rust and applied this product in 2 coats. It dried to a pleasant patina and no rust has returned.
T**N
Great sealer!
This helped keeping the original color and brilliance of our copper sink. It really works after just one coat! I applied 3 with 1 hour intervals as instructed and we waited a few hours for it to really dry and cure in there. After that, we were washing pot and pans and even left a few in there overnight to test out and to my surprise it actually left no markings of any kind. I just bought another, larger can.
B**
Metal jewelry sealer
I use it to seal my handcrafted brass and copper jewelry that I make for my shop. It works well against tarnish but will not stand up to repeated exposure to water.
J**R
Great product!
Works great for sealing any wire that tarnishes. I use it for wire wrapped jewelry. It lasts a long time before needing any sort of reapplication. The bottle lasts for a really long time so value for the money is great!
R**S
Works Great
This works great for copper and brass. Does not leave any indication of being brushed on.
A**C
Thin, easy to work with, would recommend for red metals, with a caveat
Original review, see edit below:I tried this for the first time for coating copper and bronze rings, and I think I like it. Very thin, you don't need much for small pieces, so 4oz will go quite a ways. It self-anneals, so if you have minor abrasions during the coating process, another coat will make that go away. Cleanup is with Xylene, though I found Acetone also works great as well - I was happy to find that with a cloth and a little jar of acetone, I could completely remove a partially cured coating without any residue. This 4oz can to be much better than spray polyurethane, which was difficult to get right on metal and needed sanding between coats, whereas this did not. I like how thin it is.Make sure you read the instructions and follow all of them. Wash the item with soap and water, use the neutralizing solution to remove any acids from polishing compounds, use alcohol as a final step to clean the surface. With rings, I made some hooks from some sprue wax I had laying around, and dipped half the ring in the coating, removed excess with a small painter's brush, and let it dry for two hours, then dipped the other half. There was no seam or any sign at all that there had been a delay between coatings. I gave each ring two full coats (that is, four half coats), and let them hang for a week to harden, as recommended. They all look pretty great - you cannot tell there's a clear coat over the metal, and I don't have to worry about the copper tarnishing or turning people's fingers green.Aside from the long curing time - though it is dry in a couple hours, a full cure takes five days - it's pretty good stuff. I'd recommend it for anyone who is making jewelry out of red metals if you want to preserve the patina or surface for as long as possibleEDIT: An update. So, after about six months of wear, this is the result. I made six rings, and coated all of them with ProtectaClear. Two of these rings were either all metal or a hard patina, and four had a cyanoacrylate-type gemstone inlay as well. Of these rings, five of them, which are worn about once per week, are holding up quite well. The sixth, however - an inlay type which is worn every day - has begun to peel. It started after about three months, so I had the recipient send it back to me so I could strip off the coating, re-polish the ring, re-neutralize it, and try again. I did so, but within two months it has started to peel again, coming away in little flakes. Needless to say, this is very disappointing. I followed the instructions religiously, careful with the neutralization process, careful with the cleaning, gave the ring two complete coats and a full two weeks at room temperature to cure after coating, but the effect was the same both times. The flaking is occurring on the metal and the inlay, but does not - from appearances - appear to be occurring on the inside of the ring, so at least there are no green fingers.As a result, I cannot necessarily recommend this for rings which will be worn all of the time. I an currently seeking alternative coatings, and will leave an update if I find one that works well.EDIT 2: See my response in the comment below this for further details on an alternate coatingEDIT 3: As Amazon is removing the review reply function, here is a copy of my findings:I did eventually find a solution, which I just tried late last autumn and still appears to be holding up. I purchased Finish 1 2K Urethane Automotive Clear Coat: 32 oz. Quart Clear Coat + 8 oz. Activator, and thinned it with Rust-Oleum Automotive 253307 32-Ounce Lacquer Thinner, with a ratio of about 2:1 clear coat to thinner. You are really going to have to experiment with the ratio to find one that works for you, but broadly speaking, the thinner you can make it work, the better. Eight thin coats is much better than two thick ones.It took a considerable amount of testing, but I ended up getting something that looked pretty good in the end. Basically I bought a bunch of those little clear plastic cups and some craft syringes. I cut the top off of the plastic cup, just because it made it easier to work with and I used less clearcoat as a result. I measured the mix with the syringes, mixed the clearcoat, added the thinner and stirred it well. I polished the rings to a brilliant shine and cleaned them with alcohol. Then I used the sprue wax hooks to dip them into the clearcoat, one half at a time , and a small painter's brush to rid the excess. I gave it about an hour drying time between each dip (so dip one half, wait an hour, dip the other half, repeat). Each ring had at least two full coats (four dips), and most had four.I had the best results using a completely new batch of clearcoat for each dip This does mean that for every dip, you lose the majority of the clear coat, but since I was using about 8ml (clearcoat+hardener+thinner) each time, when I look in the can I can barely tell I used any at all. I gave an hour of drying time per dip (I was using the hardener with the medium drying time), but I followed the instructions pretty exactly beyond that. The coating can be handled within 48 hours, but I recommend at minimum a two week drying time to really harden it up, and if your logistics allow for it, a month. If you have a UV lamp that might improve your drying time by a good margin, but I can speak from experience on that one.Caveat here would be that this coating is much thicker than the Protectaclear, even when thinned. If you custom size your rings, then you might want to increase it by a hair - and I mean a hair, no more than a hundredth of an inch diameter. The Finish1 guys say it can be sanded and polished but I didn't risk it myself, you'd have to wait a month before you tried anyway. If you mess up a coating and it isn't fully set yet, use the thinner, completely clean the ring, repolish it and try again. If you are getting bubbles, then trying going a little thinner with the mix. Definitely get the bubbles out when it is wet, because when it is dry they are there to stay. I found a good, hot breath will help disperse most little bubbles, but you can also try an indirectly and very (very) carefully applied torch lighter if you are feeling adventurous. If you only notice a mistake after it has set, you might be able to soak it in thinner but you are probably stuck sanding it down and trying again.It took me 2-3 tries to get something presentable, but I had good results after I figured out the details.
S**T
Great For Oura Ring Gen 3 Horizon Rose Gold!!
Oura customer service provides little to no advice on how to protect your ring and the reps know very little of the build material which is important when figuring out enamels and/or protective clear coats.To preface I have the Oura Ring Gen 3 Horizon Rose Gold, and I wear it on my left hand index finger (non-dominant hand)I took a chance on ProtectaClear and very happy I did! I did 4 applications/layers (Did not apply/dip whole ring) by brushing on the outer layer. I wore latex gloves and put the ring on my index finger and did circular motions with a small sponge applicator on the face and edges of the ring, but avoiding the inside so it doesn't effect the sensors.I have wore the Oura Ring for a few months with the ProtectaClear and I have not been cautious on protecting it from objects or grabbing items because I want to truly see how well it protects the ring. I also wear the O. Sleeve (expensive but necessary) and Ring Wrapper (I wear both) when I workout/lift because I know the bars will 100% scratch it. Outside of lifting I do not wear the protection sleeves.Also to note the O. Sleeve and Ring Wrapper work amazingly during workouts and the Oura Ring doesn't get damaged. I have put 255lbs benching, 50+Lbs dumbbells, 170lbs double D Row Handle Attachment, etc and no issues at all. So I highly recommend this combo!Also, the ProtectaClear doesn't do anything to the color or make it less/more glossy. Which was something I didn't know how the ProtectaClear would or wouldn't do. I don't know how this would protect on the Matte Black/Stealth but I would assume it would turn the Matte look to a glossy look. So I would be cautious to use this on Stealth.The only thing I don't know about with ProtectaClear on the Oura Ring is how often do I need to reapply. I've seen anything from 6 Months to 2 years. I'm leaning more towards 6 Months for reapplication since forums reported that for heavily used metallics using ProtectaClear should reapply every 6 Months to 12 Months.Overall, very happy with ProtectaClear on my Oura Ring and have truly put this ring and ProtectaClear through a lot of wear and tear (banging it against hard items, grabbing keys/metallic items, etc) with literally no scratches. Simple water and wipe down will shine it back to normal to get smudges off the ring.Hopefully this helped because there isn't a lot of information out there to help Oura Ring owners to protect their ring.
Trustpilot
1 week ago
3 weeks ago