Desert Online General Trading LLC
Dubai, United Arab Emirates
Desert Online General Trading LLC
Dubai, United Arab Emirates

🚗 Illuminate your drive, don’t let fog hold you back!
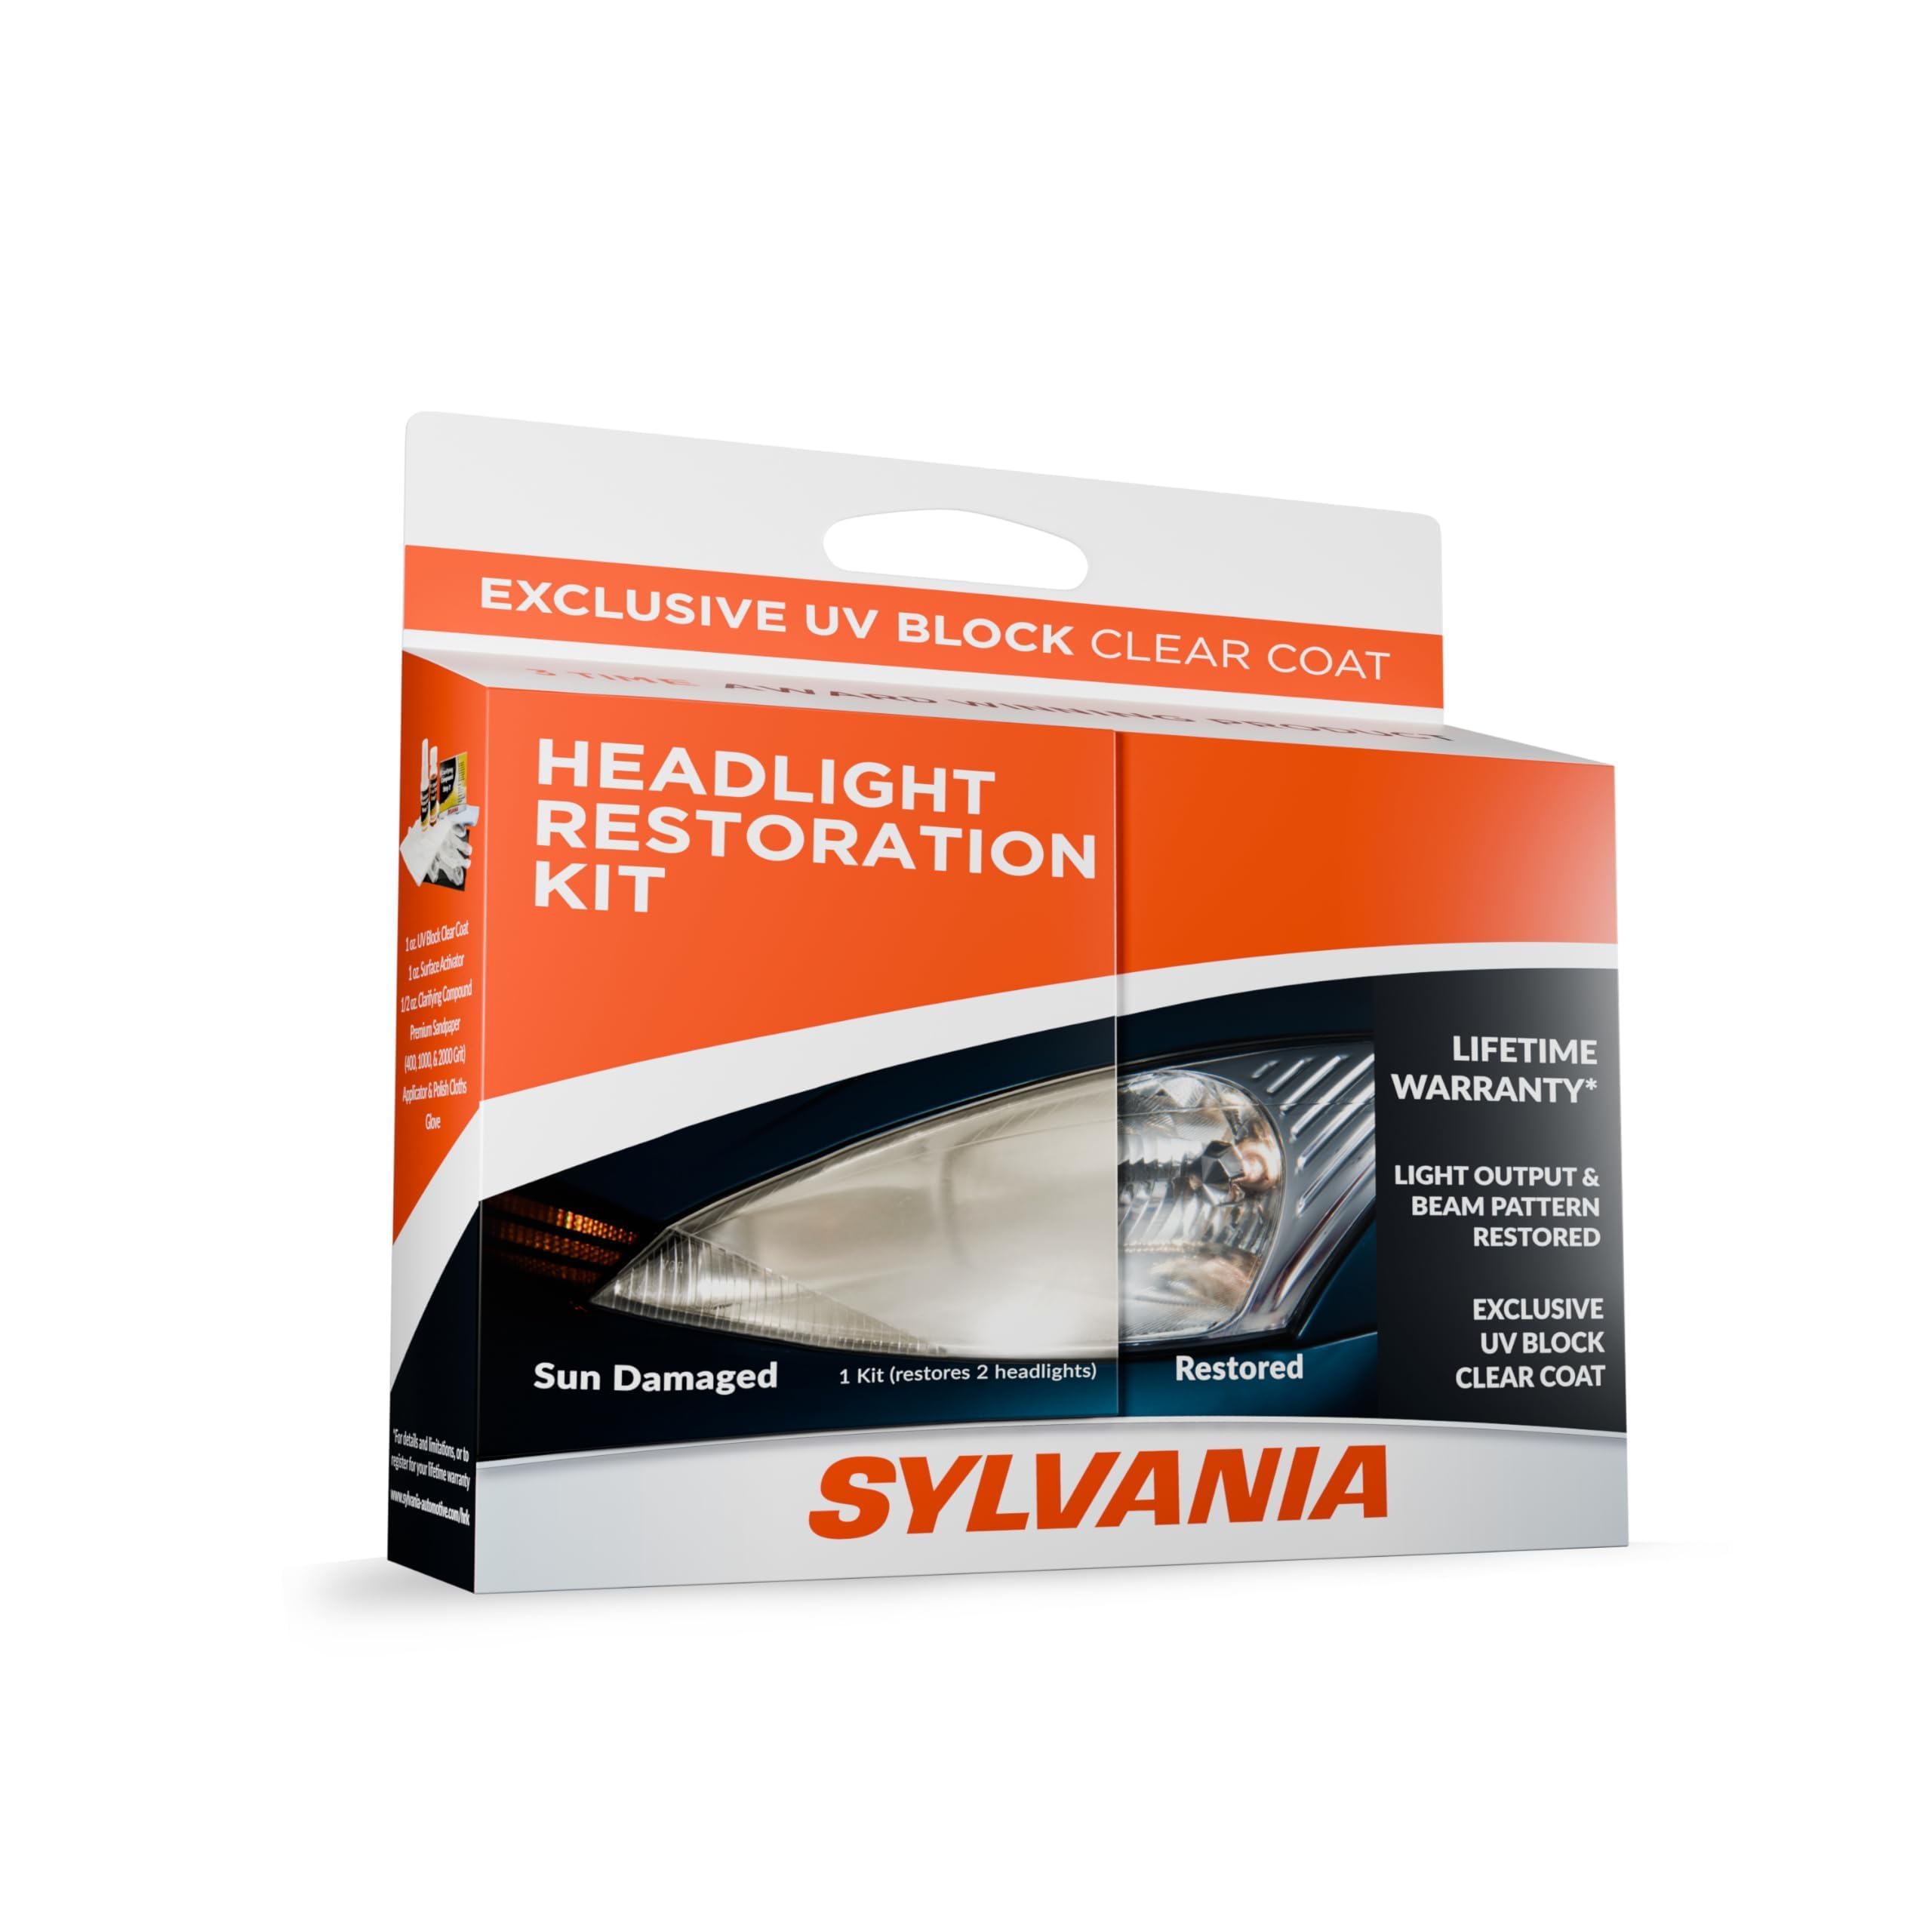
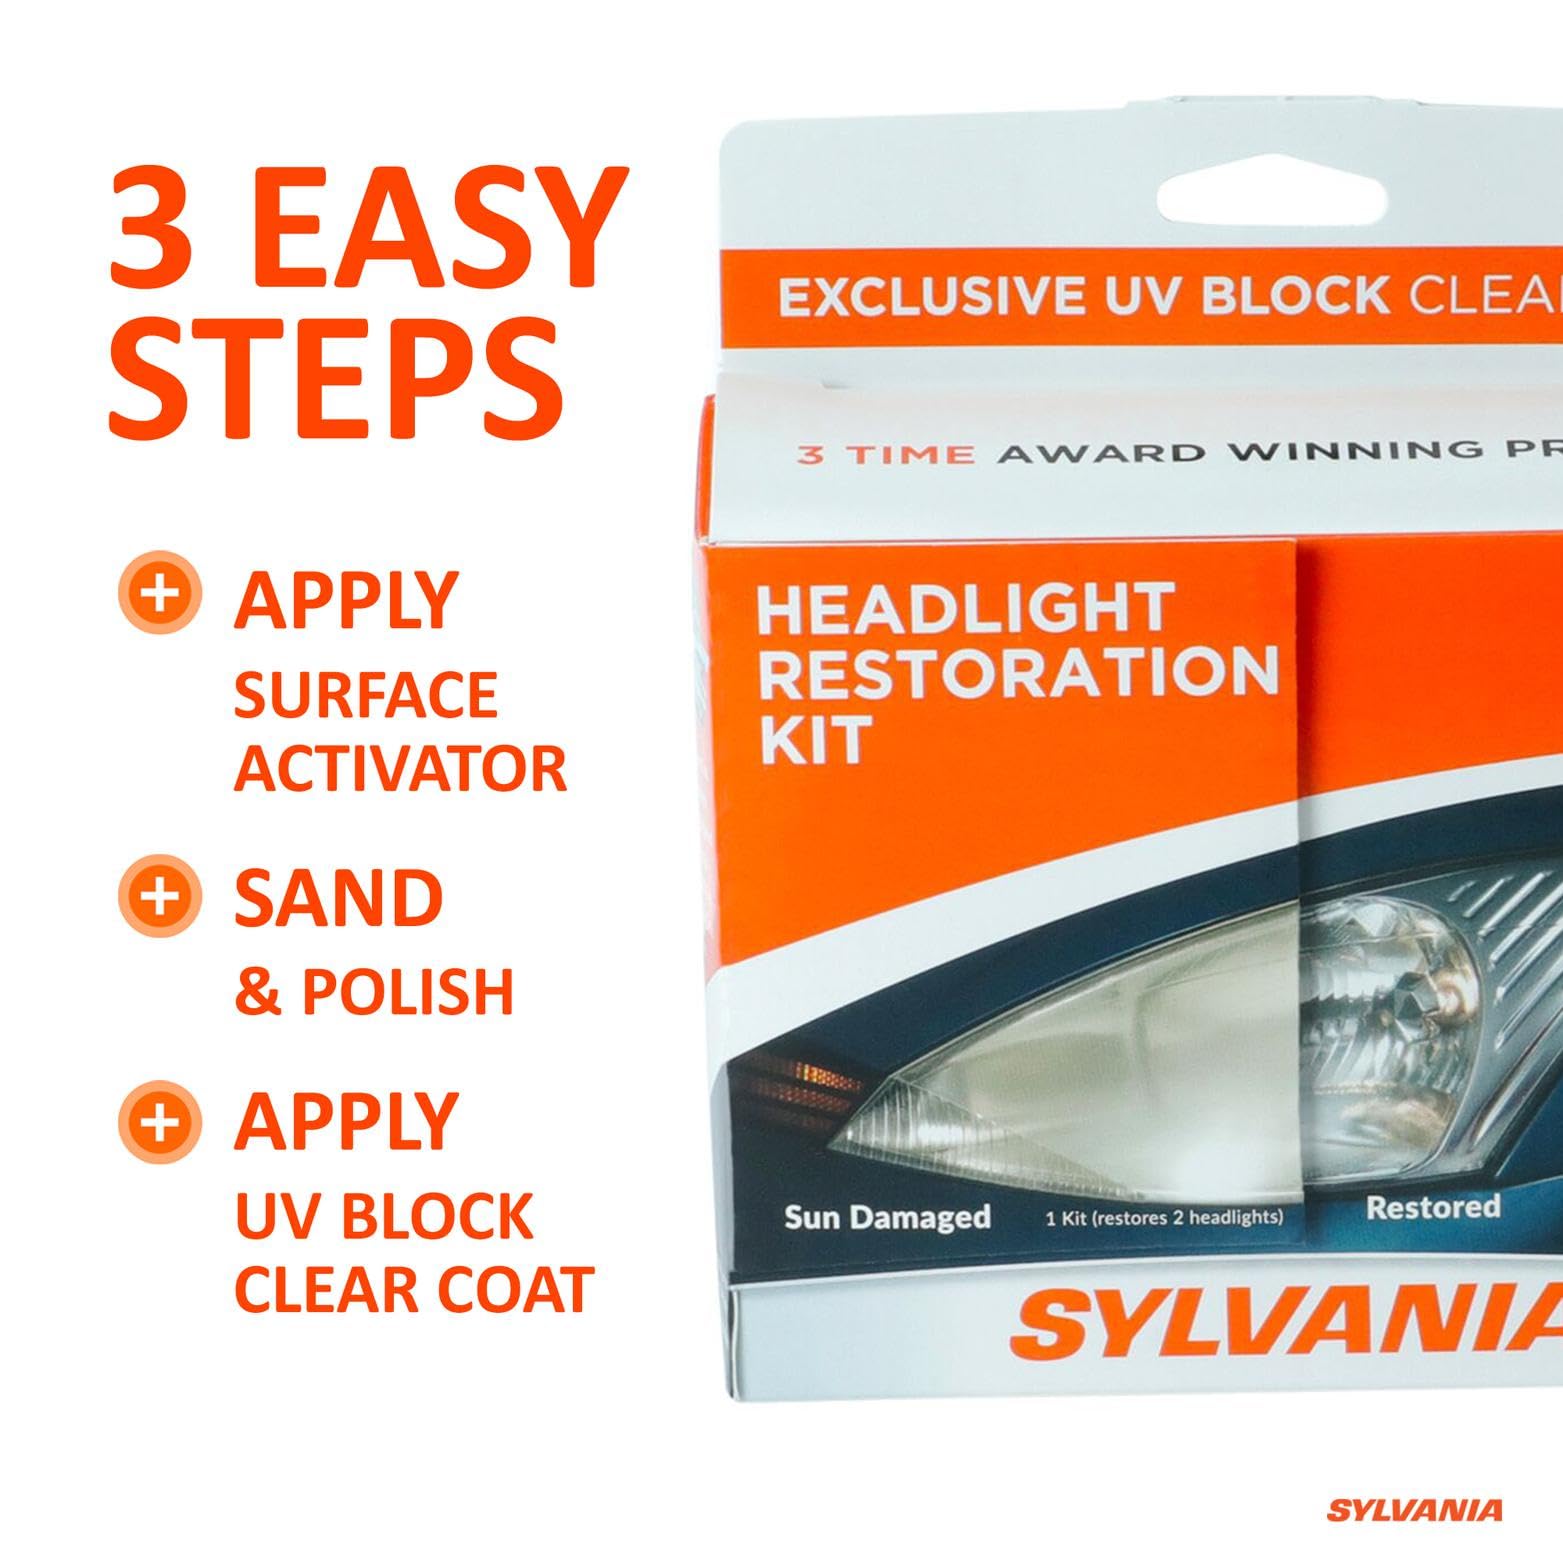
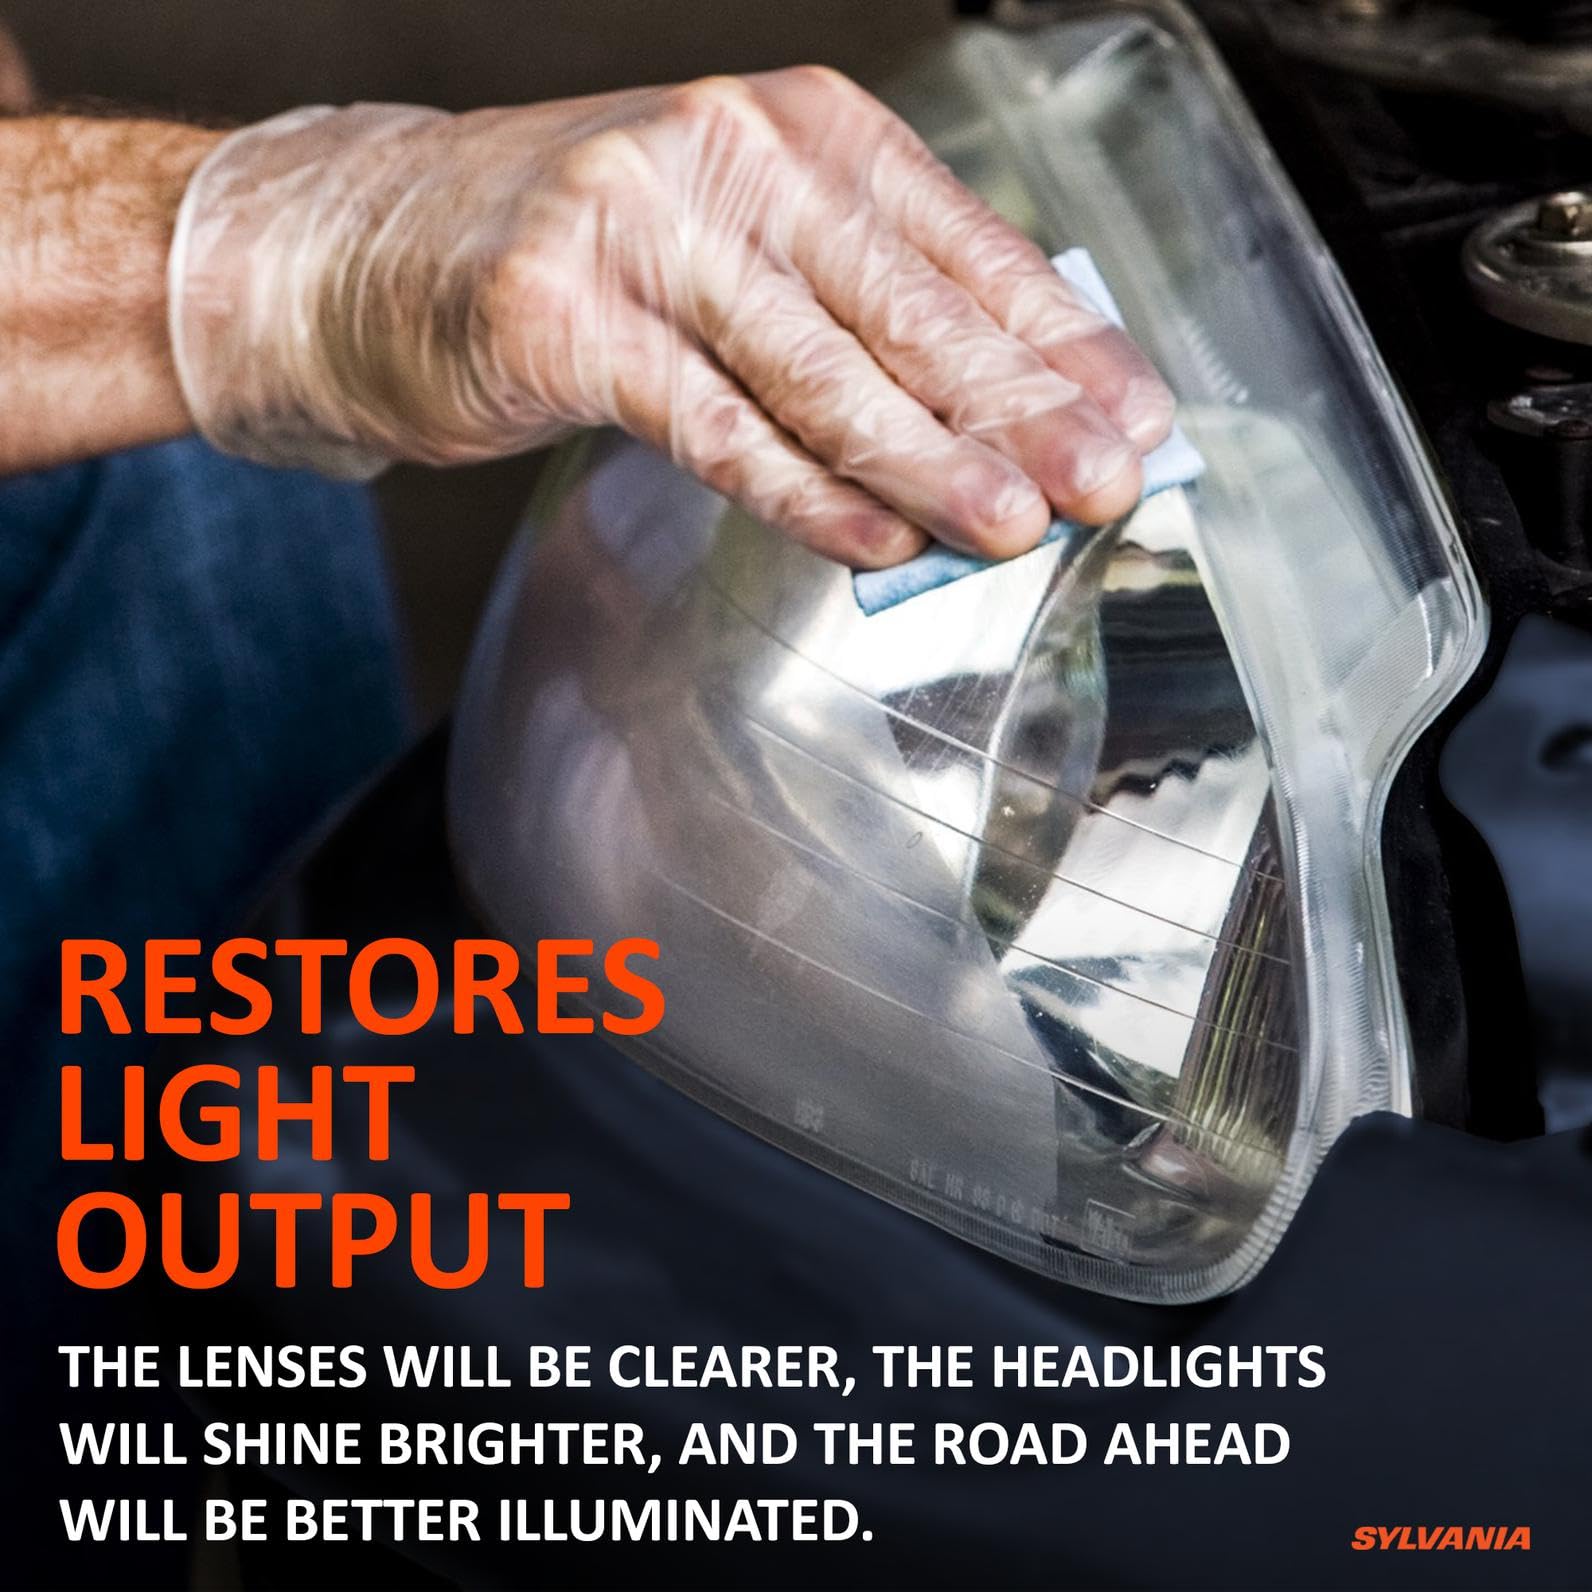
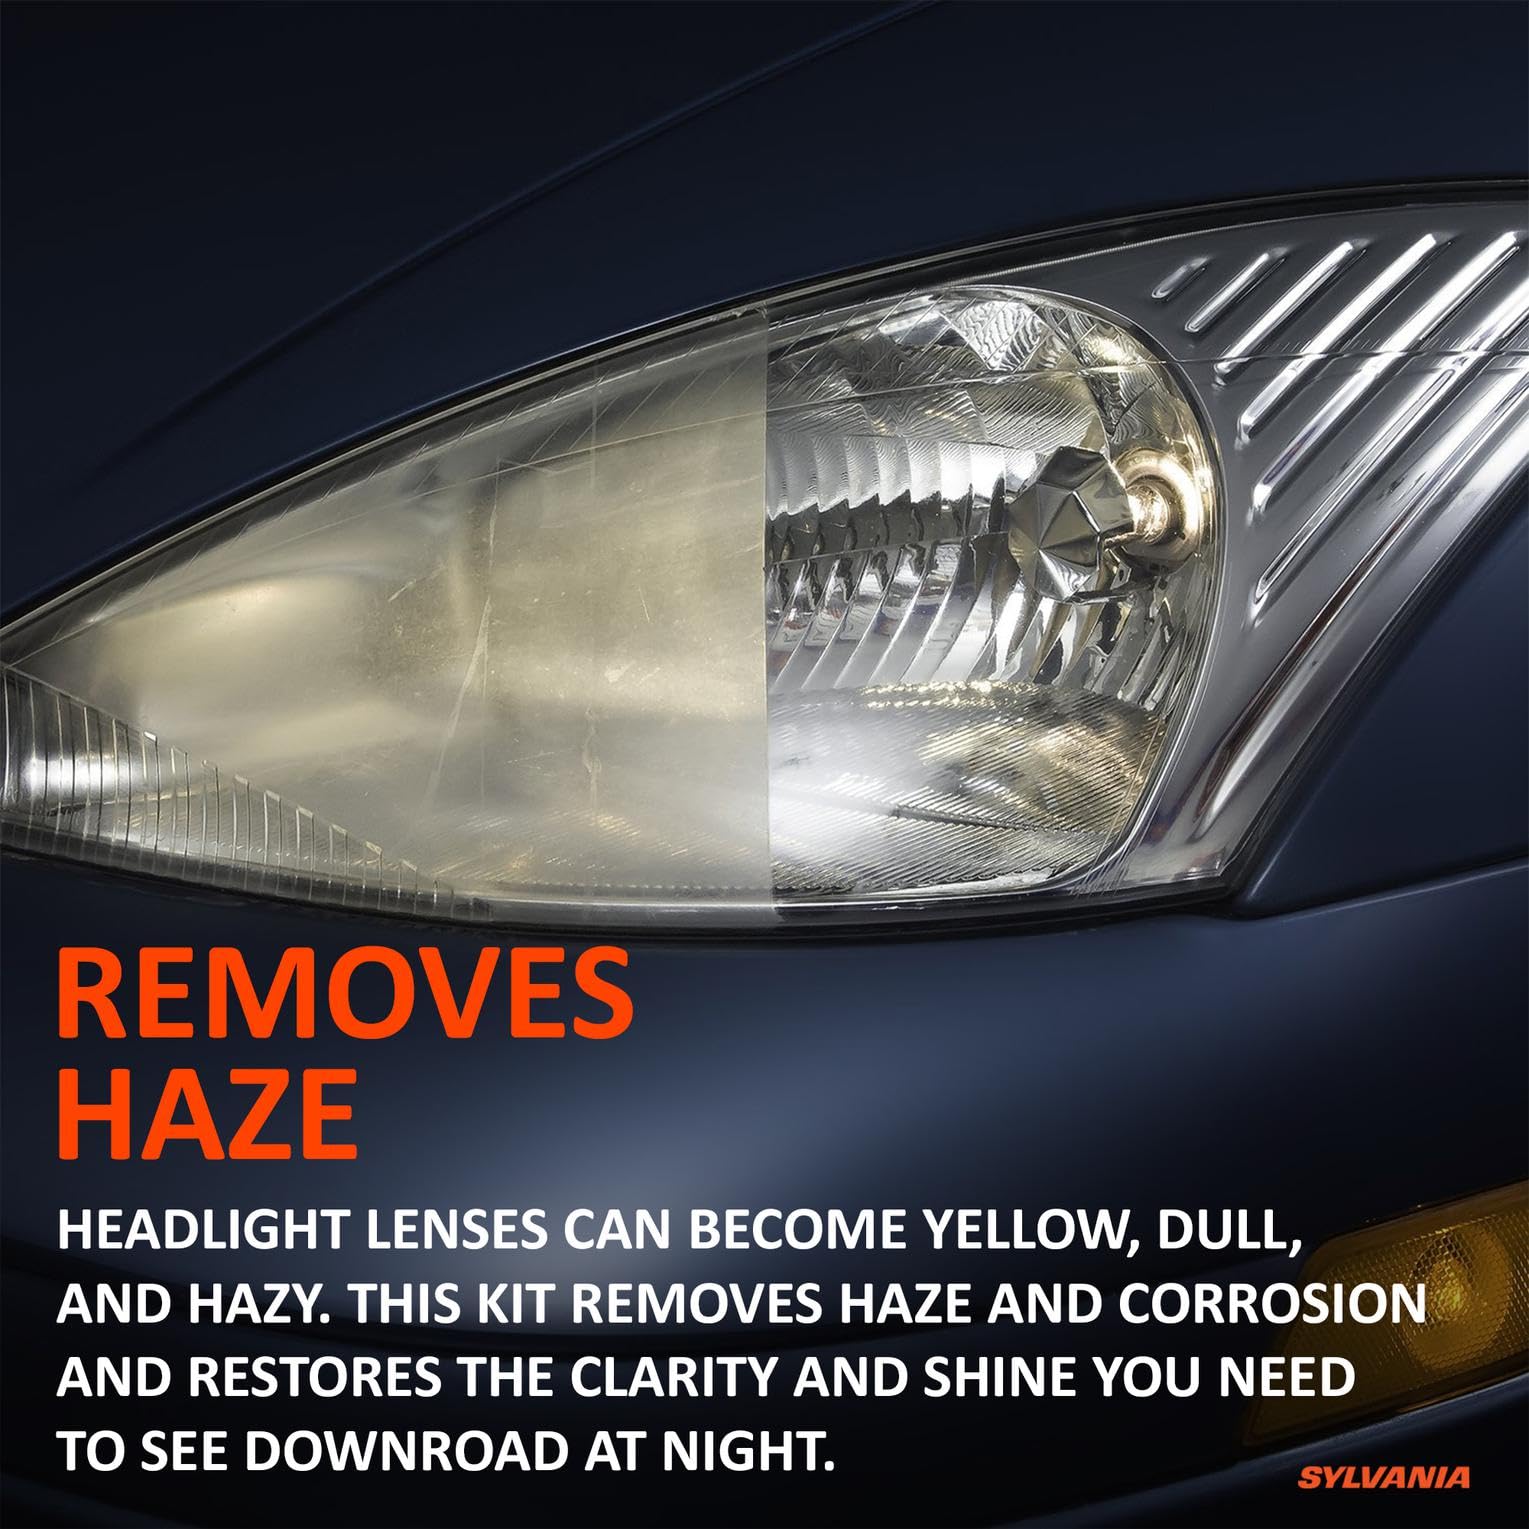
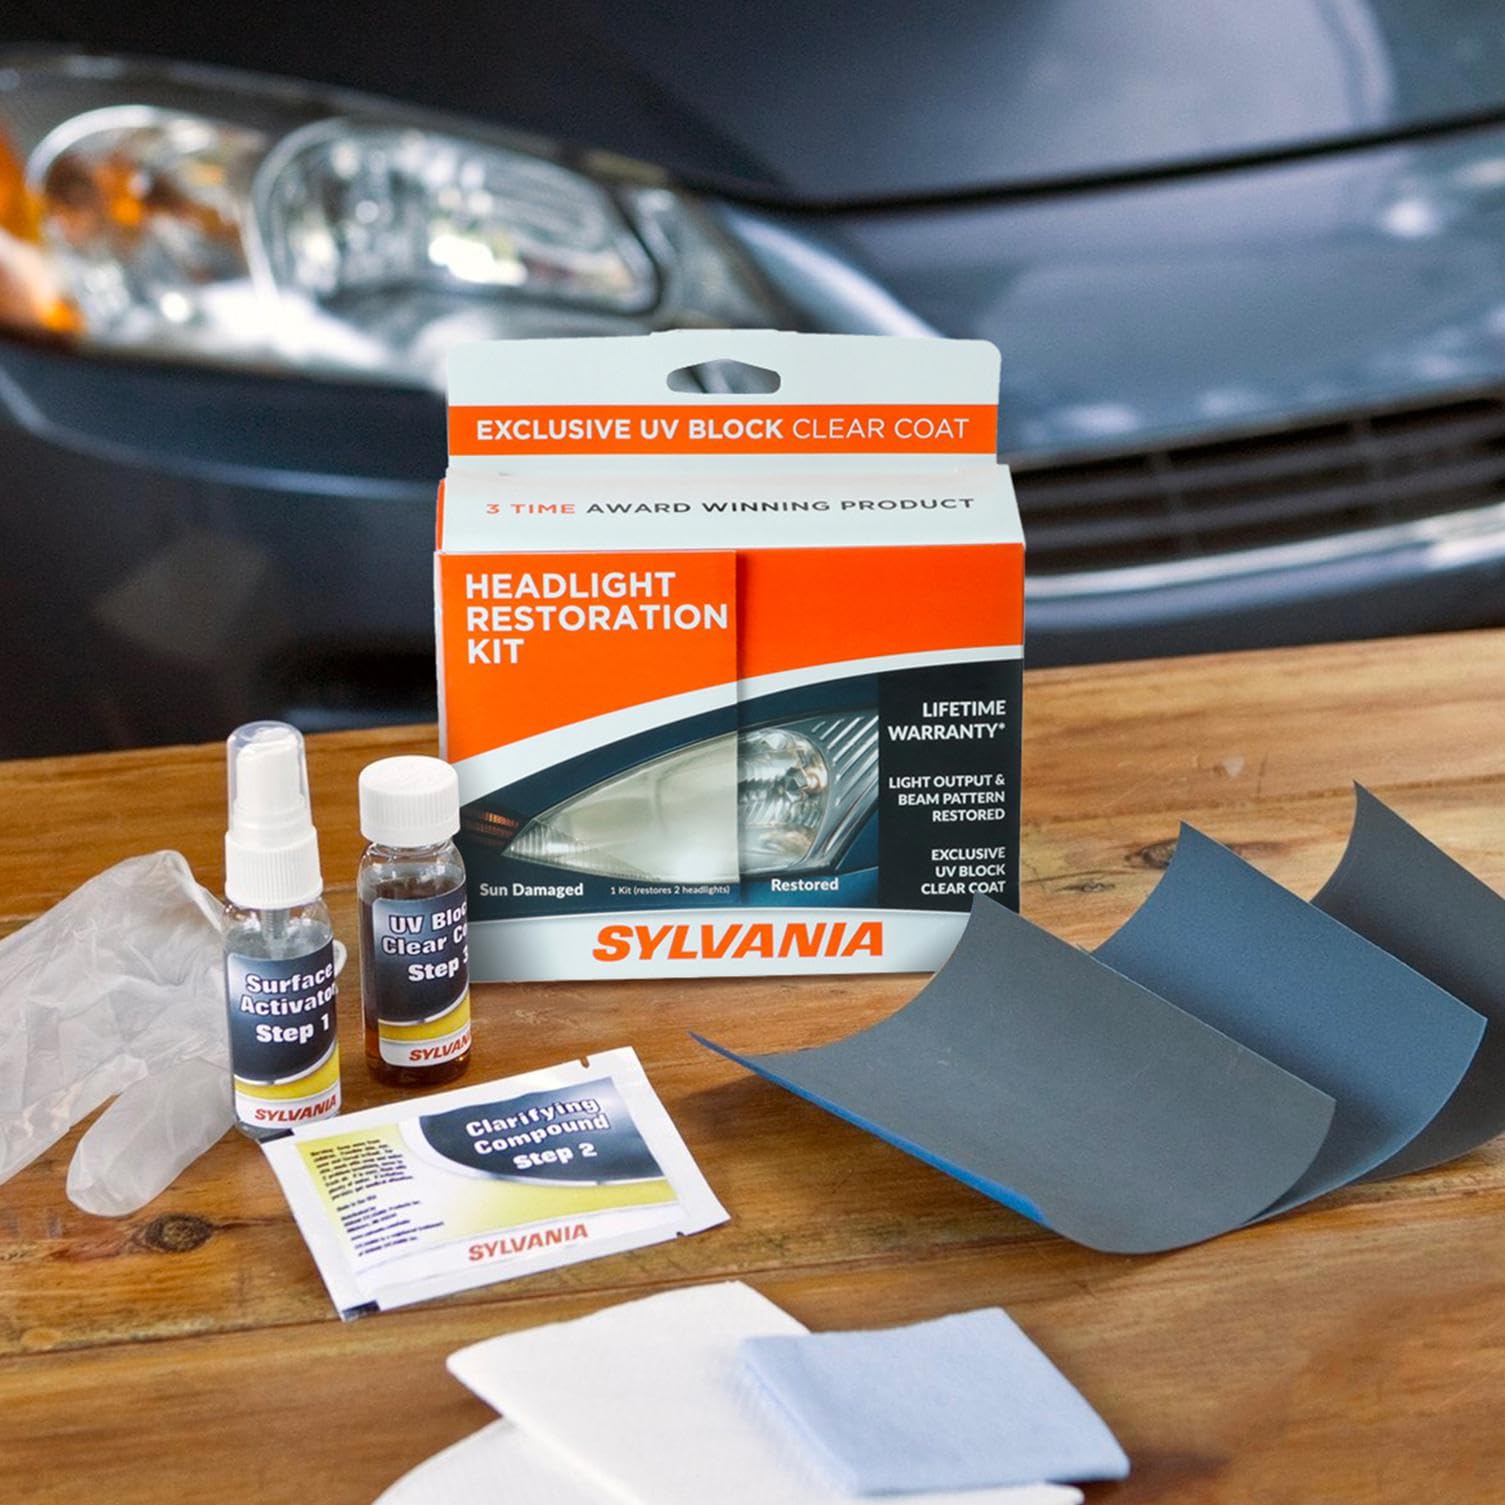
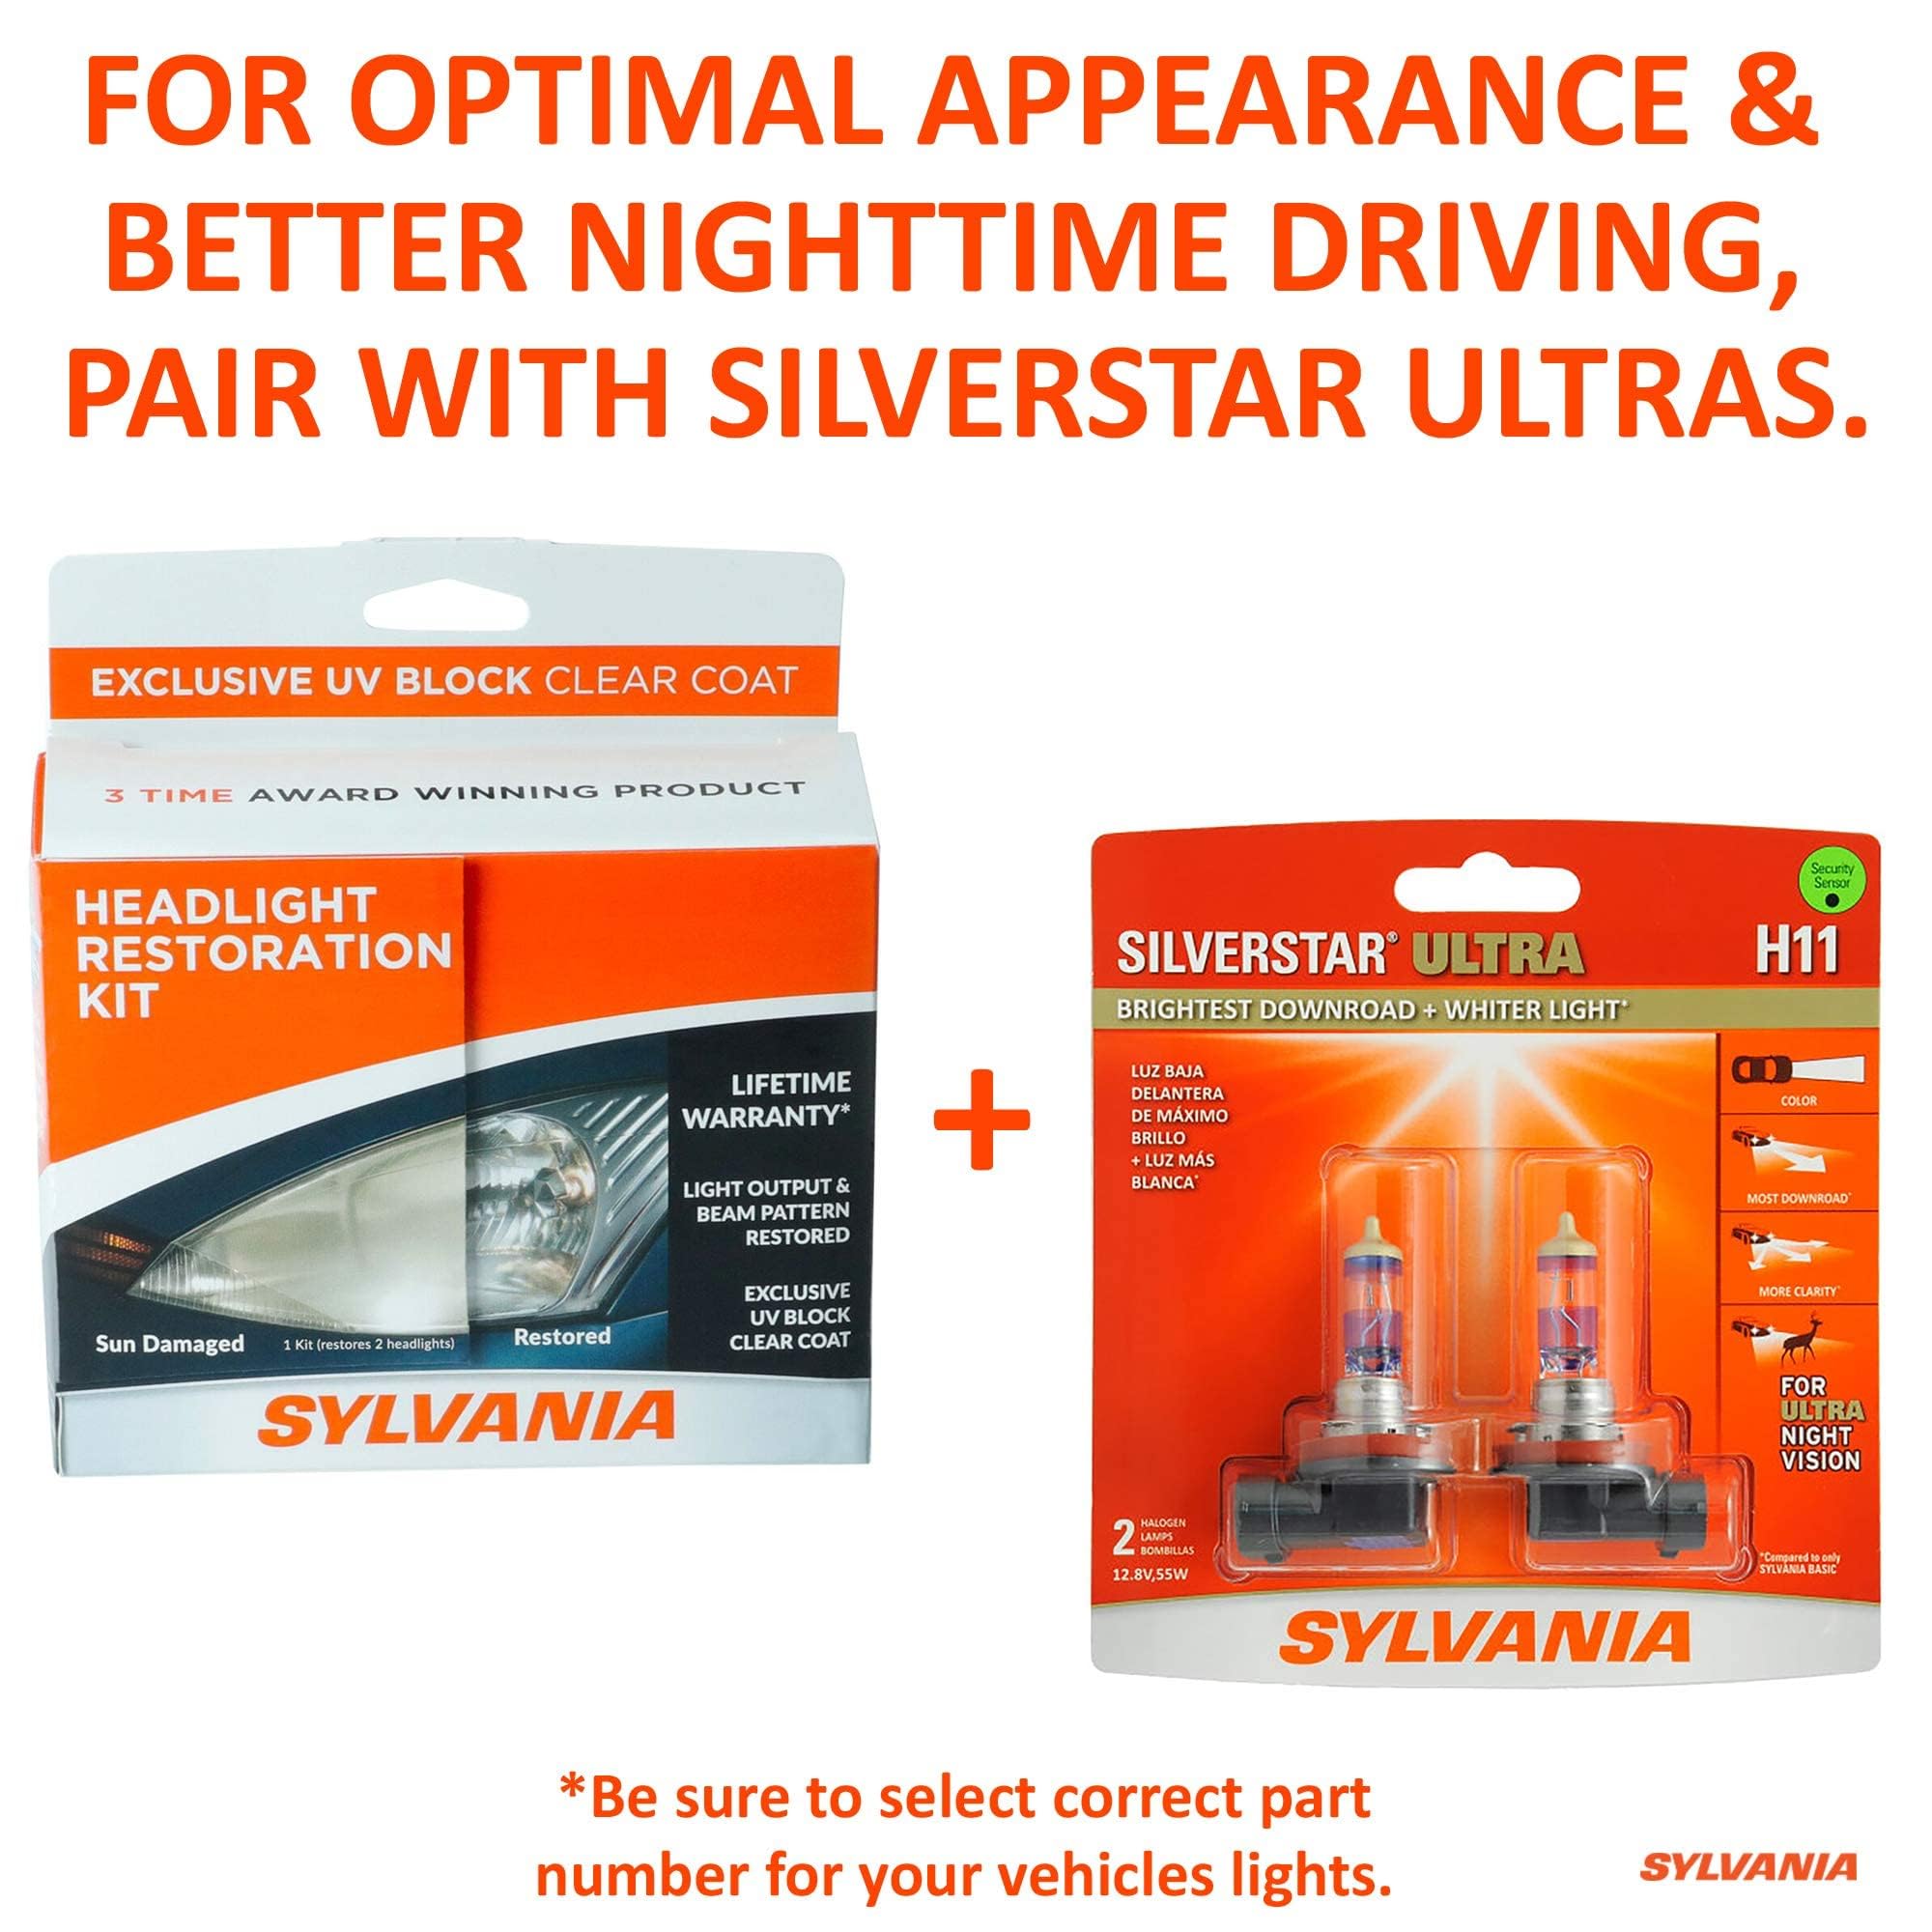
The SYLVANIA Headlight Restoration Kit is a comprehensive, easy-to-use solution designed to restore headlight lenses to like-new clarity. Featuring a surface activator, premium sandpaper, clarifying compound, and an exclusive UV-blocking clear coat, this kit improves night driving visibility and protects headlights from future yellowing—all without the need for tools. Trusted by professionals and DIYers alike, it leverages over a century of Sylvania’s lighting expertise to deliver long-lasting, safer illumination.


| Manufacturer | SYLVANIA |
| Brand | SYLVANIA |
| Model | 38772 |
| Item Weight | 4.8 ounces |
| Product Dimensions | 8 x 2 x 6 inches |
| Item model number | HRK.BX |
| Is Discontinued By Manufacturer | No |
| Exterior | Machined |
| Manufacturer Part Number | HRK.BX |
| OEM Part Number | 38771 |
| Voltage | 12 Volts |
C**.
Headlights you thought you'd have to replace? Nope! This makes them like new. Really!
I own a seventeen-year-old Toyota Yaris hatchback (152,000+ miles), which has been parked outside in the sun and elements all of its life. I'd already had the headlights resurfaced (by the Toyota team) many years ago—but my headlights were, by this point in time, at the stage of not passing annual inspection. Replacing both headlight units at the dealership (including labor) would have cost in excess of $700, so I figured—why not try this, and see what happens!The results are really terrific. As "like new" as you're going to get with a seventeen-year-old car which is parked outside. Here would be my observations having just done this project this morning (without access to a hose, mind you!).The instructions are worth reading a couple of times before you take-on the project. It's, actually, a lot easier than the very detailed instructions might imply. Just go step by step, doing each step to both headlights before you move on to the next step, and you'll be fine.1) Bring lots of water, and a spray bottle (as recommended in the instructions). I filled up some clean milk-cartons I'd saved for the project, and just refilled the spray bottle from those as needed. Super easy. I used about three milk-cartons of water (1.5 gallons). You'll need lots of water-spray as you sand with the provided grades of sandpaper. I would recommend starting (with the first grade of sandpaper) with light to medium pressure, then move to more consistent medium pressure. The second and third grades of sandpaper really are very smooth and fine, and you can finish-off the third grade of sandpaper with a really light pressure. Be patient, and go for a truly smooth surface. I did the recommended circular motions both clockwise, and counter-clockwise, to ensure the smoothest possible finish. Worked like a charm.2) Regarding the activator spray (with which you will start and, toward the end, use again): I used about 2/3rds of the spray on the first stage (both headlights), dissolving the initial oxidation and grime. I feared I'd not have enough with just 1/3rd by the end, but I had plenty. I'd bring a soft sponge, too, just to ensure that you get the lenses fully clean between steps. I found having extra soft, clean rags helpful with drying as well.3) Painter's tape definitely protects your paint around the headlight, so take the time to mask-out your light, and protect your paint. The only thing I'd suggest, is to spray-clean your paint-surface after your remove the painter's tape following use of the polishing compound. Some of the polishing compound gets under the tape, so just give that a rinse before you dry the lenses and apply the final UV gloss-coating. Keeps things neat and clean around the lenses.4) As for the gloss-coating: you really can be very generous applying it to the provided blue-cloth. I was a tiny bit stingy on the first headlight, fearing I might not have enough product for the second headlight. Don't worry ... you'll have plenty of UV product left over when you're done. I'd really soak the entire blue-rag well, and apply generously. I can see a *very* tiny difference between the first headlight I did (where I was more stingy applying the UV gloss-coating) and the second (where I was more generous). It's so slight you'd never see it. Just rest assured that you'll have plenty of UV gloss by the end of the project, as it spreads evenly, smoothly, and well—so be generous in applying it.The best part? If I get any haze again, this was probably the easiest headlight-repair imaginable. I'll just do it again! And I saved about $700 to boot. You just need to set aside the time to do each step well and carefully. It took me perhaps an hour and a half from start to finish (and I was moving slowly and carefully), with some time thereafter cleaning up and just standing around to ensure no falling autumn leaves fell on the UV gloss while it was still wet. Just went to check on the headlights, and they're completely dry to the touch, and very smooth and glossy.This is a terrific product! Easy to use, great instructions, and a really fine result. I look forward to seeing the longevity of the product.
F**R
Great results, crystal clear looks just like a new headlight!
I usually foul up these projects, but this worked surprisingly well. Short version - the headlight really does look "like new" after I finished!I only had one headlight to do since the other one had been replaced due to being broken. Some notes on the process:Read ALL of the instructions FIRST! Basically you will need to prep BOTH headlights before doing the very last step, because there is only one included applicator for the last step. Other than that, the instructions are straightforward.I masked off the headlight with painters tape, before doing anything else. This is important otherwise the sandpaper steps could damage the paint right next to the headlight, if you even lightly brush the paint with the sandpaper. Also, while the kit is supposed to be safe in case it accidentally gets on your paint a little bit, why risk any affect on your paint at all?The first step is a big part of the magic here. I thoroughly cleaned the headlight before starting, but the first step loosened up so much grime and surface contamination that my wiping cloth was FILTHY! It really softened up the contamination and surface deposits, which probably saves a ton of time sanding and polishing in the next step. Because I had plenty of fluid and was only doing one headlight, I did this step twice. The second time I didn't get nearly as much contamination on the rag, so doing it once per the instructions is probably fine.The second step took a while because I'm a perfectionist and took extra time making sure I evenly sanded the whole headlight all the way to the edges. I think this paid off, but it added extra time for 2 reasons. First, it took time carefully wet-sanding the edges of the headlights using small circular motions in order to avoid creating lines and gouges in the headlight. Second, since this is a wet-sanding process, the painters tape may come loose due to the water. Trust me - it is WORTH IT to stop, dry everything off, and re-apply the tape so you don't ruin the paint on your car next to the headlight! So I stopped a few times to re-apply the tape mask.The only minor critique of the kit itself was that the step 2 polishing paste comes in a single packet that you cut to open. So you need to do both headlights at once otherwise you'll end up wasting half of the polishing paste and not have any to do the other headlight. Also, the headlights on my car are pretty large and I think I would have had to really skimp on the paste in order to polish both headlights with the paste. Since I was doing only one headlight I could be liberal with the use of the paste, but even using "just enough" I think I might have not had enough for the second headlight. Still, my headlights are unusually large and it still might have been barely enough, so the kit will still work for both headlights. I'd be much more comfortable however if Sylvania had simply included 2 slightly smaller step 2 polishing paste packets instead of one larger one that has to be used for 2 headlights at once.After step 2 polish, the whole headlight looked kind of like frosted shower glass, except that even though I took my time to do the sanding and polishing right, I could still see sanding swirls and some uneven remaining oxidation. I figured I had nothing to lose though, so I proceeded to the third step in spite of not being 100% happy with how I had done the preparation. Remember, I usually foul these things up somehow, so...I was AMAZED at how well it looks after the third step! This is the second magic part of this kit. The step 3 solution went on very easily with the included applicator. A tip - follow the instructions EXACTLY, including resisting the temptation to go back and "touch up" sections that don't look quite right after the application. I had to dab/wipe on a bit near a corner where I didn't smoothly apply the final coating on the first swipe, and if I look VERY closely I can see that the coating is thicker and not very even in the places where I went back a second time. Bottom line, pretty much soak the applicator with the fluid, make one pass over every part of the headlight, and LEAVE IT ALONE without even thinking about making second coats!After the application, it was immediately obvious that it came out looking great. When standing just 2-3 feet away, the headlight looks just as clear as the brand new one on the other side, and there are no visible scratches or hazing at all. Even the area where some of the original oxidation damage was uneven after sanding came out looking crystal clear. If I put my face 6 inches from the headlight and shine a light on it just right, I can see the coating in the areas where I had to go back to cover places on some curved edges that I didn't get with the smooth application swipes, but those are the only areas where I can even tell anything has been done at all, and my face has to be right up close to the headlight. From a few feet away, it looks brand new.Time will tell whether or not the finish stands up to the sun and heat, but the initial results are amazing. Follow the instructions, take the time to protect the paint during steps 1 and 2, do steps 1 and 2 on both headlights before step 3 (and remember that step 2 packet must be split for both headlights) and resist the temptation to apply second coats of step 3. Do that, and you'll have great results too.Highly recommended, and good luck with your headlight restoration!
Trustpilot
2 months ago
3 weeks ago
3 weeks ago
2 weeks ago