🔥 Keep Your Cool Under Pressure!
The VHT Flameproof Coating is a high-performance primer designed to withstand extreme temperatures up to 2000°F. With its matte finish and advanced ceramic silicone base, this product is perfect for automotive exhaust applications, ensuring both durability and aesthetic appeal. Ideal for professionals looking to enhance the longevity of high-heat surfaces.
Item Volume | 11 Fluid Ounces |
Unit Count | 11.0 Ounce |
Size | 11 Ounce (Pack of 1) |
Finish Types | Matte |
Color Code | SP118 |
Color | Flat White Primer |
Additional Features | Flame Resistant |
S**S
Sweet primer for painting your brake calipers any bright color.
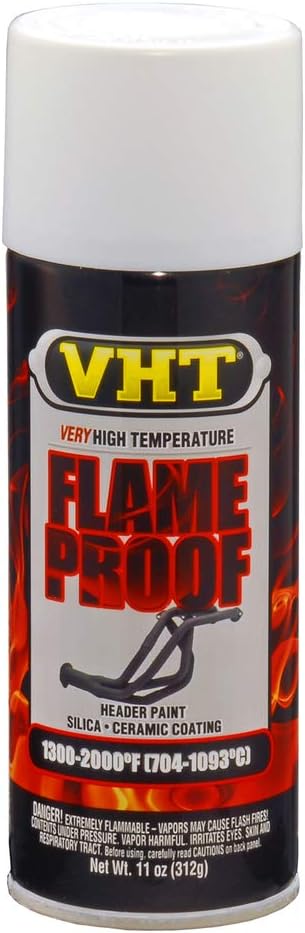
I used this product in conjunction with an appropriate primer and clearcoat, all from VHT, to paint my car's brake calipers bright glossy red. I'd suggest a white primer for any bright color. Grey primer works well too, and gives a deeper finish. Black primer should really only be used for a black base color.step 1) Wearing a respirator (if possible), remove brake dust, grease, and rust using a brake caliper cleaning agent of some kind. Also use a wire brush if you can.step 2) Sand your calipers using 320-grit sandpaper. Really rough them up. Then use some more brake cleaner to remove whatever you sanded off.step 3) Mask off your car's corner body panels, the wheel wells, the struts and hoses, and finally, the brake rotors. Take the time to mask the bleed valves on the calipers too.step 4) Apply primer (THIS PRODUCT!!) to the caliper in a very light, speckled coat, then move to the next caliper until you've applied a coat to all 4. Do this 4 times, gradually getting heavier, but avoid letting the paint run (it's okay if it happens in the primer). Try to do this as quickly as possible.step 5) Apply your base color using the same method as in step 4: light coats multiple times. I suggest a sweeping method, rather than just spraying hard. Do NOT allow the base color to run.step 6) Apply a clear coat using the same method as in steps 4 and 5, but be careful not to overdo it. Clear coats can run more easily than base colors. The paint should be looking thick and glossy by this time.step 7) Wait about an hour. Drink a margarita, or call your mom.step 8) Remove your masking. Gaze upon your new calipers. Then, use some brake cleaner to remove any overspray from the brake rotors or undercarriage areas. Do NOT use brake cleaner to clean body panels, as it will probably remove the paint.step 9) put your wheels back on. wait a few more hours. THEN drive your car pretty hard, making sure to go fast, and brake hard. This will heat your brakes up. The paint needs to cure at 200ºF, which means you need to drive and brake repeatedly. Don't go too nuts.Your paint job is complete.
R**O
can take the heat
Easily applied to a well-prepared surface. My project was those nasty drip pans under my electric stove reamers. once thouroly degreased, and scuffed, now look better than new. Once this stuff cures, it can withstand extremely hot conditions and still be cleaned up again and again, so the end finish is also very tough. Awesome stuff and likely to buy again if coating anything in a super high heat situation
D**O
nice coating
it arrived fast and i used it on a muffler of a motorcycle it looks awesome. it dryed super fast. i taped everything off and did the rattlcan spray paint thing to my bike muffler and it went on smooth and without flaws. whew.
A**.
-Great for exhaust parts- Follow the process- and it will be GREAT!
Color is FLAT black- if you rub it with some microfiber it will barely shine. wanted the chrome pieces black on my bike. These were polished chrome . I used the strongest stuff I could think of to degrease. First step , paint thinnerStep 2 - sand with 400 gritStep 3 - rub with 91% isopropylStep 4 - good rub down wit Brake CleanerStep 5 - wear gloves from now on- the grease on your greasy paws will ruin steps 1-4Step 6 - paint per directionsStep 7 - and this one is KEY- bake per directions. I used the grill with some foil over the burners.
N**A
Vanishing cream ... made the muffler disappear.
A flat black coating. I had a shiny new muffler that couln't be tucked up to hide it. I sprayed this on the parts of the muffler that were visible when looking at the car on a walk around. Amazingly, the muffler seems to have just disappeared. The heat from the muffler doesn't seem to have affected the coating at all. If it looks this good in 12 months, then five stars.
A**S
Came out great
Used it on some headers, the paint didn't flake or change colors, came out great. I didn't use the clear coat as some people reported it turning yellow.The procedures I followed: (not exactly what the bottle said)I applied the VHT primer as it directed, except I used 4-5 light coats (instead of 2 lights and a thick). I waited the recommended times between coats and the time recommended before spray painting.I also applied the paint in 5 light coats instead of 2 lights and 1 thick.The bottle isn't clear as to what window you have before curing it, but from my research its fine if you prime + paint, and let sit for a few days before you begin curing (needed if curing on vehicle so that paint isn't too soft). What I did was prime and paint all on the same day, let cure for that remainder of the day and half of the next day in direct sun (so it got about 12 hours of direct sun in the high 80s ambient temp).I didn't have a good way to cure the headers off of the car so I did it on the car. I would not recommend using a heat gun to cure the parts as it will not pass enough heat through the headers to cure things evenly...perhaps on smaller items it will be great.Installation and curing on vehicle:I wrapped the headers in plastic wrap to prevent scratching, oils, greases, filths from collecting on them. I then installed them, removed the wrapping and began curing by:-Turning engine on for 30 seconds and let sit for 5 minutes (repeated this about 4 times)-Turning engine on for 1 minute, let sit for 5-2 minutes heat, 10 minute sit-I then worked my way up in the time I let the engine run, and the time I let it sit up to the 20 minutes idle and 20 minutes cooling.-I stopped curing once the paint stopped giving off fumesIf you are painting motorcycle exhaust tubes, it might be a good idea to follow the above curing procedures as from what I read, the paint is more prone to lifting/burning off/changing colors on motorcycles if you followed the procedures in the bottle, probably because the exhaust tube temp is brought up more quickly than on a car?UPDATE after 1 year of using: Paint is still holding on my cars headers, and I've just painted some exhaust tips for my motorcycle, followed the oven curing process instructions on the bottle, but did it on the grill. Paint didn't peel or anything.
M**Z
Great paint!
2 coats and in less than 1 hr i was done with all parts. Highly recommend!
K**E
Tel que vendu
La qualité du travail que nous avons fait avec ce produit est remarquable.
C**Y
A+
Primer A+
C**Y
A+
Paint A+
R**D
Waisted a lot of time prepping stove
Came out orange held cap next to the dry paint and not even close to red cap color
K**D
Perfect high temperature paint
I wanted a high temperature paint to finish my ugly looking room heater. Amazon solved my problem and I found this perfect paint. I am very much satisfied with it.
Trustpilot
1 day ago
2 weeks ago