
♻️ Quiet power that fits your lifestyle — because your kitchen deserves the best.
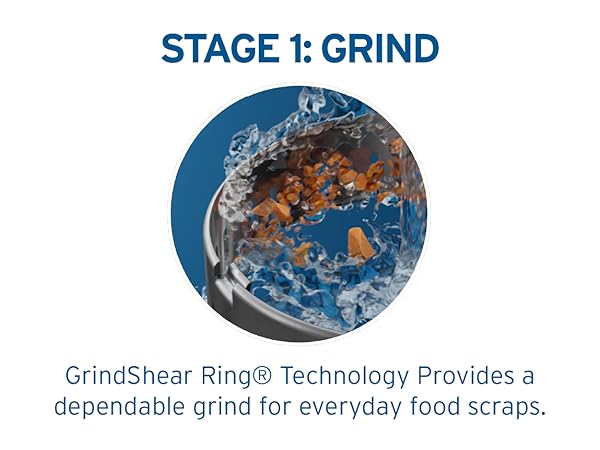
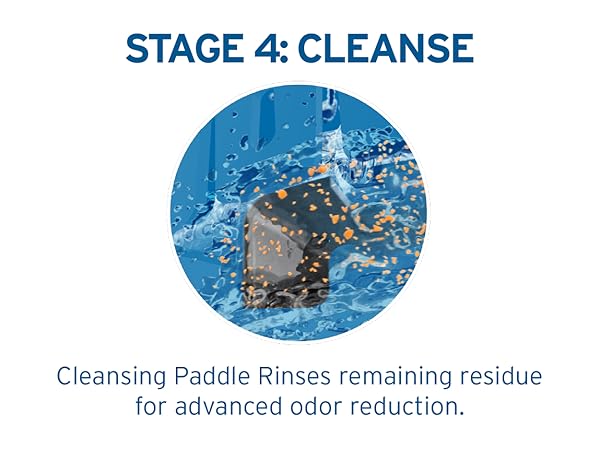
The InSinkErator COMPACT Evolution 3/4 HP Continuous Garbage Disposal combines a powerful 3/4 horsepower Dura-Drive induction motor with innovative SoundSeal technology to reduce noise by up to 40%. Its compact footprint is ideal for small kitchens, while the two-stage MultiGrind system efficiently handles tough food waste like bones and fibrous vegetables. Featuring durable alloy stainless steel components and an easy Quick Lock installation system, this eco-friendly disposer minimizes landfill waste and comes backed by an 8-year in-home warranty for lasting peace of mind.


| ASIN | B000G837TW |
| Best Sellers Rank | #807,588 in Tools & Home Improvement ( See Top 100 in Tools & Home Improvement ) #140 in Garbage Disposals |
| Brand | InSinkErator |
| Brand Name | InSinkErator |
| Capacity | 2.2 Pounds |
| Color | Gray |
| Customer Reviews | 4.8 out of 5 stars 9,700 Reviews |
| Included Components | disposer, installation manual |
| Installation Type | Undercounter |
| Item Height | 12.63 inches |
| Item Type Name | Quiet Series, 3/4 HP Continuous Feed |
| Item Weight | 1 Pounds |
| Manufacturer | WEYEEN |
| Material | Alloy Stainless Steel Components |
| Material Type | Alloy Stainless Steel Components |
| Power Source | Corded Electric |
| UPC | 050375006794 |
| Unit Count | 1.0 Count |
| Warranty Description | 8-Year We Come to You In-Home Service Warranty |
K**D
A solid choice in an mid-priced disposal
Update: It's 2024 and this same unit is still going strong. It even carried over through a kitchen remodel last year since it was in perfect working order. Other than getting a new baffle for very cheap all else is original. Great disposal. ***Important Note!*** Don't do what I did and forget to knock out the dishwasher hookup plug before you get the whole thing mounted up under your sink. That is, of course, as long as you're using the dishwasher hookup. I was lucky enough to remember before I ran my dishwasher, but it was a pain to knock it out under the sink. The previously installed disposal in my kitchen was an Insinkerator Badger 5 of unknown age. It failed in typical fashion due to internal seals breaking down and eventually causing water to leak through the bottom of the case. The best thing about this new unit was that it went in place with no adjustments to the rest of the plumbing. It was an exact fit for the Badger. I replaced the sink flange with all the new mounting hardware, which was perfectly simple. The new unit is relatively quiet and seems effective at disposing what little waste I use it for. I will say that it seems substantially more quiet when actually grinding up food waste than the Badger was, and I'm sure it is due to the combination of sound-dampening and grinding efficiency design improvements over such models. In my opinion, nobody *needs* to spend hundreds more for a disposal quieter than this one for anything more than bragging rights. It's a machine designed to pulverize your food waste into a slurry to go down your drains, and, from what I can tell, the sound of water running in my sink is almost louder than the sound of this unit grinding up my week-old leftovers. I will speak to the rate of water draining through the rubber baffle, as I've seen some people complain about it. In my own experience, I've seen no issues with slow drainage. My sink faucet has an aerator as most down nowadays, which reduces water flow. However, I tested it without the aerator using full water flow from the tap, and still had no problems with water draining through the baffle. If I dump a huge pot of water into the sink, does it drain more slowly than a regular sink drain? Absolutely. That's to be expected. The baffle does have a smaller opening than my previous unit for sure, and I do often have to push food scraps through, but this doesn't bother me. The smaller opening does make the unit quieter by creating a barrier of water as stated in the literature, and it's also less prone to the garbage slurry splashing back out while operating, which did sometimes happen with my Badger. The only tricky part of install was getting the quick mount collar rotated far enough to fully latch. I ended up using a large screw driver slipped between one of the mounting screws and the throat of the flange as a lever to hold the sink flange in place while I rotated the quick-mount collar in the opposite direction with the jam-release tool. This is critical since I've read several reviews around the internet where people had their disposer fall off several weeks after installation. I'd bet it was because they didn't fully engage the collar until it reached the stops. This can be a simple thing to overlook. I nearly did it myself. My previous disposal was hard-wired to a switch inside the cabinet under the sink. Not exactly an ideal arrangement. I rewired the switch as a GFCI outlet and bought the power cord kit ( InSinkErator CRD-00 Power Cord Kit ) for the new disposal along with the InSinkErator STS-00 Dual Outlet SinkTop Switch . This was a great choice and now makes using the disposer much simpler than opening the cabinet, hunting for the switch, dumping food waste, hunting for the switch in the cabinet again, and shutting the door. I know, first-world problems. If I discount the time it took for the electrical work I had to do (about two hours), the disposal install itself took no more than an hour. I'm pretty handy, but if all someone is doing is a direct replacement for another Insinkerator, it should be a fairly simple job. My only minor complaint is that this unit didn't include a power cord, which is a separate purchase if one is not hard-wiring it. In my case I was moving from hard-wired to plug-in installation. Most installations of disposals seem to be going to plug-in judging by the modern homes I've seen over the past few years. I do realize the benefit of waste reduction however in not including the cord for those who would be hard-wiring. It would simply be another part headed for the landfill or squirreled away in a homeowner's miscellaneous junk drawer. Simply be sure you know which type of install you've got and buy the extra parts if needed. I spent a fair bit of time trying to decide between this Insinkerator and a couple units from Waste King which were less expensive. In the end I chose the Insinkerator for the benefit of a direct replacement for the Badger 5, and also seeing a good number of people complaining about failures of the Waste King EZ Mount system used to attach the disposal to the sink flange. There was a lot of talk of plastic parts failing, and I decided that the tried and true Insinkerator mounting system (all metal) seemed like a better choice in the long run. Time will tell if this disposal proves to be reliable and lasts an expected number of years.
R**S
another great ISE product
Amazingly quiet!!! This Evolution Compact 3/4 hp ISE unit replaced an ISE model 333 1/2 hp unit purchased at Price Club 17 years ago. The latter unit stood up to raising a family of six and finally quit being reliable (bearings in motor going out). The new "compact" one is rated higher in power, is about the same size, and (possibly because it is attached to a cast-iron sink embedded in a tiled sink top.....) it is super quiet by comparison to its predecessor. If the radio is playing in the background and the water is turned off at the sink, you may not hear that the unit is still running. The new design of the rubber baffle in the intake throat eliminates outward splash when grinding food waste. It also absorbs a lot of the sound of food being ground up in the grinding chamber. It also is not part of the mounting gasket that seals the disposal to the drain flange. Therefore, unlike the old design, if the rubber baffle ever tears you don't have to take apart the disposal-flange junction to replace it. You simply pull the torn baffle out from the top and put in the new one. (That easy removal feature also makes it nice for viewing the inside of the grinding chamber if you want to retrieve an object....just lift out the baffle and go for it) The only two downsides for this unit: 1. The new rubber throat-baffle slows the passage of water from the sink into the unit and down the drain....so if you are in a hurry it takes a few seconds longer to empty the sink. (Not really a negative for most people) 2. The new stopper that plugs the drain flange, allowing the sink to be filled with water, is a solid plug. The one it replaced (from the 17 year old unit) had two positions: one that allowed filling the sink, and one that allowed water to drain but partially blocked the disposal's throat from an inadvertent dropping of objects into the dosposal. In reality the new baffle helps to accomplish that function....so a solid stopper is not all that bad. Fortunately for me the new ISE still uses the original stainless steel drain flange design, so I didn't have to remove and replace that. The removal and installation was done in 15 minutes.....and I can still use the old adjustable stopper, or I can use the new solid one. Unless this company has started to use cheaper materials or shoddy assembly processes I expect this new unit to outlast me.
K**Y
Silent and very easy to install
Installation: I've never really done any plumbing, and before installing this unit, the thought of doing any plumbing sounded insane. Useful information: I was replacing a 1/3 HP GE disposal that is probably at least 13 years old. It was installed either by the previous homeowner or by the home builder (25 years ago). It made a lot of noise when it ran and sounded like it would be dying soon. It did still break down food, but slowly, so the sink would sometimes get backed up when we used it. I was planning to pay a plumber to come and install this unit, but hearing that it would take a plumber 1-2 hours to install meant another $100-200 on top of the cost of the disposal, which may be worth every dollar it cost, but is still expensive ($174 when I bought it from Amazon). So, I decided to try my hand at installing it. I figured I'd use an afternoon, and worst case, I wouldn't be able to figure it out, and I'd call someone to come install it tomorrow. Before purchasing this unit, I noticed two things in many of the comments: 1) The unit does not come with a power cable. That needs to be purchased separately. 2) Installation also required plumber's putty, which ranges in price from about .99 to $15, depending on how much you buy. I spent the $15 by buying a large container (14oz). You could probably get away with 1-2 oz -- maybe even less. It is only used to create a good seal between the flange (the park of the disposal that sticks through the sink) and the sink. If you already have an InSinkErator installed, you probably do not need to replace that part, so you don't need the putty. If you have a different brand installed, you should buy some. There are a few things to determine before installing this unit: 1) Do you have an outlet under your sink? I did not, but I had a wire coming directly from the wall that went into the old disposal. I was able to easily unhook the wires from the old disposal and connect them to this one. I did buy the InSinkErator power cable kit from Amazon, just in case, and I'm glad I did. Even though I did not use the power cable itself, I did use the wire nuts and the Romex connector. No matter what, you will need 2 wire nuts and a Romex connector. Buying them outside of the kit would probably cost less than a dollar total, so if you're interested in saving money, I recommend that. If you're nervous about the installation, like I was, just spend the $8 and buy the kit and you'll have everything you need (aside from the plumber's putty mentioned above). 2) Are you hooking your dishwasher up to the disposal. If so, be sure to follow that step in the instructions to remove the dishwasher plug or it won't work. 3) Are you replacing an InSinkErator? If so, you probably will not need to remove the collar from the sink that holds the disposal up. This will shorted installation time drastically. 4) Is anyone available to help you? It's a good idea to have a second set of hands when you are uninstalling your old disposal and when you are installing the new disposal's collar to your sink. I needed my wife to push down on the sink to keep me from pushing the new collar up through the drain hole. It would have been much much harder to do this job alone, even though 95% of it is easy to do alone. So anyway, back to installation... The first step was to remove the old unit. The instructions that came with the InSinkErator described how to remove an InSinkErator, but I had an old GE unit. I tried following the instructions, but eventually had to figure it out myself. It was not difficult though -- just look for screws and unscrew them. The removal of the old unit is definitely the hardest part of a new disposal installation. Some of the existing screws can be difficult to reach and over-tightened. However, once it was removed, installation of the new unit was simple. The total process of removing the old unit and installing the new one took about 1.5 hours -- way less time than I expected. Operation: The unit purrs. I've never heard a disposal that was this quiet. It sounds just a bit louder than the ceiling fan spinning above my head at full speed in my room right now. It would not interrupt a conversation to turn the disposal on. The unit also vibrates very little. At first it vibrated a lot, but then I noticed that I had not tightened the unit in place as much as the instructions told me to. Once I tightened it a bit, there were no noticeable vibrations. Long-term: I literally just installed the unit 15 minutes ago, so I can't talk about how the unit will hold up in the long-term, but if it maintains its current operations, I'll be very happy. Additional notes: The instructions that come with the device are very clear and easy to follow. Just please note the extras that you will need to buy to install it. They are listed above.
A**J
Quiet, Reliable, Trust Worthy Brand A++
I really love the InSinkErator Evolution Compact 3/4 HP garbage disposal I had bought earlier this year. I researched for a while to find the right one before ever purchasing this. I never thought I would know so much about garbage disposals but now I do. This particular model is compact and super quiet! I just recently remodeled my kitchen and spent thousands on all the newest gadgets to include a new garbage disposal. You would think that these disposals are all alike but let me tell you - they are not! There are ones that are quiet but giganticly huge and cost a fortune. There are ones that look perfect and cost less but are so loud you could wake the dead. There are also ones, i discovered, that sound great, look great, are the right size, and the cost is good but have horrible ratings from customers (you can find with a little research) and the contractor even encourage you to not buy them. I went with the InSinkErator because it checked off all my boxes when it comes to creating my new kitchen. It was a great price. It is compact enough. It is super quiet. They could ship it right away. The contractor gave a two thumbs up for quality, reliability, quiet, cost, easy installation. It is just perfect. Daily i use it and it hasn't failed me and I don't expect it to either. I highly recommend this InSinkErator Evolution Compact Disposal for anyone. A+++
L**5
A Nice Disposal With a Few Installation and Design Quirks That Likely Could Be Improved
We purchased this to replace a 13 year old Badger 500 that died. I was willing to spend a bit more primarily for the stainless steel internals. (The other one rusted out almost entirely). The instructions were fairly good overall, but there are a few nuances. First of all, it is not obvious that the unit attaches in a screwing format (think of disposal as bold and mount as the nut). From what I can see, the "z" hex wrench tool's sole purpose is to allow you to get leverage to loosen (remove) or tighten (install) the unit. Right tight left loose. The wiring is also a bit of a hassle due to very tight quarters. I was able to re-use the connector (in our case armored metal supply cable to a threaded end that attaches to the unit and is tightened with a Phillips screwdriver). I used some extra black electrical tape as the removal of the three wires (hot black, white neutral, solid copper ground) chewed up the insulation a bit. I believe the extra tape should prevent arching. I also always use black tape on the wire nuts on any vibrating appliances, like this one and ceiling fans. (Prevents them from coming loose, which I had happen on a ceiling fan some years ago). The connector threads into the body of the disposal just like a common bolt. Perhaps the most fun part of the install is getting the heavy Badger unit down and getting the heavier replacement unit in place is holding it in place to thread it into the mount. I used a 2 ton floor jack for this and it really helped. (Example: Pro-LifT F-2315PE Grey Hydraulic Trolley Jack Car Lift ). Some cardboard to protect the cabinet base, align the jack under body, and use the jack to lower or raise the disposal into place. Without this tool the job would have been much tougher as there is no room for two sets of hands down there. We re-used the hose and clamp from the dishwasher after punching out the stopper on the upper discharge. (This was far more challenging than the instructions suggested as it came out in pieces and had to be extracted from the disposal cutters with needle nose pliars). I also do not agree with the instructions as to the installation of the lower discharge pipe from disposal to drain. I put the unit in place first, aligned it, and THEN made my measurements for cutting the pipe. I re-used the old pipe as it was still fine but it needed to be about 4 inches or so shorter than the Badger 500 due to the connection. NOTE: My only dislike on this unit is the use of a flexible rubber connection to this pipe and a metal spring clamp. The Badger had a two bolt to body format that I think is much more reliable. If there is going to be a leak or problem with this unit, I believe it will be there. (I use a Basement Watchdog Water Alarm under all of my sinks, near the fridge, and by the toilets in case there is a leak so I should detect any problem quickly). Overall the unit is much quieter than the one it replaced and with stainless steel innards it will hopefully last at least as long. I did register the warranty online which took less than a minute.
J**S
Perfect Badger 5 replacement
When my home was built 8 years ago the builders installed an Insinkerator Badger 5. This unit was extremely loud, but fairly reliable up until two weeks ago when it suddenly seized up, and wouldn't work anymore. I did a lot of research, and decided to go with he Evolution Compact as a replacement because it was very similar in size to the badger 5, but clearly an upgrade. Install: Although the Evolution Compact came with no instructions (Possibly a function of buying it as a Warehouse Deals open box item), it was easy to install. The old Badger 5 just twisted off the Insinkerator mount, and the new Evolution Compact twisted on in it's place. The two ports in the side lined up with where they were on the old Badger 5 as well. However, the lower PVC pipe leading to the drain had to be cut down by about 3 inches since the Evolution Compact is a bit wider than the Badger 5. Other than those two connections, I just had to wire in the power (also reused from the Badger 5, and I was ready to go. Overall, even with cutting, the install took less than an hour, with no trips to the hardware store. (NOTE: I didn't find it necessary to replace the drain portion in the sink since I already had one from the Badger. If you choose to replace this, you will need some plumbers putty). Operation: The Evolution Compact is noticeably quieter than the badger 5, and takes up the same space. It is operating as expected, so i couldn't ask for more. I strongly recommend this product if you are replacing a Badger 5. 6/11/12 Edit. Two things I wanted to add. First, the top port on the unit is your dishwasher hookup. This comes sealed. If you have a dishwasher you need to punch out the hole otherwise the dishwasher will fail to drain (Again if you have install instructions you will know this already... I didn't) Second, Just for fun, I stuck some fairly big stuff down this disposal. It makes short work of everything so far, even watermelon rinds. Just a little extra vibration as it works.
D**N
Easy install, Excellent Product
I purchased this disposer on Amazon in Sept. 2012 to replace an ailing General Electric model that looks like it may be older than I am. I was expecting the installation of this new disposer to occupy me for most of the evening, but I was happy to be mistaken. The instructions are very detailed, and from start to finish, including removing the old disposer and hooking up the electric and plumbing, this install took me 45 minutes. I was lucky enough that the pipes lined up perfectly, so there was no cutting of the tail pipe for me, which might have brought the installation time up to an hour. Some important things to note for the install: -Do not over-tighten the mounting screws on the sink flange. My first attempt at mounting the flange failed because I went too tight and the snap ring flew off the bottom of the flange. It sounded like something broke, but I was happy to see it was just the ring flying off. You need to supply : -plumbers putty for around the sink flange. Stainless Plumber's Putty, 14 oz -a 3/8" wire clamp to screw into the bottom of the unit. Halex 90512 Clamp Connector for Non-Metallic Cable -2 wire nuts. Gardner Bender 10-003 Wire Gard Orange Wire Connectors, 100-Pack Tools you may need: -Philips Screwdriver (for the mounting screws, and the wire clamp.) -Slotted Screwdriver (to pry the snap ring open on the sink flange, and to hit with the hammer to open the dishwasher inlet.) -Hammer (to break the seal for the dishwasher inlet.) -Channel Locks (I needed these to loosen the drain lines on the old disposer.) Now, on to my thoughts on the product itself. This disposer is the quietest disposer I have ever heard. Period. When I finished installation, I turned on the water and flipped the switch on the wall. I thought something was wrong, maybe I messed up the wiring -No, it's just that quiet. I actually had to throw a cucumber down the drain to make some noise, I couldn't tell if it was running otherwise. In addition to being ridiculously quiet, there is one major improvement I noticed on this unit over my old GE model. The connection to the sink, the connection to the drain, and the connection to the dishwasher are all rubber. This should help eliminate any vibration or noise from traveling out of the unit and into the sink / pipes. The quality of the unit seems to be pretty good, and I'll be sure to post with any updates as I get the unit more broken in.
P**N
Great disposal, good power and really quiet.
I've had this installed and been using it for just over 2.5 weeks now. Everything is working great with it and it is significantly quieter than the lower priced Insinkerator Badger series and a Kenmore model that I had. It is so quiet that it almost sounds like it might not be working correctly. I haven't had any major large food clogs or anything large to dispose of yet, but what I have ran through so far has gone down fine. I wasn't sure if I should get this Compact version of the Evolution series or one of the larger models, but this has 3/4 HP which is more than plenty for household needs - only the Evolution Excel has more at 1HP and is over $300 - the other Evolutions are also 3/4HP. Although it is smaller than the other Evolution models, the Compact actually still has a 34.6 oz. grind chamber which is only 5.4 oz. smaller than the larger Evolution models (40 oz.) and still larger than the Badger 5X series which has only a 26 oz. grind chamber. The Evolution Compact ranks in the middle of the Insinkerator quiet scale (a 3 out of 5, 1 being quietest, 5 being the loudest) compared to the other Evolution models, but I don't need anything quieter than this and am very satisfied with the quietness of this model. I will note that the upper portion of this is a bit larger in diameter than a traditional disposal (assume it is due to sound insulation), so keep that in mind with your plumbing and cabinet space, especially if your sink drain is further to the rear than in the center of the sink bowl. I Have this in a 60/40 sink which has the drains further to the rear - it is installed in a 36" wide cabinet. My sink drain line is center and it got a little tight to my main drain pipe and vent with about an inch to spare. I don't think it is a major issue for most, but just be aware. You can likely adjust your plumbing lines around this in a worse case scenario. I have it connected to a Insinkerator countertop air button and that's also working great. Also have a dishwasher draining connected to it as well. So far so good!
Trustpilot
2 months ago
3 days ago


