💎 Illuminate your lifestyle with crystal clarity and modern edge!
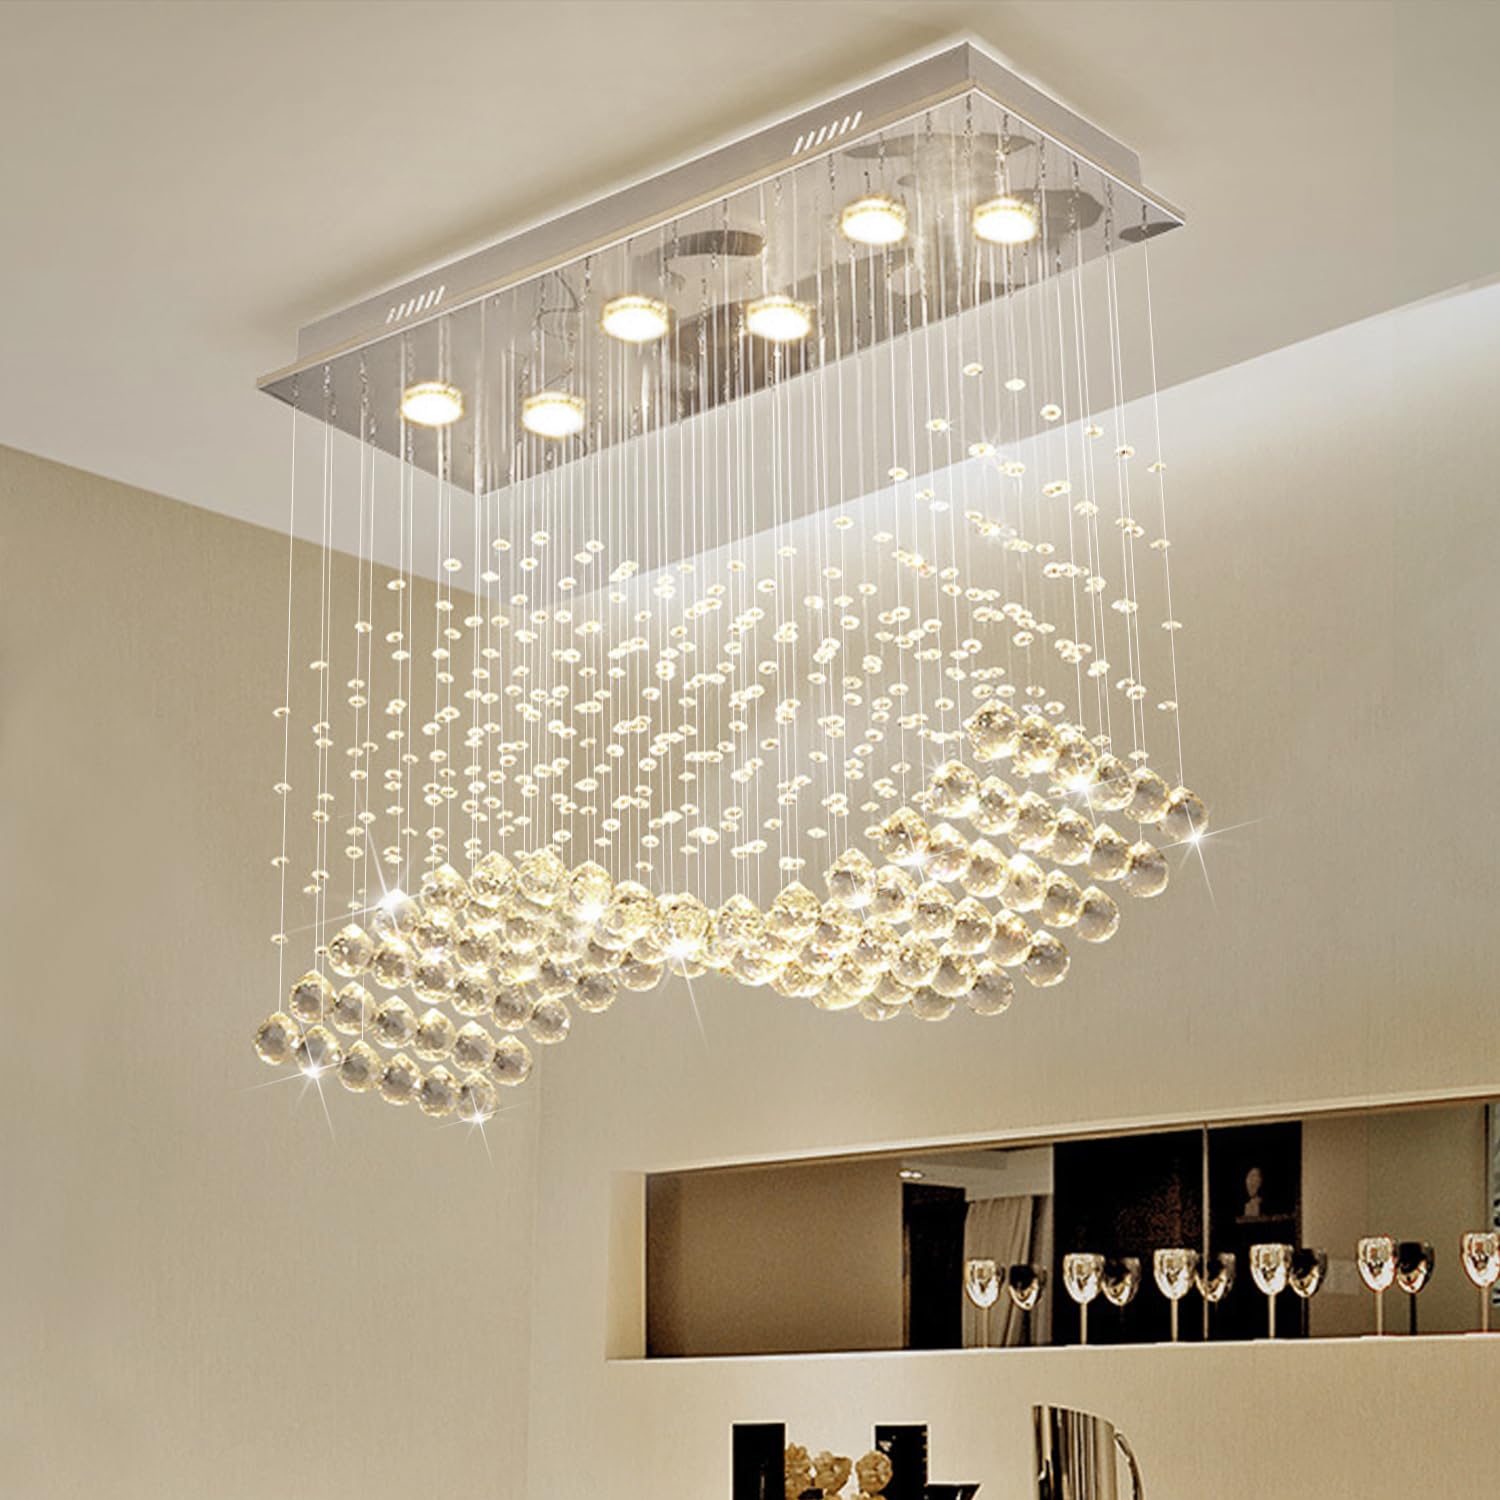
The Modern Wave Chandelier by CRYSTOP is a polished chrome, rectangular flush mount fixture featuring 6 GU10 bulb sockets compatible with LED and other bulbs. Measuring 23.6" x 9.8" x 27.6", its crystal raindrop design delivers a sparkling, high-efficiency lighting experience perfect for upscale indoor spaces like dining rooms and living areas. Easy to install and backed by responsive after-sales support, it’s a statement piece that blends luxury with modern minimalism.


| Brand | CRYSTOP |
| Color | 07-Silver-L23.6" x W9.8" x H27.56" |
| Material | Crystal, Metal |
| Style | Modern |
| Light fixture form | Chandelier |
| Room Type | Lobby, Kitchen, Bathroom, Bedroom, Living Room, kids room, Library, Study Room, Hallway, Dining Room |
| Product Dimensions | 23.6"L x 9.8"W x 27.56"H |
| Specific Uses For Product | Home |
| Indoor/Outdoor Usage | Indoor |
| Power Source | Corded Electric |
| Installation Type | Flush Mount |
| Control Method | Remote |
| Light Source Type | Incandescent, LED bulbs, CFLs |
| Finish Type | Polished |
| Shade Material | Crystal |
| Number of Light Sources | 6 |
| Voltage | 110 Volts |
| Light Color | White with Sparkling Rainbow Effect |
| Shape | Rectangular |
| Included Components | 2x Gloves, 1x Installation Instruction |
| Embellishment | Crystal |
| Lighting Method | LED |
| Specification Met | UL |
| Item Weight | 8.7 Pounds |
| Number of Items | 1 |
| Wattage | 60 watts |
| Bulb Base | GU10 |
| Controller Type | Push Button |
| Switch Type | Push Button |
| Unit Count | 1.0 Count |
| Water Resistance Level | Not Water Resistant |
| Efficiency | High Efficiency |
| Mounting Type | Ceiling Mount |
| Shade Color | Crystal |
| Fixture Type | Non Removable |
| Assembly Required | Yes |
| Manufacturer | CRYSTOP |
| Size | L23.6'' x W9.8'' x H27.6'' |
| Model Name | Rectangular Crystal Raindrop Chandelier |
| Part Number | Flush Mount Ceiling Light Fixture |
| Item Weight | 8.7 pounds |
| Item model number | Wave Crystal Chandelier |
| Finish types | Polished |
| Plug Format | gu10 |
| Batteries Included? | No |
| Batteries Required? | No |
C**I
Cost effective and very good looking chandelier. Needs to be patient when installing.
Installed this chandelier in place of a recessed light. Looks great and best bang for the buck. No questions.There should have been a template to drill holes on the ceiling included with the chandelier. It is difficult to hold the base and mark places to drill to put screw anchors, unless you have someone else to hold it for you. I got a piece of paper cut to the exact size of the base and marked the holes for the screws, used the template to mark the holes on the ceiling and then drilled the holes with a 1/8” drill bit. Of course, you have to align the template to your desired position first. After making electrical wire connections, installing the base was not that difficult.Before you start hanging the crystal strands, make sure to separate them into piles by the numbers 1 through 8. Also identify the crystal strands marked with a something like double arrow in the #3 and #6 (2 each) and #8 (1 stand). They have split “Y” shape wires to go on each side of the bulbs.After peeling the protective sheath, install the cover plate using the screws. Don’t install the bulbs yet. Start installing the strands from one end (five #1 strands). After you install the split-wire strand on #3 position, install the first bulb. Continue the process until you install all 80 strands and 5 bulbs. Instruction manual doesn’t give much details, but has a diagram illustrating how the strands are placed. “Threading” the split-ring through the hole in the shiny cover may be difficult if you don’t have fine motor skills ( it’s even more difficult with those cotton gloves: I used a pair of nitrile gloves).One important thing: do not use a sharp object (knife or scissors) to cut open the bubble wrap covering the strands. The coated wire is so fine and you could easily cut them. Best is to tear the bubblewrap open. Be very patient and don’t rush if you get neck strain while hanging the strands. Take a break and do it later. It’s worth it. Good luck
M**N
Gives a stylish and a modern vibe.
It is very easily to assemble. It comes with all the clear instructions so everyone should be able to assemble it. Can be mounted on your existing ceiling mounting box. You may need to install extra drywall anchors to hold it on the place which is not a very big deal.
G**A
Lovely
I’m in love with this chandelier! It’s the perfect centerpiece for our dining room, making the space feel more modern and elegant. The quality is exceptional, and it definitely adds a wow factor to the room. Whether you’re hosting a dinner party or having a quiet family meal, this chandelier creates the perfect ambiance. I highly recommend it to anyone looking to elevate their dining room decor with a sleek, modern touch.
S**U
BEAUTIFUL, but tedious. Well worth the work and you even get to work on your patience!!! Lord knows we all need work there!
This is an EXTREMELY beautiful piece. However, when ordering you can expect to receive damaged crystals and/or missing strings that the crystals hang on. Although the seller is very responsive and wants to help, he is located in HONG KONG and somewhat slow in getting replacement pieces sent out, unless of course you get it directly from Amazon. My suggestion is to order two, take out what you need if anything, and then send one back for a full refund. I sent mine back directly to Amazon as the seller (SST Ltd) has orders fulfilled by Amazon as well. My other concern is how the crystal balls are wrapped. I believe the seller tries to do a good job, but more often than not, strings become tangled and you have to work out the knots. This is very tedious and time consuming. My suggestion to the seller to solve this issue would be to fold the strings in halves or quarters, then roll up. This would eliminate the strings getting tangled and have already tried this method should we need to remove and box the light back up. Include a diagram and use the same method for all crystal lines.As far as installation, this light will help you work on your patience. I clearly needed to work on mine and although tedious, the end result is well worth it. As they say, "patience is a virtue" or in this case, "patience is extreme satisfaction.I have ordered two different styles and becoming somewhat of an expert, I can make some recommendations on installation.1. Make sure you use 6-8 butterflies when attaching to the ceiling. I saw one review recently where an individual used the plastic anchors supplied with the light(s), then complained when the piece came crashing down. First of all, you need a little bit of common sense to realize that these lights once assembled are somewhat heavy. Butterflies, which would be 1/8 in. X 3 in. should be sufficient. I have included a picture.2. Line up the light on the ceiling where you want it, and mark the holes with a sharpie. This is where you will drill the holes for the butterflies to mount in hollow ceilings.3. Install the the back piece of the light. DO NOT over-tighten the butterfly screws.4. Place cover on and finger tighten the chrome cap nuts. Install the light bulbs. Light bulbs are NOT included with any of these lights. Power on the light fixture to ensure your electrical connections work.5. Install each string, working from the inside out, or from the middle to left and right. Diagram explains it sufficiently enough, but you MUST pay attention and perhaps read it several times.6. Check your work as you go along by comparing the installation diagram to your work, and also by checking installed strings and un-installed string locations. If you do this often enough, you will locate an error sooner than later if you made a mistake.7. Once all the strings are installed, GENTLY and I mean GENTLY, remove the protective film from the chrome fixture. The reason you do this as the very last step is to prevent any smudges or fingerprints. On one light I installed, these smudges were not prevented when using the supplied cloth gloves. I had removed the protective film prior to installing the strings. Therefore, I figured I would do another tedious job and do it this way as it is very hard to clean once all the strings are installed.That's it. Good luck and its truly a good looking piece once installed. I have had SO MANY compliments with friends wanting to purchase one as well.
M**M
Looks great
It’s very neat and beautiful chandelier;It might take a little time to assemble all the crystals, but it’s worth ur time and money!!!!


